주요 콘텐츠로 건너뛰기

Epson Stylus NX305 Scanner Motor Replacement

필요한 것

  1. Epson Stylus NX305 Scanner Motor Replacement, Scanner Motor: 1 단계, 이미지 1/1
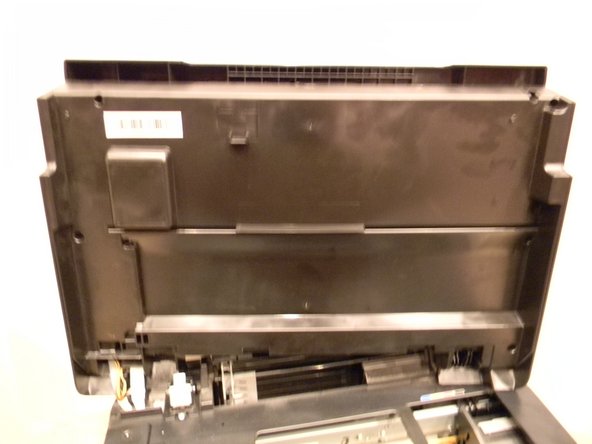
    • Make sure that the printer is not plugged in before working on it.

    • Orient the printer so that the back of it is facing you.

  2. Epson Stylus NX305 Scanner Motor Replacement: 2 단계, 이미지 1/1
    • Locate the 3mm Phillips #0 screw that is on the right-hand side of the printer.

    • Using a Phillips head screwdriver, remove the screw.

  3. Epson Stylus NX305 Scanner Motor Replacement: 3 단계, 이미지 1/2 Epson Stylus NX305 Scanner Motor Replacement: 3 단계, 이미지 2/2
    • Open up the lid of the printer.

    • With the printer facing away from you, lift up on the right hand side of the lid of the printer and slide it to the left to remove it.

    • Be careful not to remove the white ribbon and wires that are connected.

  4. Epson Stylus NX305 Scanner Motor Replacement: 4 단계, 이미지 1/1
    • With the printer facing you, open the lid of the scanner to expose the 3mm Phillips #0 screw at the top left of the scanner.

    • Using a Phillips head screwdriver, remove the screw.

  5. Epson Stylus NX305 Scanner Motor Replacement: 5 단계, 이미지 1/1
    • Locate the six 3mm Phillips #2 screws under the lid of the printer and remove them.

  6. Epson Stylus NX305 Scanner Motor Replacement: 6 단계, 이미지 1/1
    • Locate the three clips on the front side of the printer lid.

    • Use the plastic opening tool to release the clips and carefully pry open the lid.

  7. Epson Stylus NX305 Scanner Motor Replacement: 7 단계, 이미지 1/1
    • Locate the belt that is attached to the scanner motor and remove it by carefully stretching off of the gear.

  8. Epson Stylus NX305 Scanner Motor Replacement: 8 단계, 이미지 1/1
    • Remove the two 3mm Phillips #2 screws from the scanner motor assembly.

    • Carefully lift the scanner motor assembly out of the housing making sure not to damage the wiring.

  9. Epson Stylus NX305 Scanner Motor Replacement: 9 단계, 이미지 1/1
    • Flip over the scanner motor assembly to expose the scanner motor.

    • Remove the two 3mm Phillips #2 screws from the assembly and remove the motor.

결론

To reassemble your device, follow these instructions in reverse order.

Jeffrey Barnett

회원 가입일: 09/21/14

101 평판

안내서 1개 작성함

USF Tampa, Team 1-2, Donnelly Fall 2014 USF Tampa, Team 1-2, Donnelly Fall 2014 회원

USFT-DONNELLY-F14S1G2

1 회원

안내서 2개 작성하였습니다

댓글 0개

댓글 쓰기

조회 통계:

24 시간 전: 0

7일 전: 0

30일 전: 3

전체 시간: 459