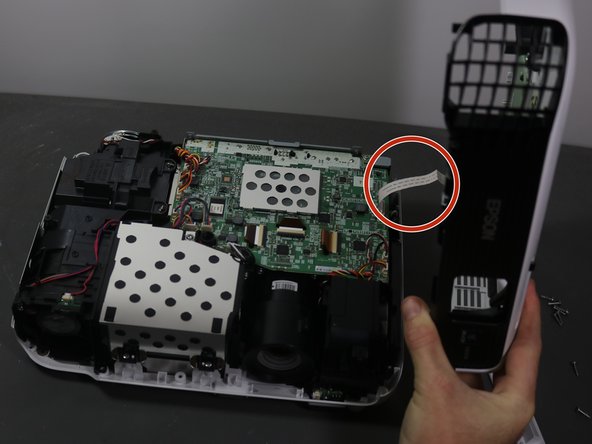
주요 콘텐츠로 건너뛰기

Epson VS240 Speaker Replacement

필요한 것

  1. Epson VS240 Speaker Replacement, Shell: 1 단계, 이미지 1/3 Epson VS240 Speaker Replacement, Shell: 1 단계, 이미지 2/3 Epson VS240 Speaker Replacement, Shell: 1 단계, 이미지 3/3
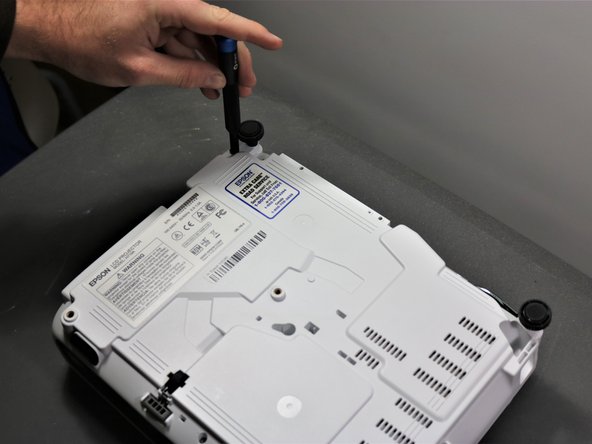
    • Using the Phillips #2 screwdriver, loosen the single captive screw on the left side of the projector.

    • The captive screw will loosen, but it cannot be fully removed.

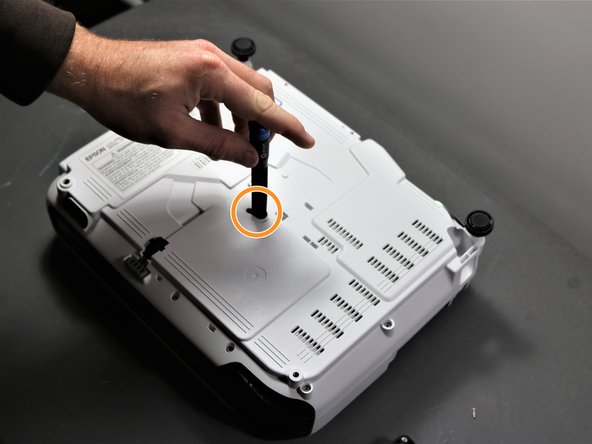
    • Slide the panel off and remove it from the device.

  2. Epson VS240 Speaker Replacement: 2 단계, 이미지 1/2 Epson VS240 Speaker Replacement: 2 단계, 이미지 2/2
    • Use the Phillips #2 screwdriver to remove the three 5 mm screws.

    • Using the same Phillips #2 screwdriver, remove the single 8 mm silver screw.

  3. Epson VS240 Speaker Replacement: 3 단계, 이미지 1/1
    • Use a Phillips #1 screwdriver to remove the two 10 mm silver screws from the bottom of the device.

  4. Epson VS240 Speaker Replacement: 4 단계, 이미지 1/1
    • Use a Phillips #1 screwdriver to remove the single 10 mm screw where the panel was removed in Step 1.

    • Remove the white back plate from the device.

  5. Epson VS240 Speaker Replacement: 5 단계, 이미지 1/3 Epson VS240 Speaker Replacement: 5 단계, 이미지 2/3 Epson VS240 Speaker Replacement: 5 단계, 이미지 3/3
    • Flip the projector over so that the underside (side with the feet) is facing you.

    • Use a Phillips #1 screwdriver to remove five 10 mm screws on the underside of projector.

    • Using the same Phillips #1 screwdriver, remove a single 10 mm screw in the center hole.

    • You may need to use a screwdriver extender to reach the single screw.

  6. Epson VS240 Speaker Replacement: 6 단계, 이미지 1/3 Epson VS240 Speaker Replacement: 6 단계, 이미지 2/3 Epson VS240 Speaker Replacement: 6 단계, 이미지 3/3
    • Use a Phillips #1 screwdriver to remove two 10 mm screws from the openings on each side of the air filter, on the topside of the projector.

    • You may need to use a screwdriver extender to reach the two screws.

    • Using the same Phillips #1 screwdriver, remove the two 10 mm screws where the white panel was removed on the topside of the projector in Step 1.

  7. Epson VS240 Speaker Replacement: 7 단계, 이미지 1/2 Epson VS240 Speaker Replacement: 7 단계, 이미지 2/2
    • Be careful when removing the top cover of projector as there is as white ribbon cable connecting it to the motherboard.

    • Gently lift top cover and place it on its top next to the projector so that the ribbon has no tension on it.

    • Gently pull the brown tape connecting the cable to the motherboard and then remove the shell from the device.

  8. Epson VS240 Speaker Replacement, Speaker: 8 단계, 이미지 1/1
    • Using the Phillips #1 screwdriver, remove the two 7 mm screws holding the speaker to the device.

  9. Epson VS240 Speaker Replacement: 9 단계, 이미지 1/1
    • Unplug the wire combination of red, black, and white wires from the motherboard using a spudger or fingernail.

    • Lift and remove the speaker from the device.

결론

To reassemble your device, follow these instructions in reverse order.

Edward O'Neil

회원 가입일: 10/05/21

85 평판

안내서 1개 작성함

Clemson, Team 5-3, Hunter Fall 2021 Clemson, Team 5-3, Hunter Fall 2021 회원

CLEM-HUNTER-F21S5G3

5 회원들

안내서 6개 작성하였습니다

댓글 0개

댓글 쓰기

조회 통계:

24 시간 전: 0

7일 전: 5

30일 전: 17

전체 시간: 166