주요 콘텐츠로 건너뛰기

Fairphone 1 Midframe Assembly Replacement

단지 전제 조건
이 안내서는 다른 가이드의 선행 작업으로 사용하기 위한 것입니다. 그 자체로는 불완전합니다.

필요한 것

  1. Fairphone 1 Midframe Assembly Replacement, Midframe Assembly: 1 단계, 이미지 1/1
    • Remove the five 3.9 mm Phillips #000 screws securing the midframe to the display assembly.

  2. Fairphone 1 Midframe Assembly Replacement: 2 단계, 이미지 1/3 Fairphone 1 Midframe Assembly Replacement: 2 단계, 이미지 2/3 Fairphone 1 Midframe Assembly Replacement: 2 단계, 이미지 3/3
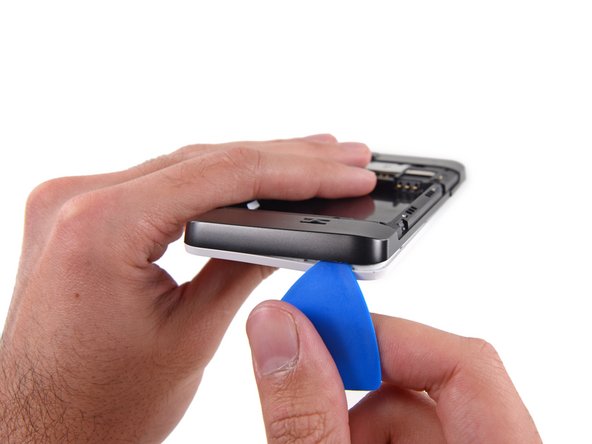
    • The midframe is secured to the display assembly by several small plastic clips.

    • Use an opening pick to carefully pry the midframe away from the display assembly.

    • Start just below the volume rocker and work your way down toward the bottom of the phone, freeing the plastic clips along the side.

  3. Fairphone 1 Midframe Assembly Replacement: 3 단계, 이미지 1/2 Fairphone 1 Midframe Assembly Replacement: 3 단계, 이미지 2/2
    • Carefully round the corner, separating the midframe from the display assembly.

  4. Fairphone 1 Midframe Assembly Replacement: 4 단계, 이미지 1/1
    • After rounding the next corner, the midframe should be free along the bottom and the sides.

  5. Fairphone 1 Midframe Assembly Replacement: 5 단계, 이미지 1/3 Fairphone 1 Midframe Assembly Replacement: 5 단계, 이미지 2/3 Fairphone 1 Midframe Assembly Replacement: 5 단계, 이미지 3/3
    • Run the opening pick and pry along the top seam.

    • To avoid bending or damaging the opening picks, do not pry near to the power switch, USB port, or headphone jack.

  6. Fairphone 1 Midframe Assembly Replacement: 6 단계, 이미지 1/1
    • Separate any remaining clips and remove the midframe from the phone.

결론

To reassemble your device, follow these instructions in reverse order.

다른 한 분이 해당 안내서를 완성하였습니다.

Andrew Optimus Goldheart

회원 가입일: 10/17/09

502,789 평판

안내서 407개 작성하였습니다

iFixit iFixit 회원

Staff

135 회원들

안내서 16,767개 작성하였습니다

댓글 0개

댓글 쓰기

조회 통계:

24 시간 전: 0

7일 전: 0

30일 전: 0

전체 시간: 584