주요 콘텐츠로 건너뛰기

이 안내서에는 최근 변경 사항이 더 있습니다. 최신 비검증 버전으로 전환하십시오.

Fender Frontman 15r Power Switch Replacement

필요한 것

  1. Fender Frontman 15r Power Switch Replacement, Back panel: 1 단계, 이미지 1/1
    • Be sure to unplug the device before proceeding.

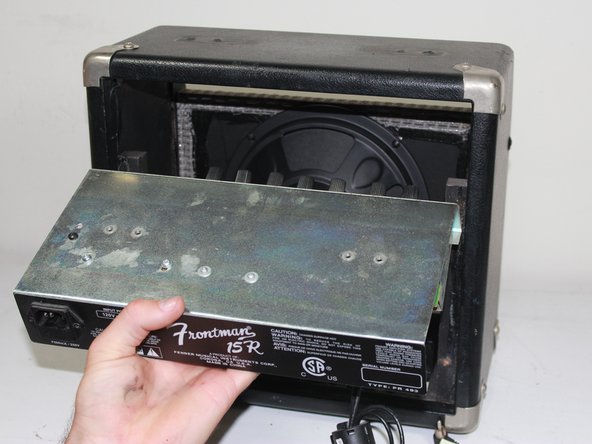
    • Use a Phillips #0 screwdriver to remove the four 21.7mm screws holding the back panel to the frame.

  2. Fender Frontman 15r Power Switch Replacement: 2 단계, 이미지 1/1
    • Once the screws are out, use a plastic opening tool or spudger to pry the top of the back panel open. There may be some resistance, but it will eventually pry loose.

  3. Fender Frontman 15r Power Switch Replacement: 3 단계, 이미지 1/1
    • Once the top is separated, use your hand to remove the back panel from the unit.

  4. Fender Frontman 15r Power Switch Replacement, Mounting Bracket: 4 단계, 이미지 1/2 Fender Frontman 15r Power Switch Replacement, Mounting Bracket: 4 단계, 이미지 2/2
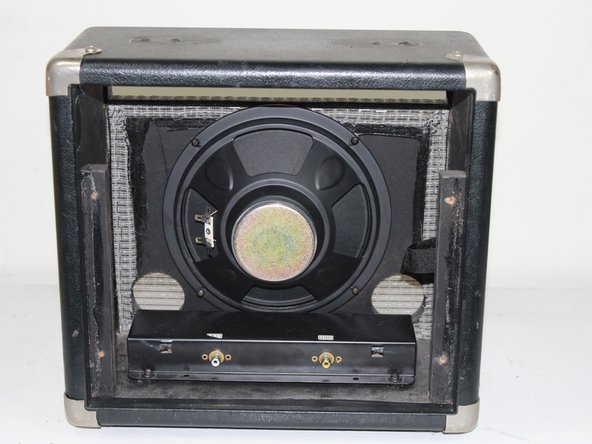
    • There will be two black wires connecting the top mounting bracket to the reverb box at the bottom of the unit. Label the wires to prevent crossing upon re-installation, then unplug the wires from the reverb box.

  5. Fender Frontman 15r Power Switch Replacement: 5 단계, 이미지 1/1
    • Label and unplug the two red wires connecting the mounting bracket to the speaker by pulling them off the nodes.

  6. Fender Frontman 15r Power Switch Replacement: 6 단계, 이미지 1/3 Fender Frontman 15r Power Switch Replacement: 6 단계, 이미지 2/3 Fender Frontman 15r Power Switch Replacement: 6 단계, 이미지 3/3
    • Use a Phillips #1 screwdriver to unscrew the four 36.4 mm screws holding the mounting bracket to the top of the amp.

  7. Fender Frontman 15r Power Switch Replacement: 7 단계, 이미지 1/3 Fender Frontman 15r Power Switch Replacement: 7 단계, 이미지 2/3 Fender Frontman 15r Power Switch Replacement: 7 단계, 이미지 3/3
    • Pull the mounting bracket free from the frame. It may be wedged in very snug, in which case, use a plastic opening tool/spudger to pry it loose from the front.

  8. Fender Frontman 15r Power Switch Replacement, Power Switch: 8 단계, 이미지 1/2 Fender Frontman 15r Power Switch Replacement, Power Switch: 8 단계, 이미지 2/2
    • Mark, make note of, or remember the arrangement of the wires.

    • Remove the four female disconnected terminals from the switch terminals.

  9. Fender Frontman 15r Power Switch Replacement: 9 단계, 이미지 1/3 Fender Frontman 15r Power Switch Replacement: 9 단계, 이미지 2/3 Fender Frontman 15r Power Switch Replacement: 9 단계, 이미지 3/3
    • Using the flat end of a spudger, push in one of the wedged locking clips.

    • Partially tilt the switch box so that clip is held down.

    • Repeat for the other side of the switch

  10. Fender Frontman 15r Power Switch Replacement: 10 단계, 이미지 1/2 Fender Frontman 15r Power Switch Replacement: 10 단계, 이미지 2/2
    • Be sure that both locking clips are pressed through the opening. This may take a few tries.

    • Gently remove the switch.

결론

Once the old power switch is removed, install the new one by following the guide in reverse.

다른 한 분이 해당 안내서를 완성하였습니다.

Greg Sawers

회원 가입일: 09/27/12

85 평판

안내서 3개 작성하였습니다

Cal Poly, Team 24-30, Regan Fall 2012 Cal Poly, Team 24-30, Regan Fall 2012 회원

CPSU-REGAN-F12S24G30

5 회원들

안내서 7개 작성하였습니다

댓글 0개

댓글 쓰기

조회 통계:

24 시간 전: 0

7일 전: 3

30일 전: 21

전체 시간: 7,899