소개
Pickups may become scratchy or unresponsive and may require replacement. Players may also want to change the sound of their guitar and decide to replace the pickups.
필요한 것
-
-
Start by loosening the strings. This is done by turning the tuning knob until the string has lost tension.
-
Repeat this for all six strings on the guitar.
-
-
-
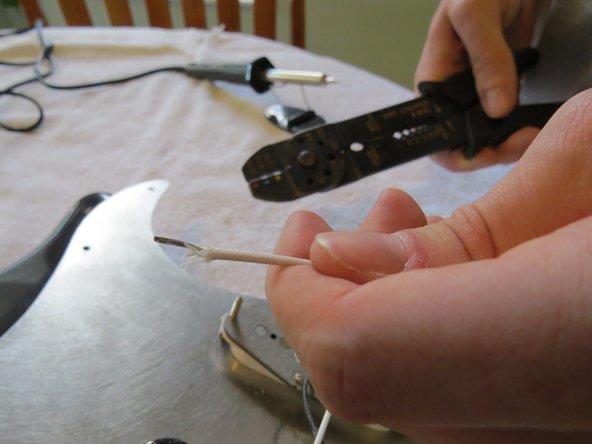
It may be necessary to use pliers to remove string ends from the tuning peg.
-
-
-
After removing the strings from the tuning pegs, slide the strings through the bridge and out of the back of the guitar.
-
If the twists in the string ends are in the way, use wire cutters to snip them off. This will allow the heavier strings to pass through the bridge easier.
-
-
-
While it is not necessary to remove the potentiometer knobs in order to remove the pickguard, it is much easier to remove them while the pickguard is attached to the guitar.
-
The knobs are removed simply by pulling up on them. Be mindful not to pry too much, as older components may feel stuck at first, and you do not want to break the pickguard, knob, or potentiometer.
-
-
-
As with the knobs, the switch cap may be removed prior to removing the pickguard.
-
Grip the cap firmly, and pull up to remove it from the switch. Be aware that the switch may move, and to be careful so that you do not break it.
-
-
-
-
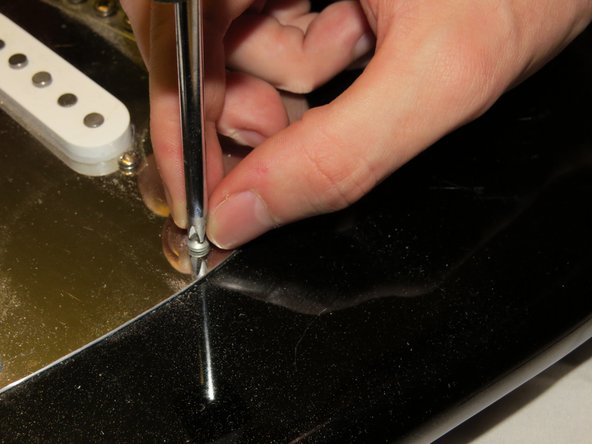
Gently lift up on the pickguard. With the screws removed, it should be loose, and easily pulled off of the guitar body.
-
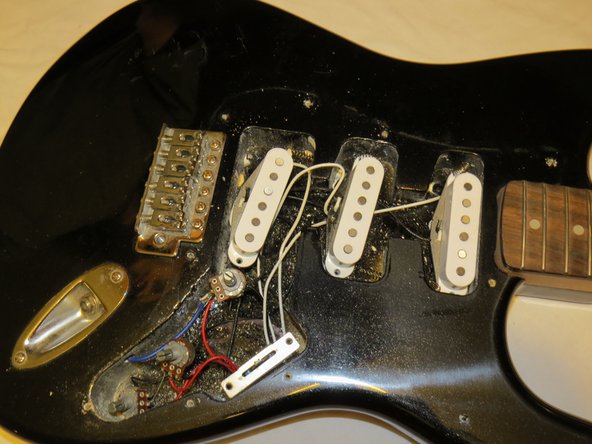
Carefully rotate the pickguard away from the guitar. Notice the electronics. There is a wire that runs through the body to the output jack.
-
-
-
Lay the pickguard back down on the guitar body. Take a wrench and unfasten the nuts around the potentiometer posts.
-
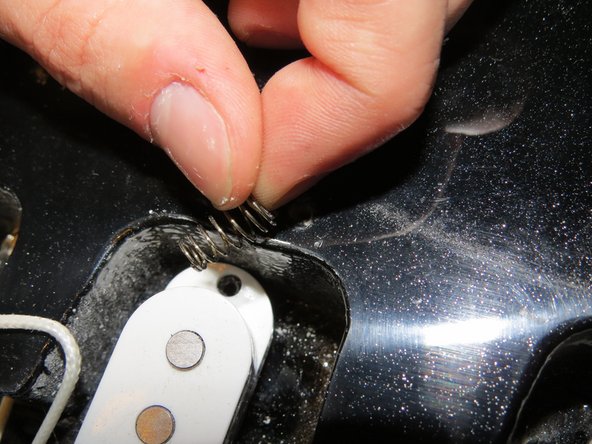
Using a screwdriver, remove the screws that secure the selector switch.
-
-
-
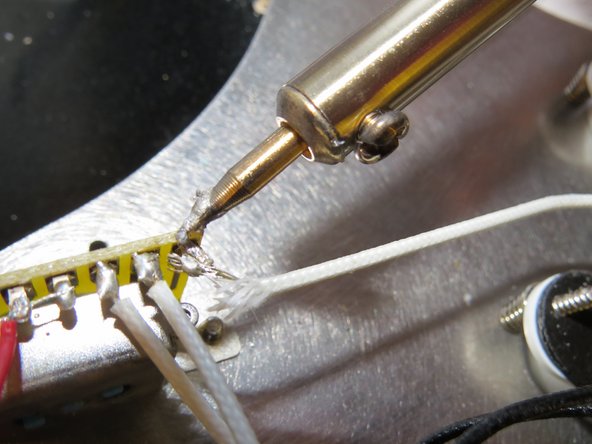
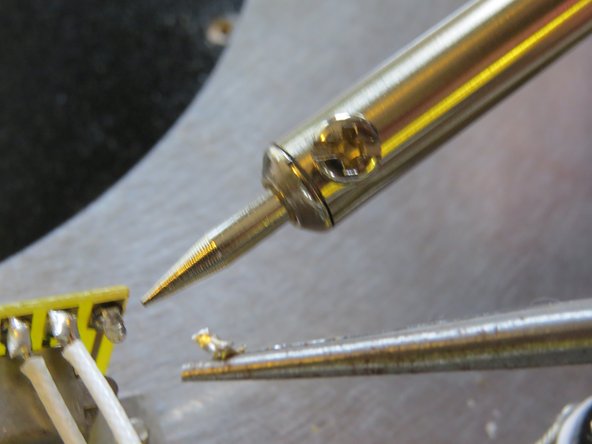
Heat up a pen-tip, soldering iron and lightly touch the solder on the end of the pickup wire.
-
Gently pull on the pickup wire while melting the solder.
-
After the wire is separated from the selector switch, remove any broken wire strands in the leftover solder with needle-nose pliers, while still heating the solder.
-
-
-
Coat the tip of your soldering iron with new rosin core solder.
-
Heat the wire and coat the exposed pickup wire with a small amount of solder - thus "Tinning" the wire.
-
Melt the solder that is still on the selector switch terminal and quickly remove the excess solder from the terminal. Wrap the tinned wire around the terminal to make a good mechanical connection, before you solder.
-
Press the tip of the soldering iron onto the pickup wire and terminal. Add a little solder, until the solder melts and molds around the wire and terminal. Don't add too much solder (Solder Blob)!
-
Let the solder joint cool and become solid.
-
Lightly tug on the pickup wire to test the strength of the solder connection.
-
If the connection appears solid, reassemble the pickguard in reverse order.
-


To reassemble your device, follow these instructions in reverse order.
To reassemble your device, follow these instructions in reverse order.
다른 3명이 해당 안내서를 완성하였습니다.

팀

Pasco Hernando, Team 5-3, Prince Fall 2014 Pasco Hernando, Team 5-3, Prince Fall 2014 회원
PHSC-PRINCE-F14S5G3
9 회원들
안내서 10개 작성하였습니다