이 버전에는 잘못된 편집 사항이 있을 수 있습니다. 최신 확인된 스냅샷으로 전환하십시오.
필요한 것
-
이 단계는 번역되지 않았습니다. 번역을 도와주십시오
-
Start by loosening the strings. This is done by turning the tuning knob until the string has lost tension.
-
Repeat this for all six strings on the guitar.
-
-
이 단계는 번역되지 않았습니다. 번역을 도와주십시오
-
It may be necessary to use pliers to remove string ends from the tuning peg.
-
-
이 단계는 번역되지 않았습니다. 번역을 도와주십시오
-
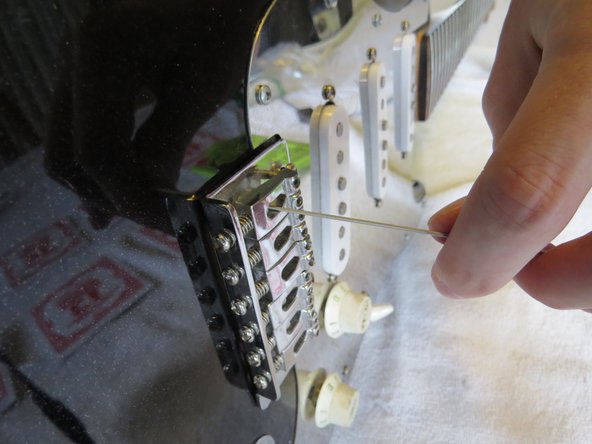
After removing the strings from the tuning pegs, slide the strings through the bridge and out of the back of the guitar.
-
If the twists in the string ends are in the way, use wire cutters to snip them off. This will allow the heavier strings to pass through the bridge easier.
-
-
-
이 단계는 번역되지 않았습니다. 번역을 도와주십시오
-
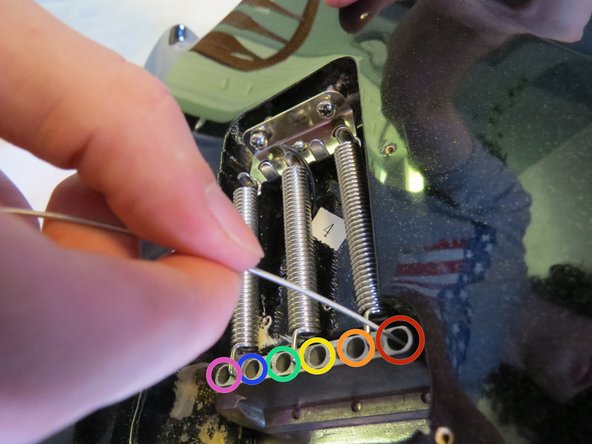
Take any one of the new strings and slide it through the appropriate bridge hole.
-
6th String: E - 46 Gauge
-
5th String: A - 36 Gauge
-
4th String: D - 26 Gauge
-
3rd String: G - 17 Gauge
-
2nd String: B - 13 Gauge
-
1st String: E - 10 Guage
-
-
이 단계는 번역되지 않았습니다. 번역을 도와주십시오
-
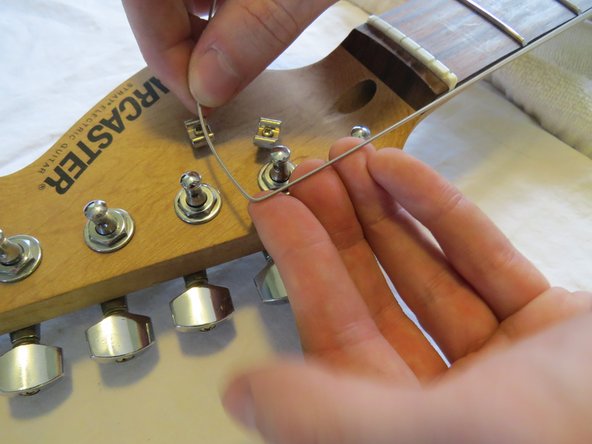
Lay the string parallel to the guitar's neck and directly over the appropriate tuning peg.
-
Measure a "three finger's length" (about 1.5") on the string passed the tuning peg.
-
Make a sharp bend in the string at where you measured 1.5" passed the tuning peg.
-
Turn the tuning peg until the string hole faces perpendicular to the guitar's neck.
-
Feed the bent string into the tuning peg until the bend meets the tuning post.
-
-
이 단계는 번역되지 않았습니다. 번역을 도와주십시오
-
Make another sharp bend in the string on the outside of the tuning post.
-
Turn the tuning key counter clockwise while applying light pressure to the string on the inside of the post.
-
Wrapping the string around the post will help the string stay in-tune longer.
-
If the wraps of the string around the post start to roll over the top of the post, hold them down while still turning the post.
-
Continue turning the post until at least 2 full wraps of the string have been made around the post.
-
-
이 단계는 번역되지 않았습니다. 번역을 도와주십시오
-
Snip the excess string off from the post with a wire cutter (leaving at least half an inch of string left).
-
-
이 단계는 번역되지 않았습니다. 번역을 도와주십시오
-
Continue installing strings using the the same method described in the last few steps.
-
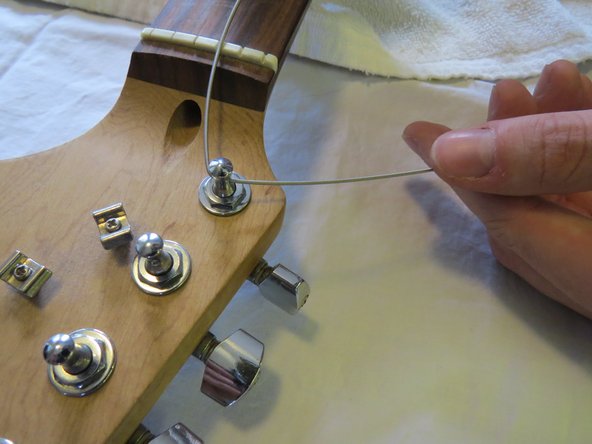
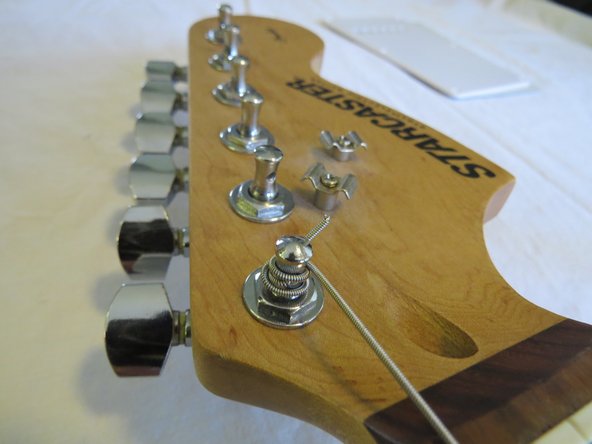
The last four strings (the D, G, B, and E strings), must be guided underneath the two "string trees" in the center of the headstock.
-
String Tree for the D and G strings
-
String Tree for the B and E strings
-
Tune the strings to your desired pitch and your guitar is ready to play!
-


다른 3명이 해당 안내서를 완성하였습니다.
