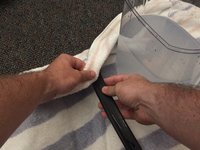
주요 콘텐츠로 건너뛰기

Fixing a Refrigerator Door Seal

필요한 것

  1. Fixing a Refrigerator Door Seal, Fixing a Refrigerator Door Seal: 1 단계, 이미지 1/3 Fixing a Refrigerator Door Seal, Fixing a Refrigerator Door Seal: 1 단계, 이미지 2/3 Fixing a Refrigerator Door Seal, Fixing a Refrigerator Door Seal: 1 단계, 이미지 3/3
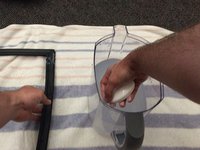
    • Grab a Phillips Head Screw Driver

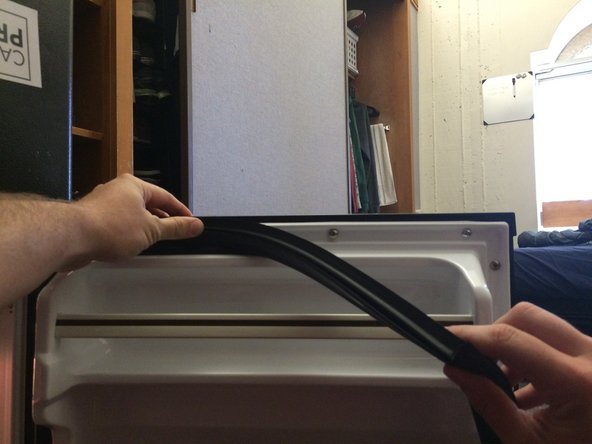
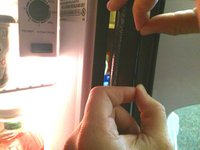
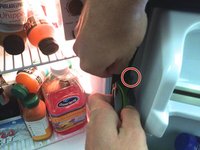
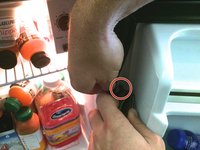
    • Lift up the door seal and locate the screws underneath that hold the seal in place. Loosen the screws to where they are pretty loose, but not out of their hole.

    • Note To save energy, you can turn off your refrigerator before proceeding to steps 2-6.

  2. Fixing a Refrigerator Door Seal: 2 단계, 이미지 1/3 Fixing a Refrigerator Door Seal: 2 단계, 이미지 2/3 Fixing a Refrigerator Door Seal: 2 단계, 이미지 3/3
    • After all the screws are loose, the door seal should slide off fairly easy. Slowly remove the door seal with your hands by peeling it off the seal's shell.

  3. Fixing a Refrigerator Door Seal: 3 단계, 이미지 1/3 Fixing a Refrigerator Door Seal: 3 단계, 이미지 2/3 Fixing a Refrigerator Door Seal: 3 단계, 이미지 3/3
    • Thoroughly wash the door seal in Soap and Water

    • Using a paper towel (or regular towel), dry the seal.

    • Note If your seal has cracks in it, you will need to replace it. If this is the case, skip this step.

  4. Fixing a Refrigerator Door Seal: 4 단계, 이미지 1/2 Fixing a Refrigerator Door Seal: 4 단계, 이미지 2/2
    • On the side that connects to the refrigerator unit, apply a thin layer of silicon grease. This will improve functionality as well as prevent the seal from cracking in the future.

  5. Fixing a Refrigerator Door Seal: 5 단계, 이미지 1/3 Fixing a Refrigerator Door Seal: 5 단계, 이미지 2/3 Fixing a Refrigerator Door Seal: 5 단계, 이미지 3/3
    • To reattach the seal,feed the back of the seal behind the white frame.

    • It is easiest to do this by starting at any corner and completing one side at a time.

  6. Fixing a Refrigerator Door Seal: 6 단계, 이미지 1/3 Fixing a Refrigerator Door Seal: 6 단계, 이미지 2/3 Fixing a Refrigerator Door Seal: 6 단계, 이미지 3/3
    • Make sure the white shell is holding the seal in place on all sides.

    • Tighten all of the screws back in place.

결론

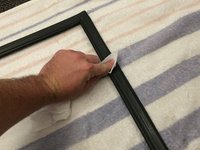
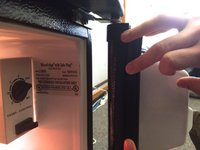
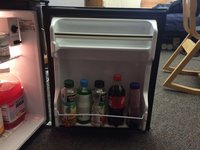
Your refrigerator should now stay shut properly, and the seal should be tightly secured in place. To assure proper functionality, check every once in awhile to make sure the seal is firmly in place.

다른 59명이 해당 안내서를 완성하였습니다.

Curtis Rosol

회원 가입일: 04/09/15

1,883 평판

안내서 1개 작성함

Cal Poly, Team 30-5, Green Spring 2015 Cal Poly, Team 30-5, Green Spring 2015 회원

CPSU-GREEN-S15S30G5

5 회원들

안내서 31개 작성하였습니다

댓글 11개

Love that you show how to fix on a mini fridge! #CollegeLife Thanks for this :)

tcarle1191 - 답글

How can I fix the seals on chest fridge.

Ramon Espinoza - 답글

Thank you for such a great article with the pictures, it is really helpful! I have just looked at my fridge door, lookes like i know how to detach the seal, but… i am afraid i won´t be able to put it back again…)))

AngiGi - 답글

buy a new fridge - i wood- support american union workers

dkp50 - 답글

How much should the GE repairman charge for this repair? My mother-in-law was told it’ll cost her between $250-$275. I think that’s too much due to the cost of the seal. Does the labor cost account for the extra $200?

Raymond Frazier - 답글

댓글 쓰기

조회 통계:

24 시간 전: 22

7일 전: 205

30일 전: 809

전체 시간: 311,505