소개
Things to Know Before Starting
This will show how to replace door lock actuators on most cars, keep in mind not all vehicles are the same.
The Removal and Replacement of the Actuators
We will have to remove the door panel from the door that has a broken door lock actuator by popping the tabs that hold it to the door while also removing door handle from inside as well as most switches. After removal of the door panel the rest is pretty easy. After removal of the door panel the steps are less stressful, unhook the door lock rod from the door lock (make sure not to loose the clip) the final step is to unbolt and unclip the motor from the door body. The scariest part for beginners is the actual popping and pulling on the door panel after that the process is in general a calm one.
필요한 것
-
-
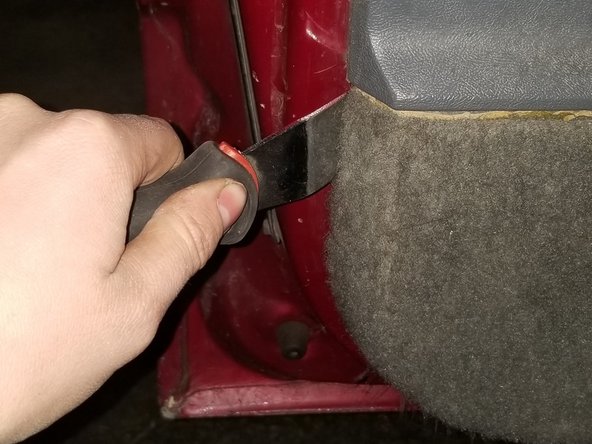
Remove door panel by using a flat head screw driver or a paint scraper to slide between the body of the door and the inside of the door panel to lift up on the 6-10 push pins
-
Be careful to not lift up hard without your tool being next to the push pin otherwise it may break.
-
-
-
-
If your door has an inner liner or panel like this one does it is easy to remove
-
Locate the bolts around the edges of the panel and unscrew them to remove the final barrier between you and the actuator. Or, if you have a plastic or fabric liner slowly peel it back, being careful not to tear it, until it is out of the way.
-
-
-
After locating the door lock actuator, which will be on the top or bottom of the door furthest from the engine bay, unplug the single socket running to it by depressing the tab and pulling it away from the motor.
-
As shown in the third image there is an eye hole where your door lock rod will be running through. This will need to be pulled out from the actuator as well
-
-
-
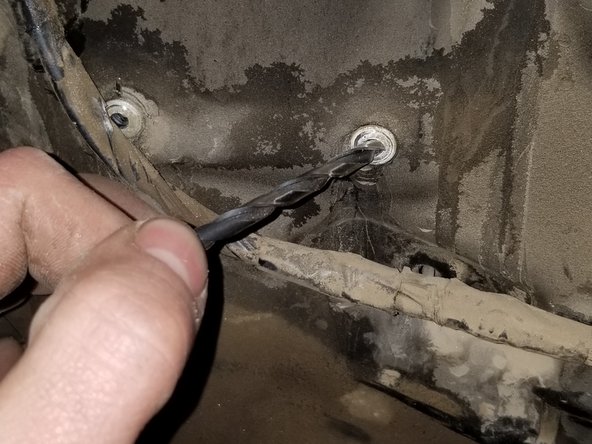
Using a drill with some drill bits to remove the rivets from the door body by finding a bit size that is bigger than the size of the dimple in the head. This may need more than one round of drilling so do not be afraid to incrementally go up in bit size.
-
After drilling this out there will be an eyelet on the end of your drill and hear a ting of the back half falling to the ground this means you have dismounted the actuator
-


To reassemble your device, follow these instructions in reverse order.
To reassemble your device, follow these instructions in reverse order.
다른 한 분이 해당 안내서를 완성하였습니다.

팀

Eastern Washington University, Team S27-G9, Munoz Winter 2019 Eastern Washington University, Team S27-G9, Munoz Winter 2019 회원
EWU-MUNOZ-W19S27G9
1 회원
안내서 1개 작성하였습니다