이 버전에는 잘못된 편집 사항이 있을 수 있습니다. 최신 확인된 스냅샷으로 전환하십시오.
필요한 것
-
이 단계는 번역되지 않았습니다. 번역을 도와주십시오
-
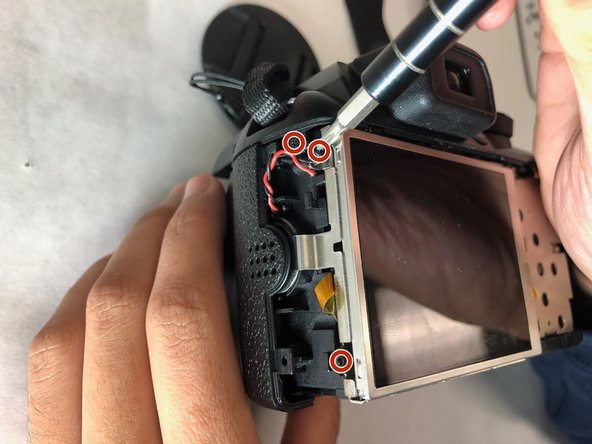
Using a Phillips #000 screwdriver, remove all of the 4mm screws from the left, right, and bottom of the camera.
-
-
이 단계는 번역되지 않았습니다. 번역을 도와주십시오
-
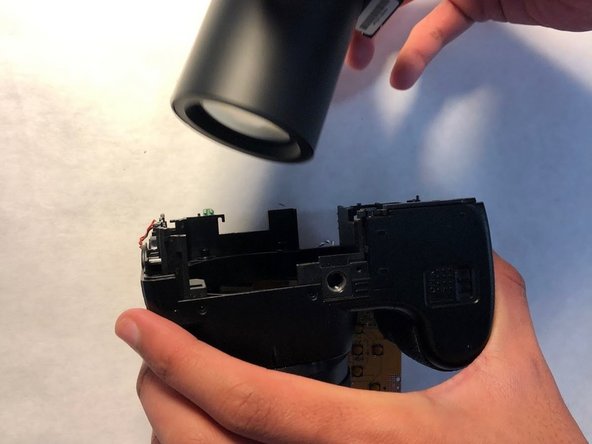
Remove casing part pictured by gently pulling up until casing is fully detached.
-
-
이 단계는 번역되지 않았습니다. 번역을 도와주십시오
-
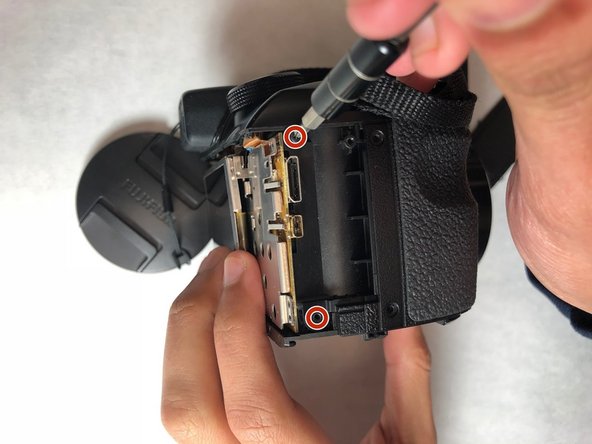
Remove the 4 mm screws on the metal plate. Then remove the 4 mm screws on left side of the camera, and remove the two 4mm screws on right side.
-
-
이 단계는 번역되지 않았습니다. 번역을 도와주십시오
-
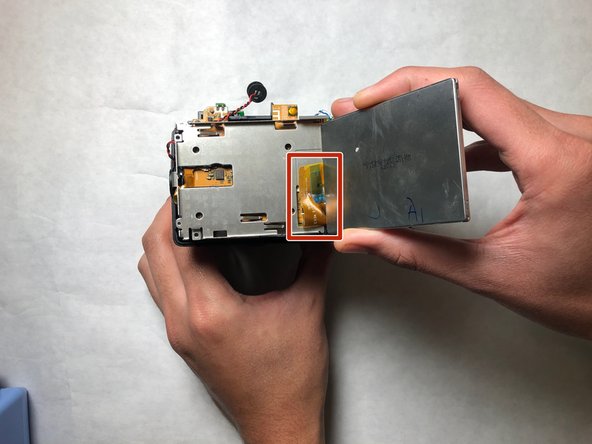
Remove orange ribbon cable by gently pulling on the cable until it is detached from the clamping device on the motherboard.
-
Remove the top casing by pulling upwards.
-
-
-
이 단계는 번역되지 않았습니다. 번역을 도와주십시오
-
Remove remaining 4mm screw. Detach metal plate by lifting plate upwards.
-
-
이 단계는 번역되지 않았습니다. 번역을 도와주십시오
-
Remove remaining orange tabs on motherboard by gently pulling on all tab until they are free.
-
-
이 단계는 번역되지 않았습니다. 번역을 도와주십시오
-
Using the Phillips #000 screwdriver, remove the 4mm screws in the corners of the motherboard.
-
-
이 단계는 번역되지 않았습니다. 번역을 도와주십시오
-
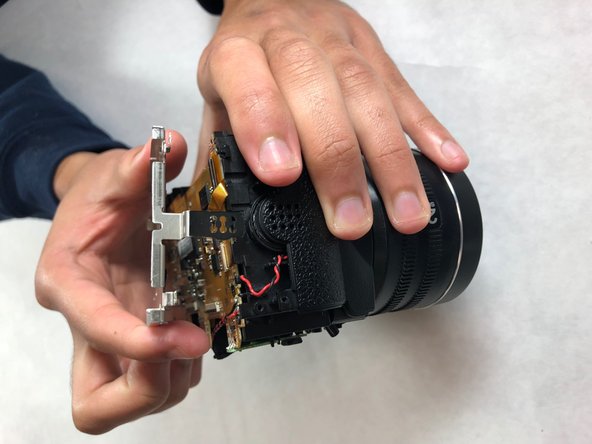
Remove the motherboard. It should be free of all connections at this point and can be lifted with ease.
-
-
이 단계는 번역되지 않았습니다. 번역을 도와주십시오
-
Using a Phillips #000 screwdriver, remove the 4mm screws around the metal plate.
-
Using a Phillips #000 screwdriver, remove the 10mm screws.
-
-
이 단계는 번역되지 않았습니다. 번역을 도와주십시오
-
Change the broken inner lens with a new inner lens.
-
Reassemble the camera.
-


팀

IUPUI, Team S1-G5, Harley Fall 2018 IUPUI, Team S1-G5, Harley Fall 2018 회원
IUPUI-HARLEY-F18S1G5
3 회원들
안내서 4개 작성하였습니다