주요 콘텐츠로 건너뛰기

Fujifilm Instax Minion Motor Replacement

필요한 것

  1. Fujifilm Instax Minion Motor Replacement, Camera Shell: 1 단계, 이미지 1/3 Fujifilm Instax Minion Motor Replacement, Camera Shell: 1 단계, 이미지 2/3 Fujifilm Instax Minion Motor Replacement, Camera Shell: 1 단계, 이미지 3/3
    • Remove the six 4.5 mm #00 Phillips screws from the bottom, left, and right sides.

  2. Fujifilm Instax Minion Motor Replacement: 2 단계, 이미지 1/3 Fujifilm Instax Minion Motor Replacement: 2 단계, 이미지 2/3 Fujifilm Instax Minion Motor Replacement: 2 단계, 이미지 3/3
    • Use a spudger to remove the film slot guard on the top of the camera.

    • Remove the one 4.5 mm #00 Phillips screw under the slot guard.

  3. Fujifilm Instax Minion Motor Replacement: 3 단계, 이미지 1/3 Fujifilm Instax Minion Motor Replacement: 3 단계, 이미지 2/3 Fujifilm Instax Minion Motor Replacement: 3 단계, 이미지 3/3
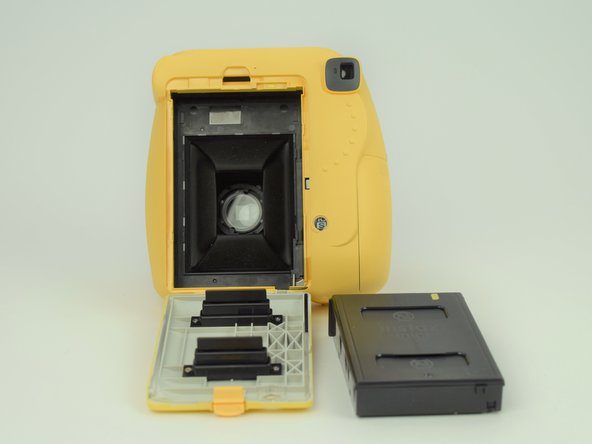
    • Press the release tab on the back of the camera to open the film compartment.

    • Remove the film cartridge within this compartment.

  4. Fujifilm Instax Minion Motor Replacement: 4 단계, 이미지 1/3 Fujifilm Instax Minion Motor Replacement: 4 단계, 이미지 2/3 Fujifilm Instax Minion Motor Replacement: 4 단계, 이미지 3/3
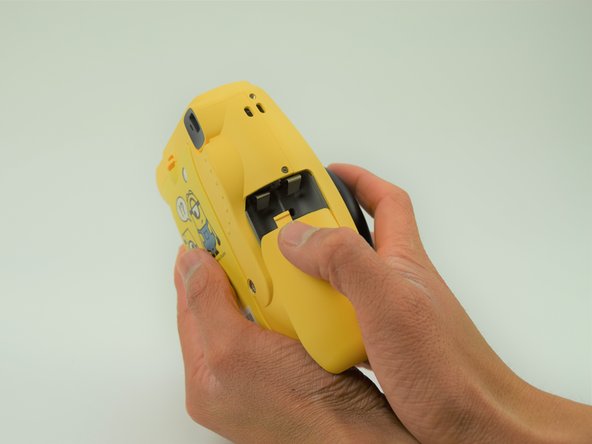
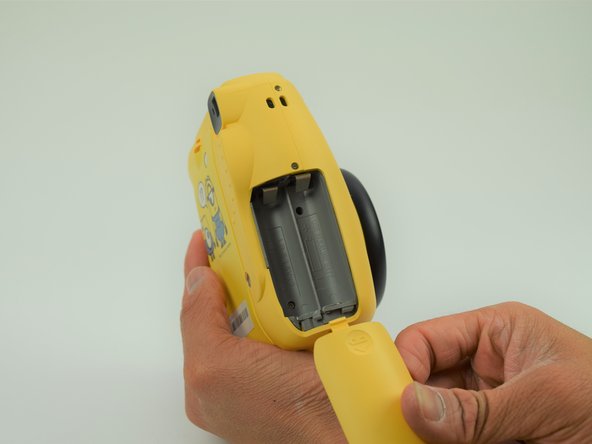
    • Press the battery cover in and down to remove it.

    • Remove any batteries within.

  5. Fujifilm Instax Minion Motor Replacement: 5 단계, 이미지 1/3 Fujifilm Instax Minion Motor Replacement: 5 단계, 이미지 2/3 Fujifilm Instax Minion Motor Replacement: 5 단계, 이미지 3/3
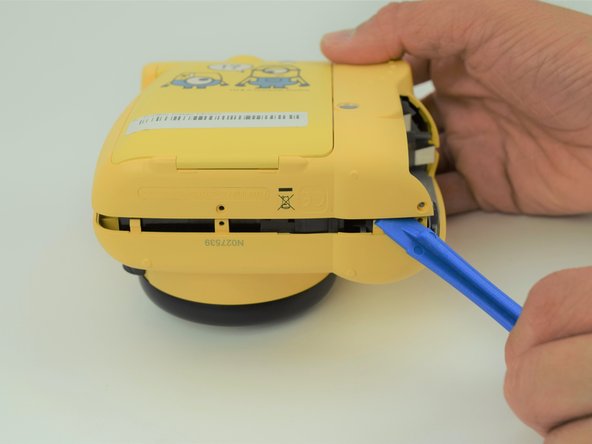
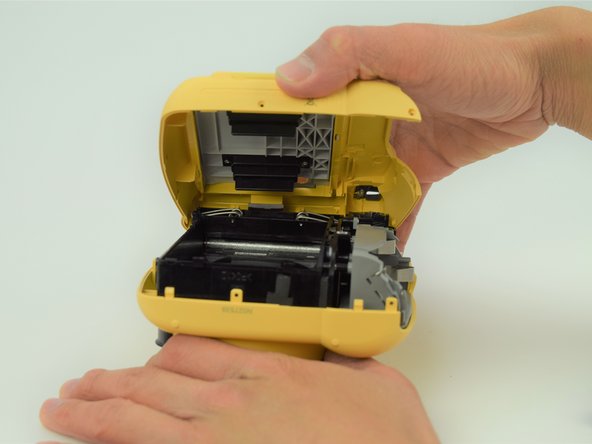
    • Use a plastic opening tool to help pry the front and back shells apart.

    • With the camera facing down, remove only the back shell.

  6. Fujifilm Instax Minion Motor Replacement: 6 단계, 이미지 1/3 Fujifilm Instax Minion Motor Replacement: 6 단계, 이미지 2/3 Fujifilm Instax Minion Motor Replacement: 6 단계, 이미지 3/3
    • Carefully peel the front side of the shell away.

    • As you lift the front shell, be careful to not pull too hard since there is a spring attached to the shell and the camera body.

    • Using a set of tweezers, detach the spring from the body. The spring will retract into the black and gray ring on the front shell.

  7. Fujifilm Instax Minion Motor Replacement, Motor: 7 단계, 이미지 1/2 Fujifilm Instax Minion Motor Replacement, Motor: 7 단계, 이미지 2/2
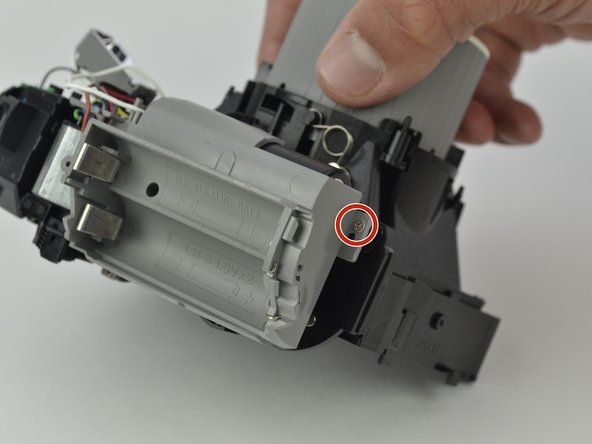
    • Remove the four 4.5 mm #00 Phillips screws on the battery compartment.

  8. Fujifilm Instax Minion Motor Replacement: 8 단계, 이미지 1/1
    • Lift up the battery compartment to free up the motor.

  9. Fujifilm Instax Minion Motor Replacement: 9 단계, 이미지 1/1
    • Unscrew the two 2.9mm Phillips #00 screws holding the motor to the frame.

  10. Fujifilm Instax Minion Motor Replacement: 10 단계, 이미지 1/2 Fujifilm Instax Minion Motor Replacement: 10 단계, 이미지 2/2
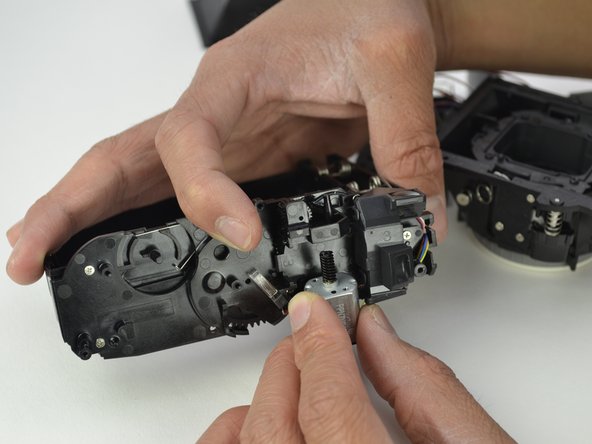
    • Remove the motor from the frame.

  11. Fujifilm Instax Minion Motor Replacement: 11 단계, 이미지 1/2 Fujifilm Instax Minion Motor Replacement: 11 단계, 이미지 2/2
    • Desolder the wires from the leads of the capacitor.

    • Take note of the connections between the wires and leads for reassembly.

결론

To reassemble your device, follow these instructions in reverse order.

다른 한 분이 해당 안내서를 완성하였습니다.

Jeffery

회원 가입일: 03/28/15

220 평판

안내서 2개 작성하였습니다

Cal Poly, Team S18-G6, Livingston Spring 2018 Cal Poly, Team S18-G6, Livingston Spring 2018 회원

CPSU-LIVINGSTON-S18S18G6

4 회원들

안내서 11개 작성하였습니다

댓글 한 개

Can anyone help finding a motor for the instax 8 or 9? I can't find one to fit any help appreciated

Jordan Kelly - 답글

댓글 쓰기

조회 통계:

24 시간 전: 1

7일 전: 9

30일 전: 24

전체 시간: 1,356