주요 콘텐츠로 건너뛰기

G'z One Boulder Double Sided Display Replacement

필요한 것

  1. G'z One Boulder Double Sided Display Replacement, Inside Screen Cover: 1 단계, 이미지 1/1
    • There are 4 black screws that need to be removed on the top of the lid. A 1.5mm flathead screwdriver will work on the star shaped screw heads.

    • Make note that two of the screws closest to the hinge are longer than the other two.

  2. G'z One Boulder Double Sided Display Replacement: 2 단계, 이미지 1/2 G'z One Boulder Double Sided Display Replacement: 2 단계, 이미지 2/2
    • Remove the two side screws.

    • When reassembling you may need to press the front and back of the lid together when inserting these side screws so that the holes align.

  3. G'z One Boulder Double Sided Display Replacement: 3 단계, 이미지 1/2 G'z One Boulder Double Sided Display Replacement: 3 단계, 이미지 2/2
    • Use a plastic opening tool to remove the screen cover from the rest of the lid.

  4. G'z One Boulder Double Sided Display Replacement: 4 단계, 이미지 1/2 G'z One Boulder Double Sided Display Replacement: 4 단계, 이미지 2/2
    • Your phone should look like the picture to the left.

    • If reassembling from a previous step make sure the ribbon cable is properly situated before securing the front cover.

  5. G'z One Boulder Double Sided Display Replacement, Front Logic Board: 5 단계, 이미지 1/3 G'z One Boulder Double Sided Display Replacement, Front Logic Board: 5 단계, 이미지 2/3 G'z One Boulder Double Sided Display Replacement, Front Logic Board: 5 단계, 이미지 3/3
    • Remove one screw located on the left side of the phone with the pictured orientation in mind.

    • This will release the logic board from the back case.

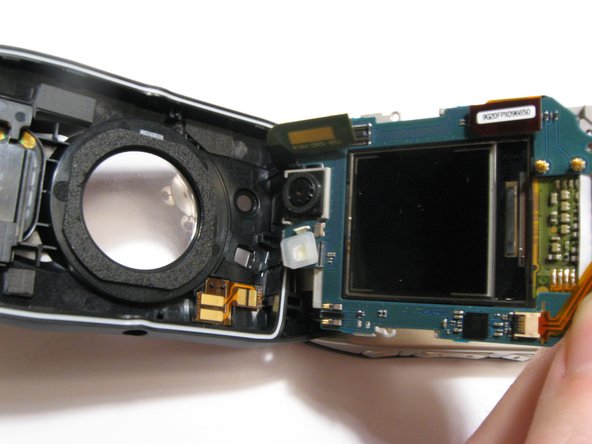
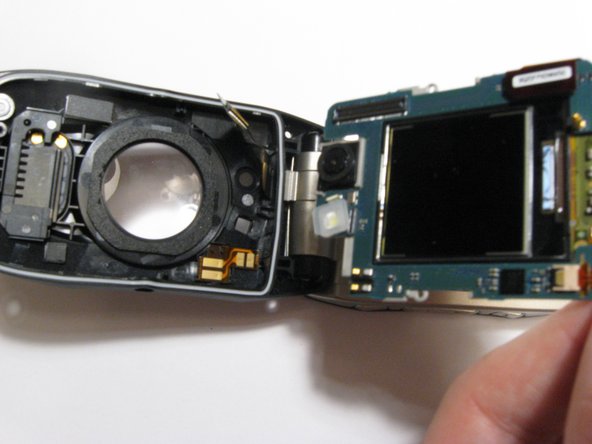
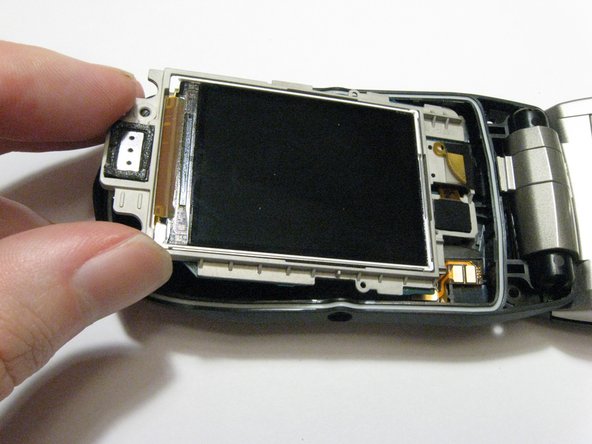
    • Lift the board out of the case starting with the top. Continue to fold it forwards to access the ribbon cable still connecting it.

  6. G'z One Boulder Double Sided Display Replacement: 6 단계, 이미지 1/3 G'z One Boulder Double Sided Display Replacement: 6 단계, 이미지 2/3 G'z One Boulder Double Sided Display Replacement: 6 단계, 이미지 3/3
    • Pull the logic board out with a pry stick gently from bottom to top at the current orientation.

    • The ribbon cable will be connected underneath the logic board. A small amount of force is required to disconnect them.

    • Although some force is required to lift up the board, be careful as to not bend any of the pins on either side.

  7. G'z One Boulder Double Sided Display Replacement, Double Sided Display: 7 단계, 이미지 1/3 G'z One Boulder Double Sided Display Replacement, Double Sided Display: 7 단계, 이미지 2/3 G'z One Boulder Double Sided Display Replacement, Double Sided Display: 7 단계, 이미지 3/3
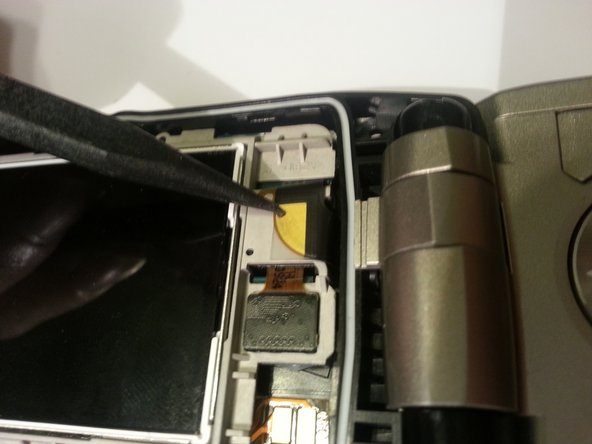
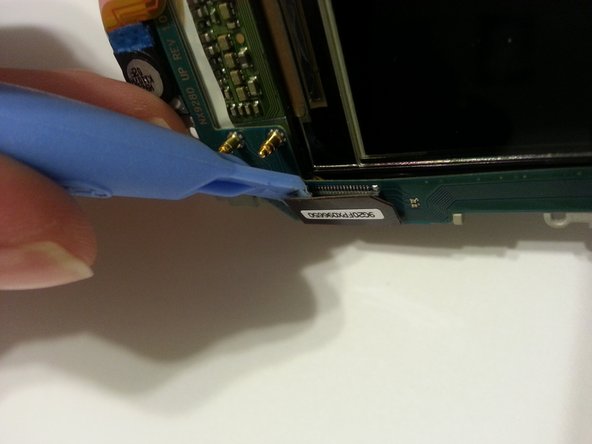
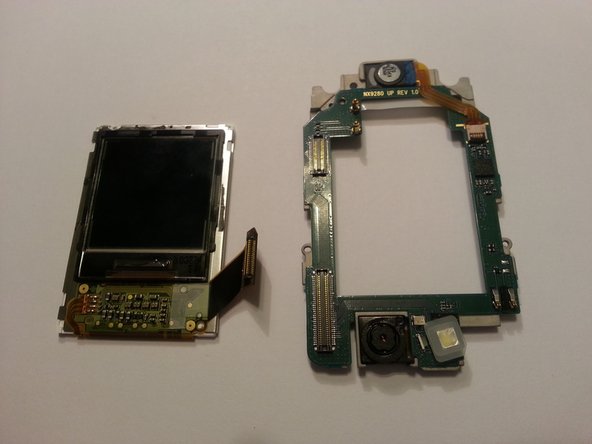
    • Remove the connector at the bottom left side of the logic board with the pictured orientation in mind.

결론

To reassemble your device, follow these instructions in reverse order.

다른 한 분이 해당 안내서를 완성하였습니다.

Raymond Caulder

회원 가입일: 03/11/13

22 평판

안내서 3개 작성하였습니다

Clemson, Team 13-3, Benson Spring 2013 Clemson, Team 13-3, Benson Spring 2013 회원

CLEM-BENSON-S13S13G3

3 회원들

안내서 14개 작성하였습니다

댓글 한 개

Thank you for taking the time to provide this detailed instruction. Worked great and only took about 15 minutes once I had purchased a used phone to take the display from!

Virginia Notter - 답글

댓글 쓰기

조회 통계:

24 시간 전: 0

7일 전: 1

30일 전: 3

전체 시간: 735