주요 콘텐츠로 건너뛰기
GATEWAY ML6720 Disc Drive Replacement

GATEWAY ML6720 Disc Drive Replacement

Semirah Dolan

Semirah Dolan다른 한 명의 기여자

최종 수정일 October 3, 2019

15 - 20 분
조정
마크업 사고

This guide shows how to take out and replace the disc drive of the GATEWAY ML6720

필요한 것

도구

  1. GATEWAY ML6720 Disc Drive Replacement, Disc Drive: 1 단계, 이미지 1개 중 1개
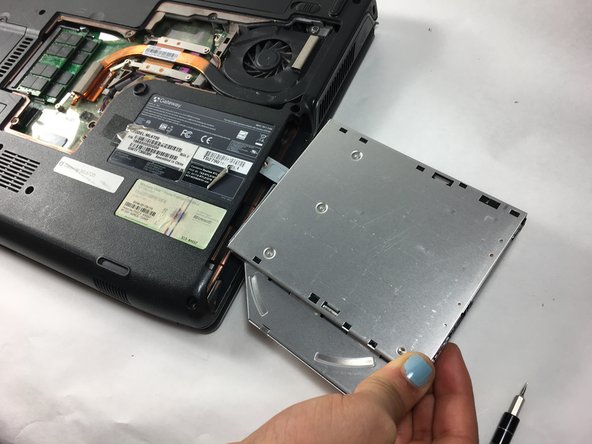
    • Remove the six screws with the Phillips #0 Screwdriver that secures the middle large piece of the back panel.

  2. GATEWAY ML6720 Disc Drive Replacement: 2 단계, 이미지 2개 중 1개 GATEWAY ML6720 Disc Drive Replacement: 2 단계, 이미지 2개 중 2개
    • Check to see if your laptop requires a screw(s) to be removed for the disc drive. Remove the screw (s) holding the disc drive down.

  3. GATEWAY ML6720 Disc Drive Replacement: 3 단계, 이미지 2개 중 1개 GATEWAY ML6720 Disc Drive Replacement: 3 단계, 이미지 2개 중 2개
    • With that screw removed, you can now pull the disc drive out of the laptop by pulling on it in the direction that it slides.

결론

To reassemble your device, follow these instructions in reverse order.

작성자

1다른 기여자 명과 함께

Semirah Dolan

회원 가입일: 10/31/16

113 평판

안내서 1개를 작성함

UMass Dartmouth, Team 2-3, Isaacson Fall 2016 UMass Dartmouth, Team 2-3, Isaacson Fall 2016 회원

UMASSD-ISAACSON-F16S2G3

2 회원들

안내서 10개를 작성함

댓글 0개

댓글 쓰기

조회 통계:

지난 24시간: 0

지난 7일: 0

지난 30일: 0

전체 시간: 220