소개
The over-the-stove GE Profile microwave oven started giving us an error message "Touchpad Shorted!" scrolling across its text screen. We ordered a genuine GE part from a third-party company, and replaced the touch pad.
필요한 것
-
-
These are pictures of the front of our microwave, and the detailed model number. Many GE microwaves have a similar disassembly method.
-
-
-
The first step is to remove the two philips screws located on the top of the microwave. These two screws hold the exhaust fan cover.
-
-
-
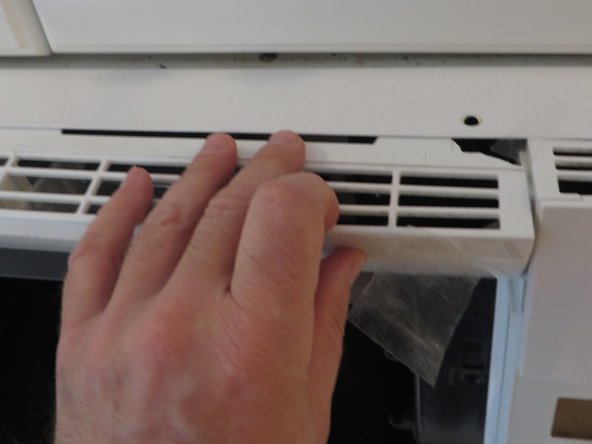
To remove the exhaust fan cover, first pull it from the right side, until it is at the angle shown in the photo. Then pull it away moving it to the right (to slide out without hitting the microwave door).
-
You'll notice in one of the photos, that I broke the plastic tab that the screw on the right screws into. Be gentler than me. I use clear tape to hold it now.
-
-
-
-
Remove the Philips screw that has been exposed when you took off the fan exhaust. This screw holds the touch pad and circuit boards.
-
After removing this screw, the touch pad assembly stays in place. See next step.
-
-
-
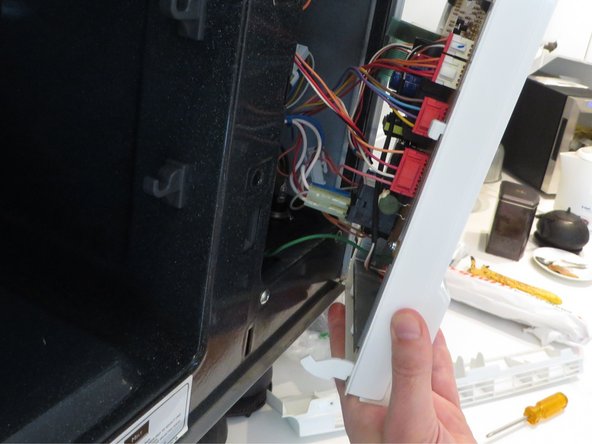
The touch pad assembly is held on by two slim plastic tabs, which have notches in them to keep this in place. CAREFULLY push up on the touch pad assembly to lift the notches out of the metal slots. Then slowly pull it away.
-
There are lots of wires inside, which prevent you from pulling it very far. This is where it is easy to break the slim plastic tabs. The touch pad will dangle from the wires, and the tabs can break if you let the weight press on them. It's better if you have two people. But one can do it if you are careful.
-
-
-
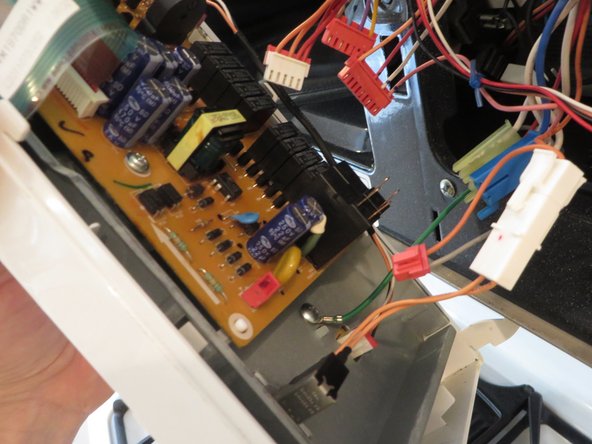
The first photo is a close up of the wire harnesses. Lots of wires here. At first it looked difficult, but in fact GE did a nice job here. Each wire harness is a difference size or shape, so it is fairly easy to get the wires back where they belong.
-
Before I realized it wasn't going to be a mess re-assembling, I sketched a diagram of the colors and number of connectors, just in case. But by the second time I repaired this, I didn't need to use it.
-
The second and third photos are close ups of the bottom of the circuit board. Important here is you need the screwdriver again. All the wire harnesses can be removed by squeezing and pulling. But the green ground wire is screwed in place.
-
-
-
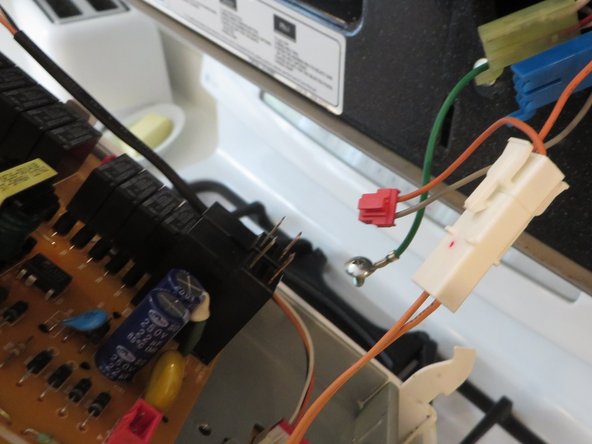
This is a photo of what's left dangling when all the wires are disconected. Don't touch! There is high voltage capacitors inside. Do not touch.
-
-
-
The circuit board is held on with 3 phillips screws, shown here, plus a metal band.
-


To reassemble your device, follow these instructions in reverse order.
To reassemble your device, follow these instructions in reverse order.
다른 한 분이 해당 안내서를 완성하였습니다.