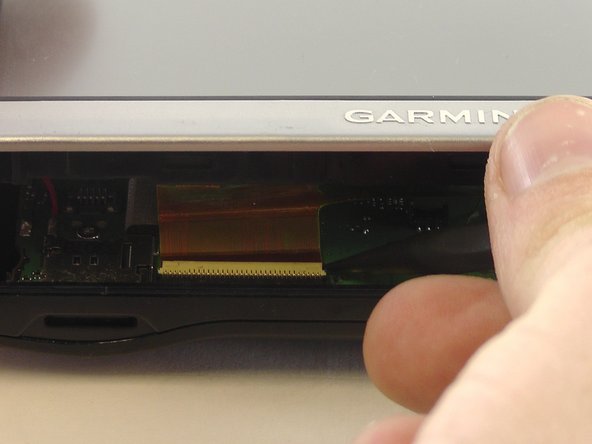
주요 콘텐츠로 건너뛰기

Garmin Nuvi 2597LMT LCD Replacement

필요한 것

  1. Garmin Nuvi 2597LMT LCD Replacement, LCD: 1 단계, 이미지 1/2 Garmin Nuvi 2597LMT LCD Replacement, LCD: 1 단계, 이미지 2/2
    • Turn your device over so the back is revealed and you can see the screws in the four corners.

    • Remove the four 3mm width by 6mm length T5 Torx screws using your screwdriver.

  2. Garmin Nuvi 2597LMT LCD Replacement: 2 단계, 이미지 1/2 Garmin Nuvi 2597LMT LCD Replacement: 2 단계, 이미지 2/2
    • Use the plastic opening tool to pry open the device at the seam where the two halves meet, prying all along all sides if need be.

    • Do it slowly so you don't accidently rip the ribbon cable that connects the digitizer to the motherboard, as well as don't completely separate the halves as this can tear the ribbon cable as well.

  3. Garmin Nuvi 2597LMT LCD Replacement: 3 단계, 이미지 1/3 Garmin Nuvi 2597LMT LCD Replacement: 3 단계, 이미지 2/3 Garmin Nuvi 2597LMT LCD Replacement: 3 단계, 이미지 3/3
    이 단계에 사용된 도구:
    Tweezers
    $4.99
    구매
    • Use your tweezers to flip back the tab of the ZIF (Zero Insertion Force) Connector, that is used to keep the ribbon cable in place.

    • This releases the ribbon cable separating the two halves of the device.

  4. Garmin Nuvi 2597LMT LCD Replacement: 4 단계, 이미지 1/2 Garmin Nuvi 2597LMT LCD Replacement: 4 단계, 이미지 2/2
    • Use your hands to pull back the clips that hold the LCD in place.

    • Once you have removed the LCD you can safely set it aside.

결론

To reassemble your device, follow these instructions in reverse order.

다른 3명이 해당 안내서를 완성하였습니다.

Patrick McNett

회원 가입일: 10/03/16

887 평판

안내서 5개 작성하였습니다

USF Tampa, Team 1-4, Sullivan Fall 2016 USF Tampa, Team 1-4, Sullivan Fall 2016 회원

USFT-SULLIVAN-F16S1G4

4 회원들

안내서 5개 작성하였습니다

댓글 한 개

Where can I get this replacement screen?

Anand Geetey - 답글

댓글 쓰기

조회 통계:

24 시간 전: 1

7일 전: 5

30일 전: 18

전체 시간: 1,662