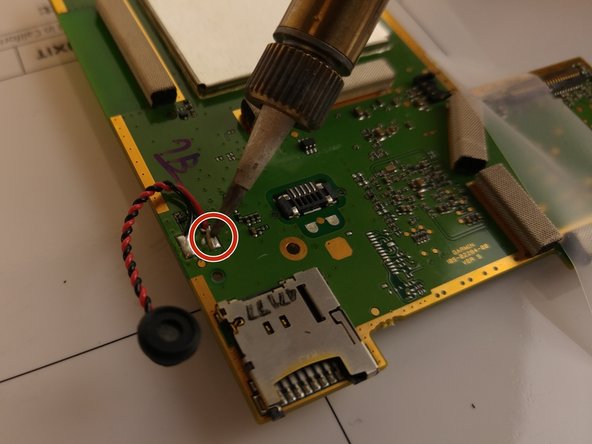
주요 콘텐츠로 건너뛰기

Garmin Nuvi 2689LMT Microphone Replacement

필요한 것

  1. Garmin Nuvi 2689LMT Microphone Replacement, Microphone: 1 단계, 이미지 1/1
    • Start by taking off the stand by depressing the table turning the round piece back toward you, pulling it away for the Garmin device.

  2. Garmin Nuvi 2689LMT Microphone Replacement: 2 단계, 이미지 1/1
    • Use a T5 bit on a screwdriver to remove the 4 screws at the 4 corners on the back of the device.

    • Right to tighten, left to loosen.

  3. Garmin Nuvi 2689LMT Microphone Replacement: 3 단계, 이미지 1/1
    • Place the device face down on a flat surface, with the bottom facing you.

    • Pry open the seam with a prying tool .

    • There are two seams, the top one is artificial.

  4. Garmin Nuvi 2689LMT Microphone Replacement: 4 단계, 이미지 1/1
    • Firmly force a plastic spudger into the bottom seam and pry open a section of the device

    • Use a prying/pushing motion to force the tool into the device until there is a click

    • Repeat all the way around the seam until the back comes off.

  5. Garmin Nuvi 2689LMT Microphone Replacement: 5 단계, 이미지 1/1
    • When the seam is completely separated, lift the back away from the screen.

    • Do not attempt to separate the unit until all the tabs have been separated.

  6. Garmin Nuvi 2689LMT Microphone Replacement: 6 단계, 이미지 1/1
    • Wedge an angled plastic prying tool under the connector to the battery where the wires attach to the mother board

    • Gently pry up the connector. It should come free easily.

    • The battery is connected to the main circuit board by two wires, that are red and green and is attached to a white connector.

  7. Garmin Nuvi 2689LMT Microphone Replacement: 7 단계, 이미지 1/2 Garmin Nuvi 2689LMT Microphone Replacement: 7 단계, 이미지 2/2
    이 단계에 사용된 도구:
    Tweezers
    $4.99
    구매
    • Melt the two metal connections on the circuit board using a soldering iron.

    • Remove the wires using tweezers.

    • There are two wires that are connected to the main circuit board.

    • Soldering irons will reach extremely high temperatures and should be used with caution.

  8. Garmin Nuvi 2689LMT Microphone Replacement: 8 단계, 이미지 1/1
    • Retrieve your new microphone for your Garmin device and attach to the circuit board with the soldering iron.

    • Carefully melt the solder onto the wire at the connection points on circuit board.

    • Keep the solder on the metal contact point and avoid heating the plastic circuit board to prevent damage.

결론

To reassemble your device, follow these instructions in reverse order.

Allyson Smith

회원 가입일: 09/26/16

114 평판

안내서 1개 작성함

USF Tampa, Team 16-5, Eyestone Fall 2016 USF Tampa, Team 16-5, Eyestone Fall 2016 회원

USFT-EYESTONE-F16S16G5

3 회원들

안내서 5개 작성하였습니다

댓글 한 개

Great explanation, thank you! But where can I buy the replacement mic, please?

André Kobzar - 답글

댓글 쓰기

조회 통계:

24 시간 전: 1

7일 전: 3

30일 전: 8

전체 시간: 287