주요 콘텐츠로 건너뛰기

Garmin Nuvi 65LM Motherboard Replacement

필요한 것

  1. Garmin Nuvi 65LM Motherboard Replacement, Plastic device casing: 1 단계, 이미지 1/2 Garmin Nuvi 65LM Motherboard Replacement, Plastic device casing: 1 단계, 이미지 2/2
    • Place the device on a flat surface with the screen facing down.

    • Remove the four 4.80 mm T5 screws on the corners of the device with a T5 Torx screwdriver.

  2. Garmin Nuvi 65LM Motherboard Replacement: 2 단계, 이미지 1/2 Garmin Nuvi 65LM Motherboard Replacement: 2 단계, 이미지 2/2
    • There is a ribbon cable that will still connect the front and back panels once they are pried part.

    • Use the plastic opening tool to gently pry apart the front and back casing panels. Repeat this at multiple locations around the edge of the device. You should hear the clips that hold the front and back together pop apart.

    • Once there is a large gap between the from and back casing panels, use your hands to separate the two halves.

  3. Garmin Nuvi 65LM Motherboard Replacement: 3 단계, 이미지 1/3 Garmin Nuvi 65LM Motherboard Replacement: 3 단계, 이미지 2/3 Garmin Nuvi 65LM Motherboard Replacement: 3 단계, 이미지 3/3
    • Use a spudger to pop up the ZIF connector tab that fastens the ribbon cable to the motherboard.

    • Gently pull the front panel away and set it on your flat work surface.

  4. Garmin Nuvi 65LM Motherboard Replacement, Motherboard: 4 단계, 이미지 1/1
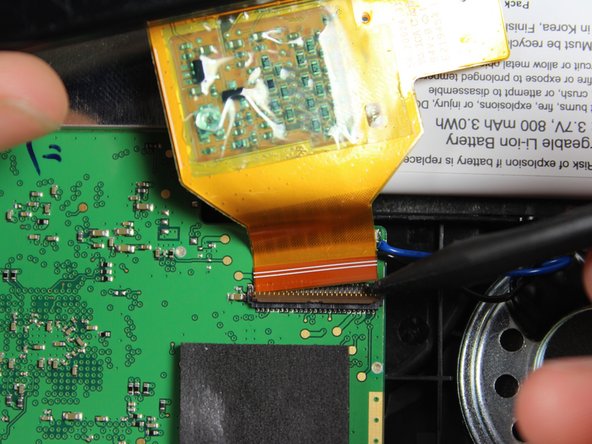
    • Make sure the GPS is laying on a flat surface with the open side showing so that the motherboard is facing you.

  5. Garmin Nuvi 65LM Motherboard Replacement: 5 단계, 이미지 1/3 Garmin Nuvi 65LM Motherboard Replacement: 5 단계, 이미지 2/3 Garmin Nuvi 65LM Motherboard Replacement: 5 단계, 이미지 3/3
    • This step requires soldering. If you are new to soldering, reference the Soldering Section of Ifixit's Device Skills Page for helpful information on soldering.

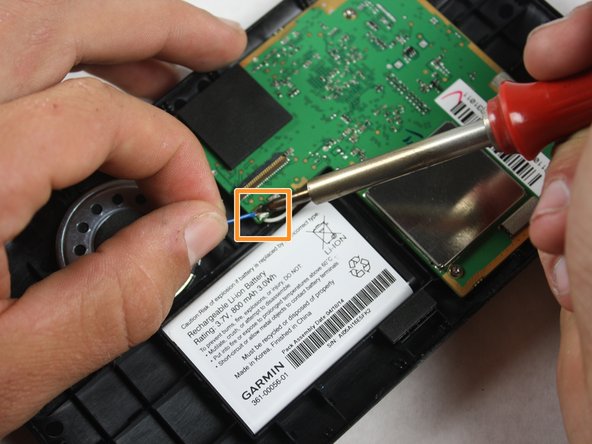
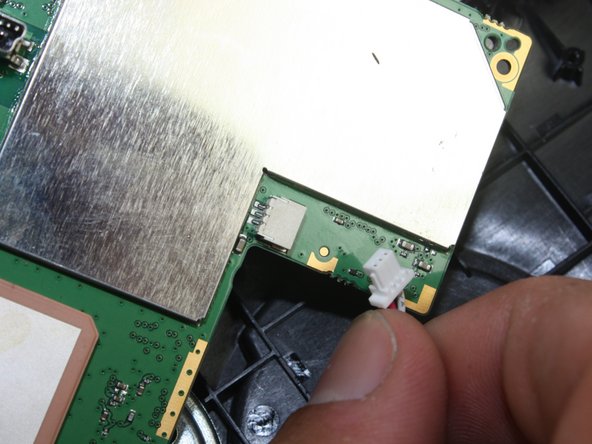
    • Disconnect the speaker wires by desoldering them from the terminals on the motherboard.

    • Plug in the soldering station and give it at least 5 minutes to heat up.

    • The soldering iron and molten solder are very hot and can burn you!

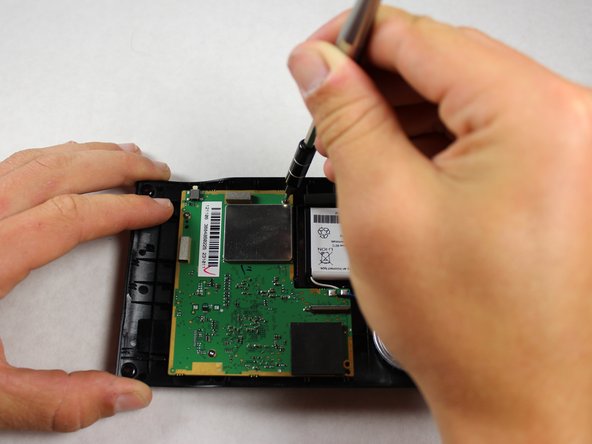
    • Touch the tip of the soldering iron to each terminal until the solder begins to melt.

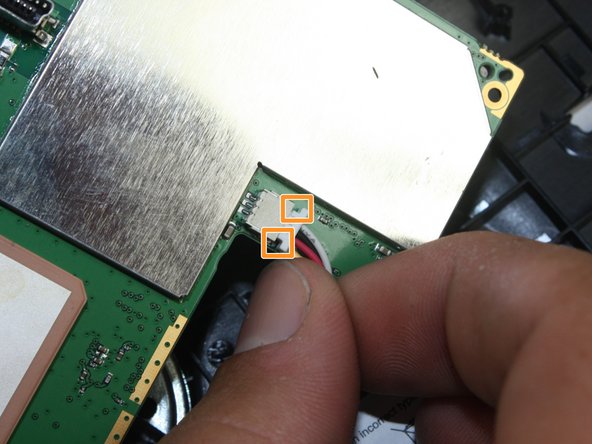
    • Once the solder melts, gently pull the wire away from its connection to the terminal with your hands.

  6. Garmin Nuvi 65LM Motherboard Replacement: 6 단계, 이미지 1/2 Garmin Nuvi 65LM Motherboard Replacement: 6 단계, 이미지 2/2
    • Unscrew the four, marked 4.00 mm T5 screws with the T5 torque screwdriver.

    • Be sure to keep track of where you place the screws. A magnetic work-pad works great for this.

  7. Garmin Nuvi 65LM Motherboard Replacement: 7 단계, 이미지 1/1
    • Gently remove the motherboard from the casing.

    • The speaker and battery are still connected to the motherboard so do not pull the motherboard completely away from the casing.

  8. Garmin Nuvi 65LM Motherboard Replacement: 8 단계, 이미지 1/3 Garmin Nuvi 65LM Motherboard Replacement: 8 단계, 이미지 2/3 Garmin Nuvi 65LM Motherboard Replacement: 8 단계, 이미지 3/3
    • Turn the motherboard over to find the power connection.

    • Gently un-connect the plug by using your thumbnail (or prying device) to catch on its grooves, then pulling away from the connection.

결론

To reassemble your device, follow these instructions in reverse order.

다른 4명이 해당 안내서를 완성하였습니다.

Patrick Beahan

회원 가입일: 04/26/15

310 평판

안내서 1개 작성함

Cal Poly, Team 15-3, Amido Spring 2015 Cal Poly, Team 15-3, Amido Spring 2015 회원

CPSU-AMIDO-S15S15G3

4 회원들

안내서 6개 작성하였습니다

댓글 2개

wher can I bay mother bord

mike berry - 답글

Hi I need to replace my nuvi 65 LM motherboard.

Where can I buy it?

Zaid Moosa - 답글

댓글 쓰기

조회 통계:

24 시간 전: 0

7일 전: 1

30일 전: 2

전체 시간: 3,433