소개
The Gateway 600 YG2 includes a full-sized 86-key keyboard. Each key performs a specific function when pressed individually or in combination with other keys.
Follow the steps in this guide to replace your keyboard if necessary.
New or pre-owned keyboards can be purchased on eBay. An original factor laptop full complete keyboard with a 2-year protection plan can be purchased for $14.99.
필요한 것
-
-
Flip the laptop over.
-
Slide the battery release tab to the right to open the battery cover.
-
-
-
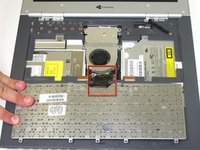
Insert the spudger between the "sysrq" and "ins" keys.
-
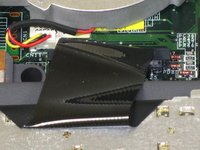
Gently pry free the power button panel above the keyboard, from the right and moving to the left.
-


To reassemble your device, follow these instructions in reverse order.
팀

Cal Poly, Team 20-10, Maness Fall 2010 Cal Poly, Team 20-10, Maness Fall 2010 회원
CPSU-MANESS-F10S20G10
3 회원들
안내서 22개를 작성함