주요 콘텐츠로 건너뛰기

Gateway KAV60 LT2016U Netbook Cooling Fan Replacement

보관된 가이드
해당 안내서는 단지 역사적인 목적으로 보관됩니다. 최신 버전 안내서를 사용하여 수리 하십시오.

필요한 것

  1. Gateway KAV60 LT2016U Netbook Cooling Fan Replacement, Battery: 1 단계, 이미지 1/1
    • Unlock the button in the top left on the back of the laptop (So the red is showing).

  2. Gateway KAV60 LT2016U Netbook Cooling Fan Replacement: 2 단계, 이미지 1/1
    • The battery should be able to be removed easily now.

  3. Gateway KAV60 LT2016U Netbook Cooling Fan Replacement, Cooling Fan: 3 단계, 이미지 1/1
    • Start by first removing the battery of the device.

  4. Gateway KAV60 LT2016U Netbook Cooling Fan Replacement: 4 단계, 이미지 1/1
    • Next remove the RAM, hard drive, and wifi card before continuing so they aren't damaged.

  5. Gateway KAV60 LT2016U Netbook Cooling Fan Replacement: 5 단계, 이미지 1/2 Gateway KAV60 LT2016U Netbook Cooling Fan Replacement: 5 단계, 이미지 2/2
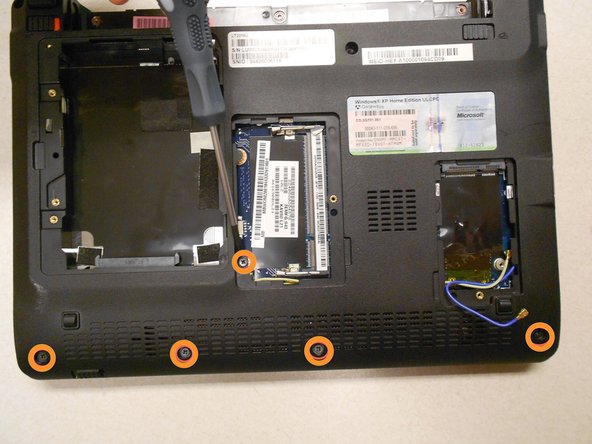
    • Remove all 11 of the screw shown on the bottom of the lap top using the specified screw driver.

  6. Gateway KAV60 LT2016U Netbook Cooling Fan Replacement: 6 단계, 이미지 1/3 Gateway KAV60 LT2016U Netbook Cooling Fan Replacement: 6 단계, 이미지 2/3 Gateway KAV60 LT2016U Netbook Cooling Fan Replacement: 6 단계, 이미지 3/3
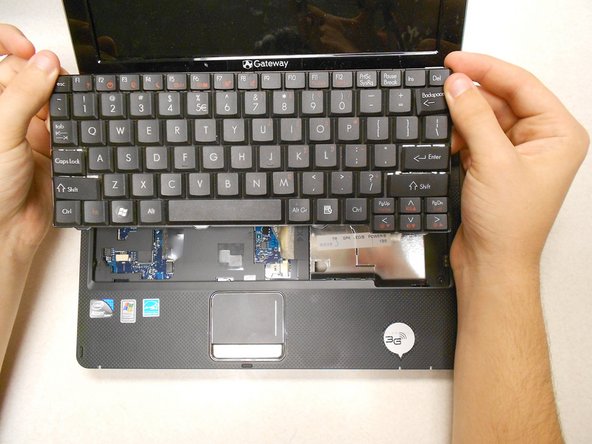
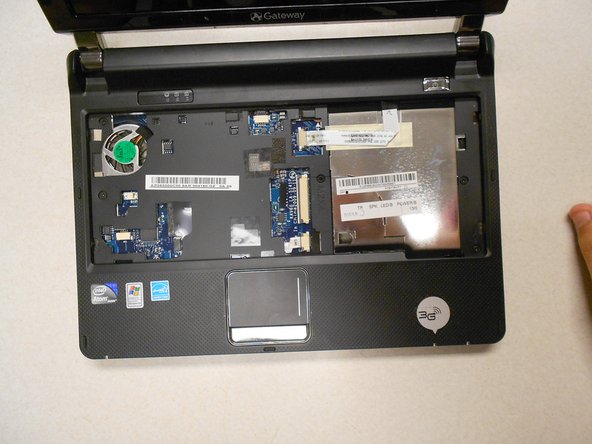
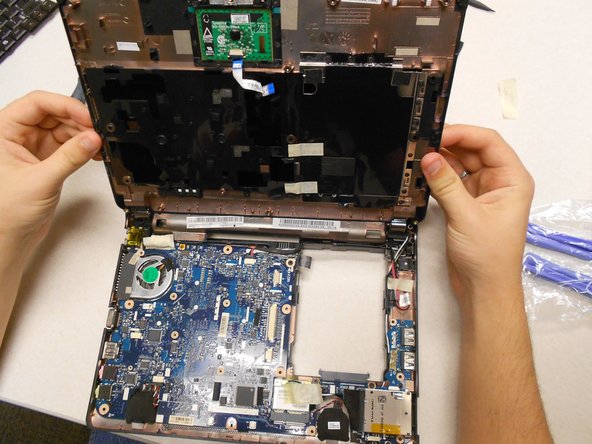
    • Lift off the keyboard by doing exactly what is shown in the first picture. Get the head of the plastic opening tool under and then wedge it out.

  7. Gateway KAV60 LT2016U Netbook Cooling Fan Replacement: 7 단계, 이미지 1/3 Gateway KAV60 LT2016U Netbook Cooling Fan Replacement: 7 단계, 이미지 2/3 Gateway KAV60 LT2016U Netbook Cooling Fan Replacement: 7 단계, 이미지 3/3
    • Remove the 5 circled screws with the Phillips #0 screw driver.

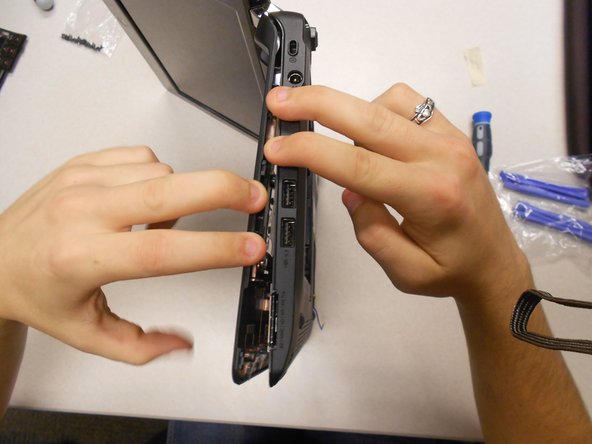
    • Carefully separate the back cover from the front either using your hands or a plastic opening tool.

  8. Gateway KAV60 LT2016U Netbook Cooling Fan Replacement: 8 단계, 이미지 1/2 Gateway KAV60 LT2016U Netbook Cooling Fan Replacement: 8 단계, 이미지 2/2
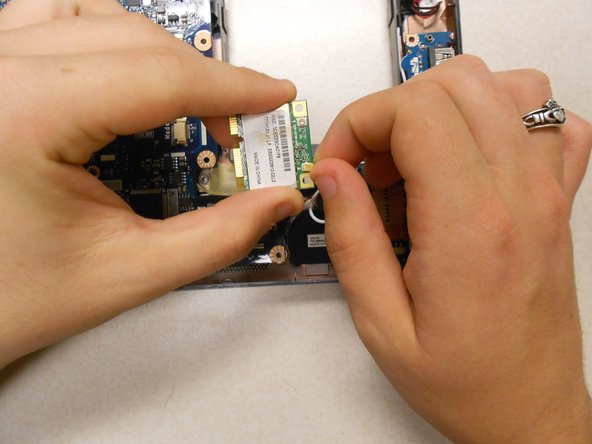
    • Unscrew this 1 screw to remove the wifi card.

    • Then unplug the wires it is attached to and take it out.

  9. Gateway KAV60 LT2016U Netbook Cooling Fan Replacement: 9 단계, 이미지 1/2 Gateway KAV60 LT2016U Netbook Cooling Fan Replacement: 9 단계, 이미지 2/2
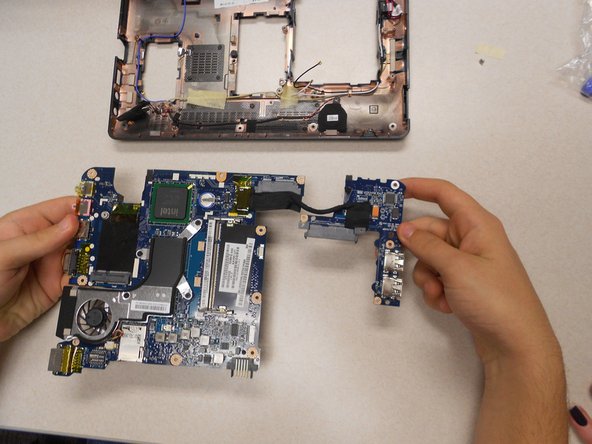
    • Use the phillps #00 screw driver to remove these 3 small scows so the motherboard can be removed.

    • Then remove it from the base of th computer.

  10. Gateway KAV60 LT2016U Netbook Cooling Fan Replacement: 10 단계, 이미지 1/1
    • Use the Phillips #00 screw driver to remove the 4 circled screws.

  11. Gateway KAV60 LT2016U Netbook Cooling Fan Replacement: 11 단계, 이미지 1/1
    • Disconnect the wires from the motherboard.

    • The fan should now be fully disconnected and ready to replace.

결론

To reassemble your device, follow these instructions in reverse order.

다른 한 분이 해당 안내서를 완성하였습니다.

Kyle

회원 가입일: 03/11/14

622 평판

안내서 3개 작성하였습니다

UMass Dartmouth, Team 3-2, Calaway Spring 2014 UMass Dartmouth, Team 3-2, Calaway Spring 2014 회원

UMASSD-CALAWAY-S14S3G2

4 회원들

안내서 6개 작성하였습니다

댓글 0개

댓글 쓰기

조회 통계:

24 시간 전: 0

7일 전: 0

30일 전: 1

전체 시간: 109