주요 콘텐츠로 건너뛰기

Gateway M-2626u CPU Replacement

필요한 것

  1. Gateway M-2626u CPU Replacement, Back Panel: 1 단계, 이미지 1/2 Gateway M-2626u CPU Replacement, Back Panel: 1 단계, 이미지 2/2
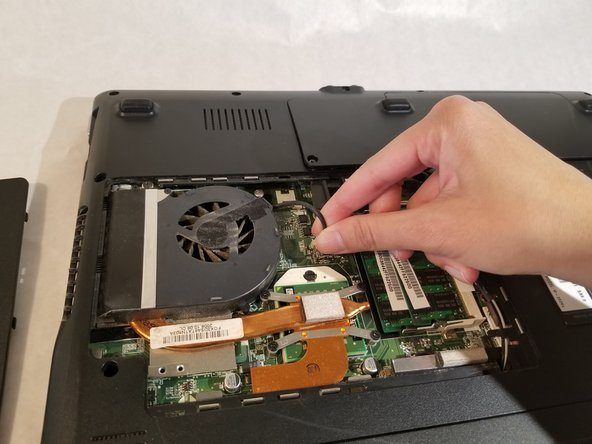
    • Using the Phillips #1 screwdriver, remove the four 6mm screws on the back of the laptop.

  2. Gateway M-2626u CPU Replacement: 2 단계, 이미지 1/2 Gateway M-2626u CPU Replacement: 2 단계, 이미지 2/2
    • Insert the plastic prying tool and pry the back panel off starting at an edge and moving your way around it.

  3. Gateway M-2626u CPU Replacement, CPU Fan: 3 단계, 이미지 1/2 Gateway M-2626u CPU Replacement, CPU Fan: 3 단계, 이미지 2/2
    • Remove the header by pulling on it with two fingers.

  4. Gateway M-2626u CPU Replacement: 4 단계, 이미지 1/1
    • Remove the six 2.5mm screws using a Phillips #1 screwdriver.

  5. Gateway M-2626u CPU Replacement: 5 단계, 이미지 1/1
    • Remove the fan by moving it to the side and lifting it out of the computer.

  6. Gateway M-2626u CPU Replacement, CPU: 6 단계, 이미지 1/1
    • Once the fan is removed, locate the CPU.

    • Rotate the plastic knob using a flat head screw driver as depicted in this image

  7. Gateway M-2626u CPU Replacement: 7 단계, 이미지 1/1
    • Lift and remove the CPU from the mother board socket.

결론

To reassemble your device, follow these instructions in reverse order.

Armani Tayeh

회원 가입일: 03/19/18

432 평판

안내서 4개 작성하였습니다

UMass Dartmouth, Team S3-G2, Peak Spring 2018 UMass Dartmouth, Team S3-G2, Peak Spring 2018 회원

UMASSD-PEAK-S18S3G2

2 회원들

안내서 14개 작성하였습니다

댓글 0개

댓글 쓰기

조회 통계:

24 시간 전: 0

7일 전: 2

30일 전: 15

전체 시간: 241