소개
This guide will help you replace the Hard Drive in your Gateway MA7 laptop. The hard drive for your laptop stores all of your computer's information. If your hard drive is corrupt it will need to be replaced in order for it to turn on. You can also replace the hard drive if you want to have more storage.
필요한 것
-
-
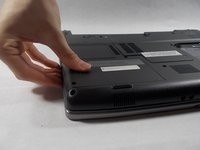
To unlock the battery slide both switches marked in the picture to the unlocked position, the one on the left marked in pink will need to be held while you remove the battery.
 FixBot에 문의하기
-
-
-
-
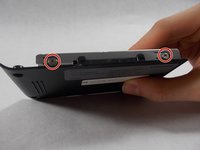
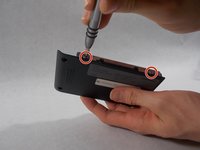
Remove two 4 mm Phillips #0 screws from the plastic hard drive cover.
-
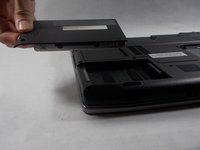
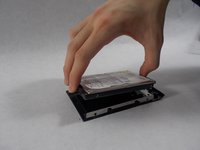
Lift the hard drive up from the plastic cover.
-


To reassemble your device, follow these instructions in reverse order.
팀

UMass Dartmouth, Team S6-G2, Bernier Spring 2018 UMass Dartmouth, Team S6-G2, Bernier Spring 2018 회원
UMASSD-BERNIER-S18S6G2
3 회원들
안내서 8개를 작성함