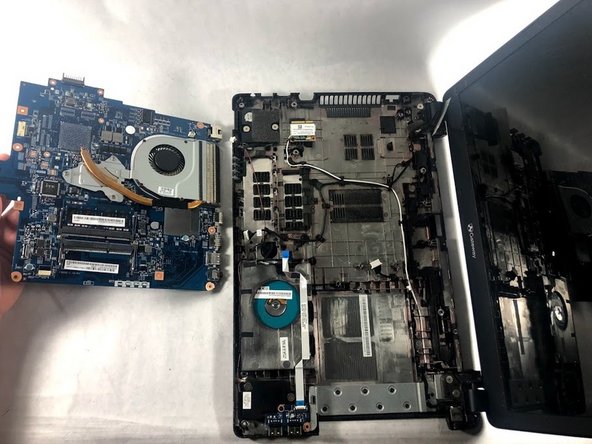
주요 콘텐츠로 건너뛰기

Gateway NE52214U Motherboard Replacement

필요한 것

  1. Gateway NE52214U Motherboard Replacement, Battery: 1 단계, 이미지 1/1
    • Make sure to power down and turn off the laptop before proceeding with this guide.

    • Flip over the laptop.

  2. Gateway NE52214U Motherboard Replacement: 2 단계, 이미지 1/2 Gateway NE52214U Motherboard Replacement: 2 단계, 이미지 2/2
    • Slide the tab to the left and hold the tab there.

    • While holding down the sliding tab, remove the battery from the device.

  3. Gateway NE52214U Motherboard Replacement, Upper Case: 3 단계, 이미지 1/2 Gateway NE52214U Motherboard Replacement, Upper Case: 3 단계, 이미지 2/2
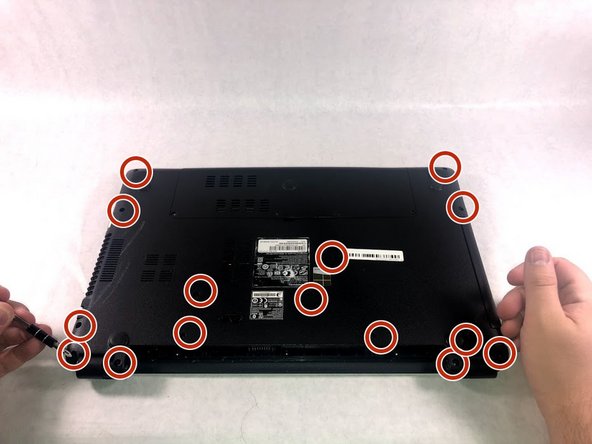
    • After removing the battery, remove 15 7mm screws using the Phillip #1 Screwdriver.

  4. Gateway NE52214U Motherboard Replacement: 4 단계, 이미지 1/1
    • Flip over the laptop and open it so the screen is facing you.

  5. Gateway NE52214U Motherboard Replacement: 5 단계, 이미지 1/1
    • Lift the upper case cover off of the device. Use a prying tool along the edges if necessary.

  6. Gateway NE52214U Motherboard Replacement, Motherboard: 6 단계, 이미지 1/1
    • Remove the twelve 3mm screws using the Phillips #00 screwdriver.

  7. Gateway NE52214U Motherboard Replacement: 7 단계, 이미지 1/2 Gateway NE52214U Motherboard Replacement: 7 단계, 이미지 2/2
    • Gently lift and remove the motherboard off of device.

    • This will also remove the fan from the device but it will remain attached to the motherboard.

결론

To reassemble your device, follow these instructions in reverse order.

Kelsey Rodrigues

회원 가입일: 10/23/18

495 평판

안내서 5개 작성하였습니다

UMass Dartmouth, Team S1-G1, Simcock Fall 2018 UMass Dartmouth, Team S1-G1, Simcock Fall 2018 회원

UMASSD-SIMCOCK-F18S1G1

3 회원들

안내서 10개 작성하였습니다

댓글 0개

댓글 쓰기

조회 통계:

24 시간 전: 0

7일 전: 1

30일 전: 2

전체 시간: 315