소개
Removing the upper case of the laptop is necessary if the case is significantly damaged since it is essentially to protecting the laptop's internal components. Upper case removal is also a necessary preliminary step for replacing many of these internal components. Remove battery before upper cover case.
필요한 것
-
-
-
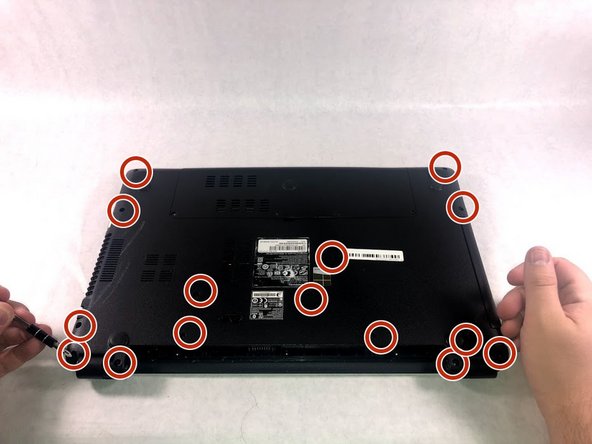
After removing the battery, remove 15 7mm screws using the Phillip #1 Screwdriver.
-


To reassemble your device, follow these instructions in reverse order.
To reassemble your device, follow these instructions in reverse order.
팀

UMass Dartmouth, Team S1-G1, Simcock Fall 2018 UMass Dartmouth, Team S1-G1, Simcock Fall 2018 회원
UMASSD-SIMCOCK-F18S1G1
3 회원들
안내서 10개 작성하였습니다