주요 콘텐츠로 건너뛰기

Gateway NE56R27u Keyboard Replacement

필요한 것

  1. Gateway NE56R27u Keyboard Replacement, Battery: 1 단계, 이미지 1/2 Gateway NE56R27u Keyboard Replacement, Battery: 1 단계, 이미지 2/2
    • Using the spudger, push the orange tab to the unlock position.

  2. Gateway NE56R27u Keyboard Replacement: 2 단계, 이미지 1/2 Gateway NE56R27u Keyboard Replacement: 2 단계, 이미지 2/2
    • Lift the battery from its compartment.

    • When reinstalling, insert back end of battery first, then clicking into place.

  3. Gateway NE56R27u Keyboard Replacement, Hard Drive: 3 단계, 이미지 1/3 Gateway NE56R27u Keyboard Replacement, Hard Drive: 3 단계, 이미지 2/3 Gateway NE56R27u Keyboard Replacement, Hard Drive: 3 단계, 이미지 3/3
    • Unscrew the two 7.9mm Phillips #0 screws that secure the service cover.

  4. Gateway NE56R27u Keyboard Replacement: 4 단계, 이미지 1/2 Gateway NE56R27u Keyboard Replacement: 4 단계, 이미지 2/2
    • Use the opening tool to gently pry open the compartment covering.

  5. Gateway NE56R27u Keyboard Replacement: 5 단계, 이미지 1/3 Gateway NE56R27u Keyboard Replacement: 5 단계, 이미지 2/3 Gateway NE56R27u Keyboard Replacement: 5 단계, 이미지 3/3
    • Unscrew the two 0.5mm screws from the hard drive brackets using the Phillips #0 screwdriver.

    • Pull the plastic tab attached to the hard drive to the right to remove the hard drive.

    • The hard drive plugs into the port on the left within the compartment. Be sure to gently remove the hard drive without damaging the port.

  6. Gateway NE56R27u Keyboard Replacement: 6 단계, 이미지 1/2 Gateway NE56R27u Keyboard Replacement: 6 단계, 이미지 2/2
    • Remove the hard drive by lifting up the right side, releasing the hard drive from the compartment clips on the left.

  7. Gateway NE56R27u Keyboard Replacement, Keyboard: 7 단계, 이미지 1/2 Gateway NE56R27u Keyboard Replacement, Keyboard: 7 단계, 이미지 2/2
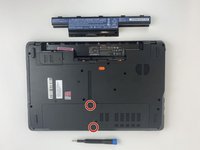
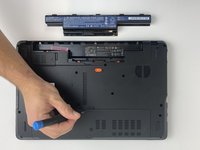
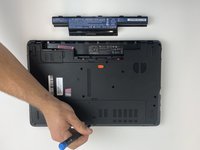
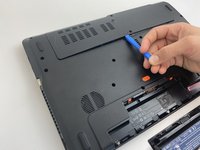
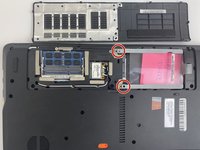
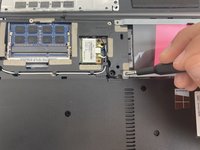
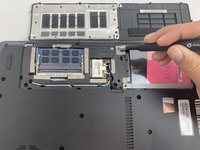
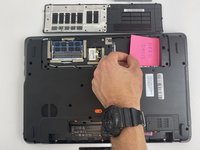
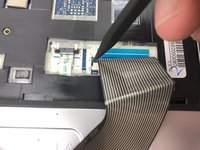
    • Flip your laptop over to view the keyboard.

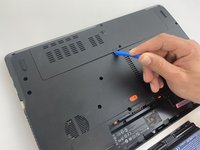
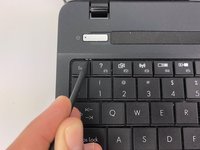
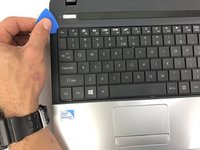
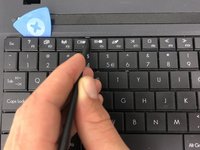
    • Using the spudger, push in the ten tabs at the edges of the keyboard.

  8. Gateway NE56R27u Keyboard Replacement: 8 단계, 이미지 1/2 Gateway NE56R27u Keyboard Replacement: 8 단계, 이미지 2/2
    • Using the opening pick, lift the edges of the keyboard.

    • Repeat around the edges of the device.

    • Lift up the keyboard to expose the cables underneath.

  9. Gateway NE56R27u Keyboard Replacement: 9 단계, 이미지 1/3 Gateway NE56R27u Keyboard Replacement: 9 단계, 이미지 2/3 Gateway NE56R27u Keyboard Replacement: 9 단계, 이미지 3/3
    • Release the clamp holding the mini-DIN cord by lifting the two black tabs on either side.

    • Gently pull the mini-DIN cord out of the clamp.

    • Remove the keyboard.

결론

To reassemble your device, follow these instructions in reverse order.

Piper Moeller

회원 가입일: 01/24/20

619 평판

안내서 4개 작성하였습니다

댓글 0개

댓글 쓰기

조회 통계:

24 시간 전: 0

7일 전: 3

30일 전: 15

전체 시간: 575