주요 콘텐츠로 건너뛰기

GeeksPhone Keon Antenna Replacement

필요한 것

  1. GeeksPhone Keon  Antenna Replacement, Battery: 1 단계, 이미지 1/2 GeeksPhone Keon  Antenna Replacement, Battery: 1 단계, 이미지 2/2
    • Insert the plastic opening tool into the seam between the front of the device and the rear cover.

    • Slide the plastic opening tool from the bottom of the phone to the top.

    • Use the plastic opening tool to free all the clips attached to the phone.

  2. GeeksPhone Keon  Antenna Replacement: 2 단계, 이미지 1/1
    • Lift the cover away from the phone.

  3. GeeksPhone Keon  Antenna Replacement: 3 단계, 이미지 1/1
    • Insert the plastic opening tool into the groove between the bottom of the phone and the battery.

    • Lift the battery with the plastic opening tool and finish removing battery by hand.

  4. GeeksPhone Keon  Antenna Replacement, Back Plate: 4 단계, 이미지 1/2 GeeksPhone Keon  Antenna Replacement, Back Plate: 4 단계, 이미지 2/2
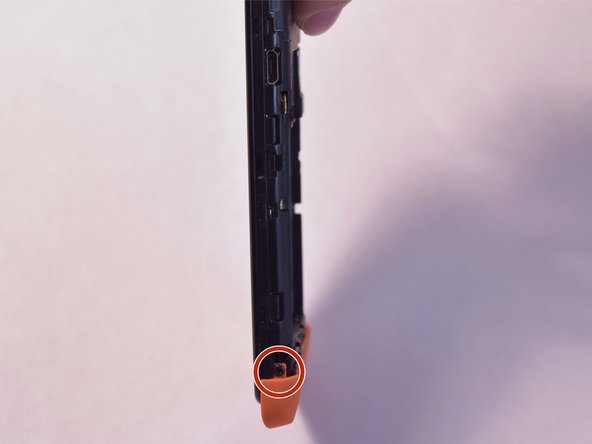
    • Remove the two 5mm T4 screws on the sides of the small orange plate.

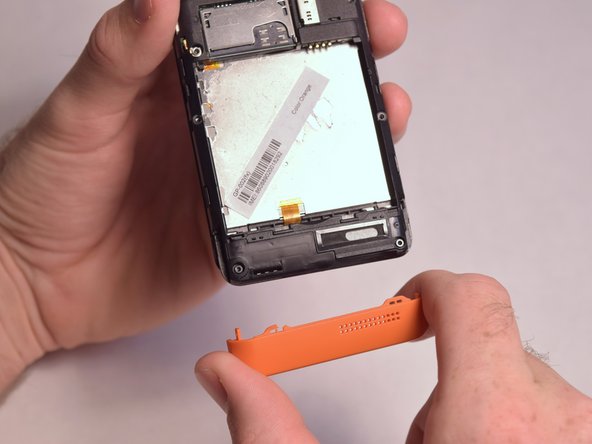
  5. GeeksPhone Keon  Antenna Replacement: 5 단계, 이미지 1/2 GeeksPhone Keon  Antenna Replacement: 5 단계, 이미지 2/2
    • Gently remove the small orange plate by pulling it down.

  6. GeeksPhone Keon  Antenna Replacement: 6 단계, 이미지 1/1
    • Remove the following screws securing the back plate to the device:

    • Two silver 2mm T3 screws

    • Five black 3mm T3 screws

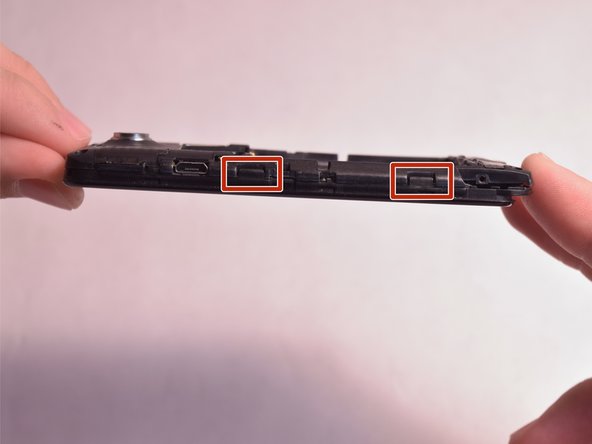
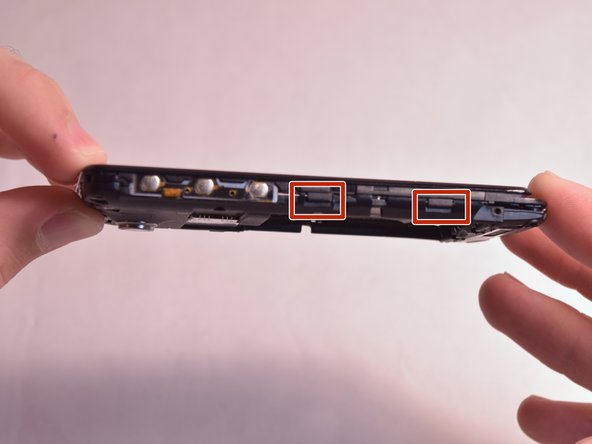
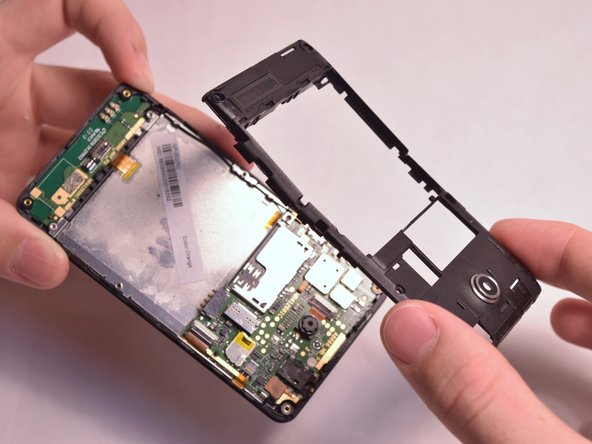
  7. GeeksPhone Keon  Antenna Replacement: 7 단계, 이미지 1/3 GeeksPhone Keon  Antenna Replacement: 7 단계, 이미지 2/3 GeeksPhone Keon  Antenna Replacement: 7 단계, 이미지 3/3
    • Slightly lift up the bottom corner of the backplate.

    • Release the four clips on both sides by pulling them away from the device.

  8. GeeksPhone Keon  Antenna Replacement: 8 단계, 이미지 1/2 GeeksPhone Keon  Antenna Replacement: 8 단계, 이미지 2/2
    • Lift the backplate away from the device.

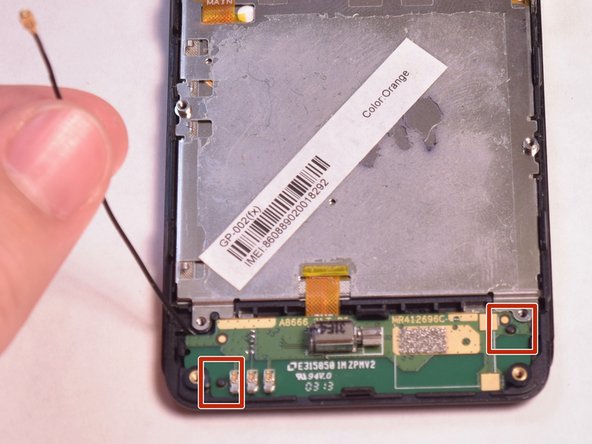
  9. GeeksPhone Keon  Antenna Replacement, Antenna: 9 단계, 이미지 1/1
    • Unfasten the black wire from the metal clamps by hand and lift the black wire away from the device.

    • Unfasten the plastic clamps attached to the antenna.

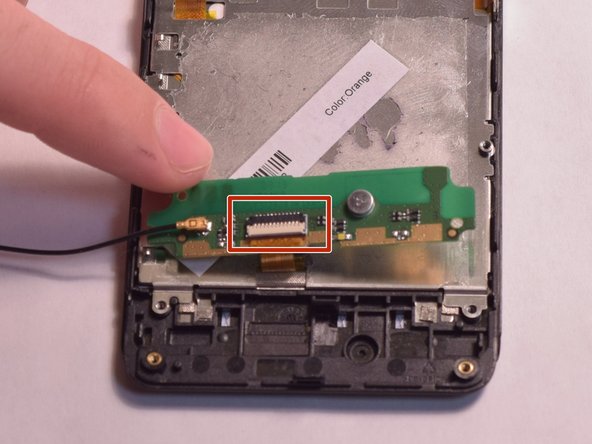
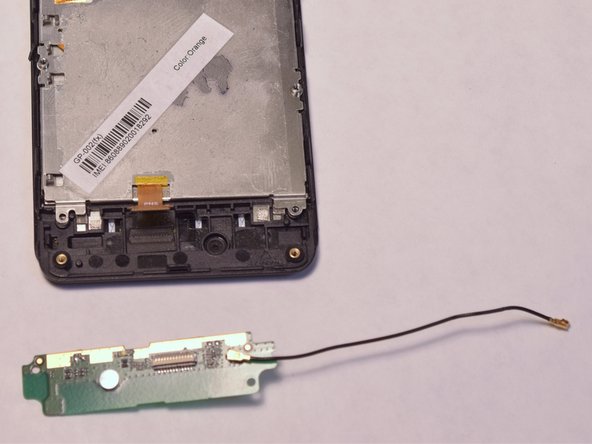
  10. GeeksPhone Keon  Antenna Replacement: 10 단계, 이미지 1/3 GeeksPhone Keon  Antenna Replacement: 10 단계, 이미지 2/3 GeeksPhone Keon  Antenna Replacement: 10 단계, 이미지 3/3
    • Gently lift the antenna and flip it over to reveal a ZIF connector on the back.

    • Flip up the small retaining flap on the ZIF connector and pull the ribbon cable out.

결론

To reassemble your device, follow these instructions in reverse order.

Michael Moran

회원 가입일: 08/26/15

113 평판

안내서 1개 작성함

USF Tampa, Team 3-5, Eyestone Fall 2015 USF Tampa, Team 3-5, Eyestone Fall 2015 회원

USFT-EYESTONE-F15S3G5

4 회원들

안내서 12개 작성하였습니다

댓글 0개

댓글 쓰기

조회 통계:

24 시간 전: 1

7일 전: 2

30일 전: 3

전체 시간: 152