주요 콘텐츠로 건너뛰기

Gigabyte RTX 3060 GPU Fan Replacement

필요한 것

  1. Gigabyte RTX 3060 GPU Fan Replacement, GPU Fan: 1 단계, 이미지 1/3 Gigabyte RTX 3060 GPU Fan Replacement, GPU Fan: 1 단계, 이미지 2/3 Gigabyte RTX 3060 GPU Fan Replacement, GPU Fan: 1 단계, 이미지 3/3
    • Remove the four springs screws attached to the thermal plate on the GPU using a Phillips #00 screwdriver.

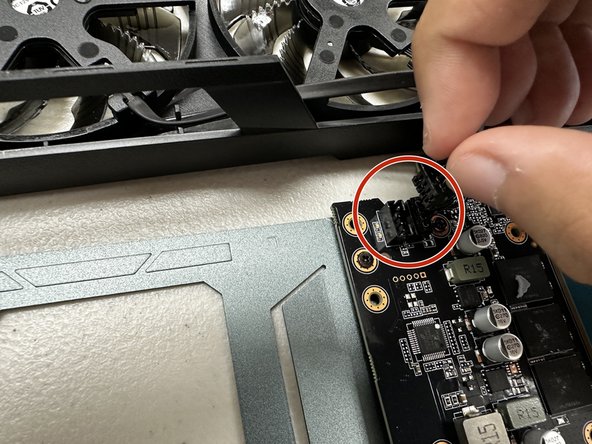
    • Remove the two screws from the right side using a Phillips #00 screwdriver.

    • Remove the two screws from the left side using a Phillips #00 screwdriver.

  2. Gigabyte RTX 3060 GPU Fan Replacement: 2 단계, 이미지 1/3 Gigabyte RTX 3060 GPU Fan Replacement: 2 단계, 이미지 2/3 Gigabyte RTX 3060 GPU Fan Replacement: 2 단계, 이미지 3/3
    • Lift the backplate off after the screws are removed.

    • You will notice both sides of the card have a cable holding the cover and the main GPU board.

    • Carefully remove the connector at the top of the GPU (the side with GEFORCE RTX like on the picture) connecting the GPU board and the fan cover.

  3. Gigabyte RTX 3060 GPU Fan Replacement: 3 단계, 이미지 1/2 Gigabyte RTX 3060 GPU Fan Replacement: 3 단계, 이미지 2/2
    • Flip over the GPU cover.

    • Remove the four screws using a Phillips #00 screwdriver.

  4. Gigabyte RTX 3060 GPU Fan Replacement: 4 단계, 이미지 1/2 Gigabyte RTX 3060 GPU Fan Replacement: 4 단계, 이미지 2/2
    • Set the thermal system to the side.

    • Flip over the GPU cover with the fans and find the fan that needs to be replaced.

    • There are three screws underneath the fan blades. Look at the second picture as a reference for one of the screws. Remove all three using a Phillips #00 screwdriver.

  5. Gigabyte RTX 3060 GPU Fan Replacement: 5 단계, 이미지 1/2 Gigabyte RTX 3060 GPU Fan Replacement: 5 단계, 이미지 2/2
    • Remove the connector associated with the fan.

    • Pull the fan out with its connector cable intact.

  6. Gigabyte RTX 3060 GPU Fan Replacement: 6 단계, 이미지 1/1
    • Grab your replacement fan for the Gigabyte RTX 3060.

    • The repair can be completed with the replacement fan by reversing the steps previously shown.

결론

To reassemble your device, follow these instructions in reverse order.

sanskar1016

회원 가입일: 10/25/23

133 평판

안내서 1개 작성함

CSU Los Angeles, Team 4-22, Kershman Fall 2023 CSU Los Angeles, Team 4-22, Kershman Fall 2023 회원

CSULA-KERSHMAN-F23S4G22

1 회원

안내서 1개 작성하였습니다

댓글 0개

댓글 쓰기

조회 통계:

24 시간 전: 10

7일 전: 41

30일 전: 195

전체 시간: 914