주요 콘텐츠로 건너뛰기

GoPro Hero 3 Silver Camera Lens Replacement

필요한 것

  1. GoPro Hero 3 Silver Camera Lens Replacement, Battery: 1 단계, 이미지 1/2 GoPro Hero 3 Silver Camera Lens Replacement, Battery: 1 단계, 이미지 2/2
    • Pull back on the tab on the back of GoPro to open the battery cover.

  2. GoPro Hero 3 Silver Camera Lens Replacement: 2 단계, 이미지 1/1
    • Pull the battery out using the tab.

  3. GoPro Hero 3 Silver Camera Lens Replacement, Camera Lens: 3 단계, 이미지 1/2 GoPro Hero 3 Silver Camera Lens Replacement, Camera Lens: 3 단계, 이미지 2/2
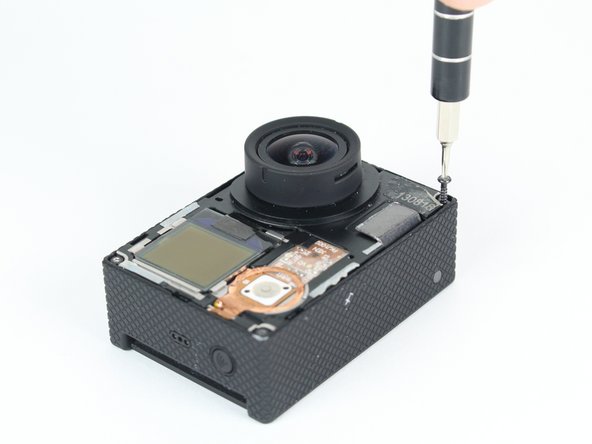
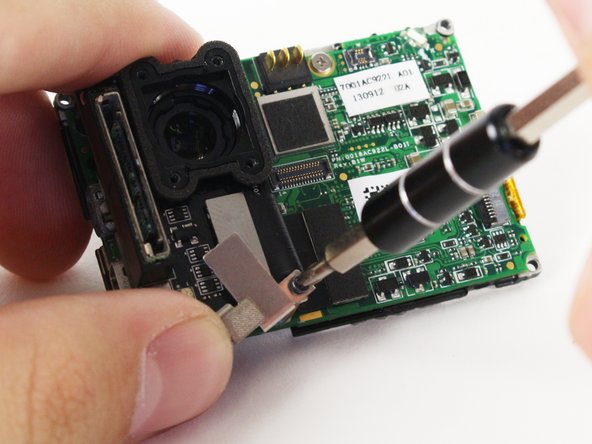
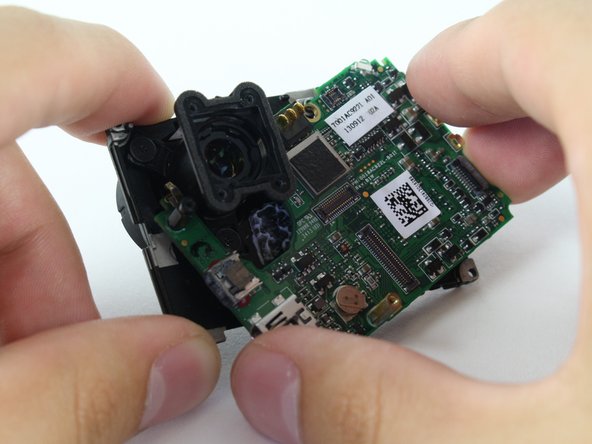
    • Use the plastic opening tool to remove the faceplate.

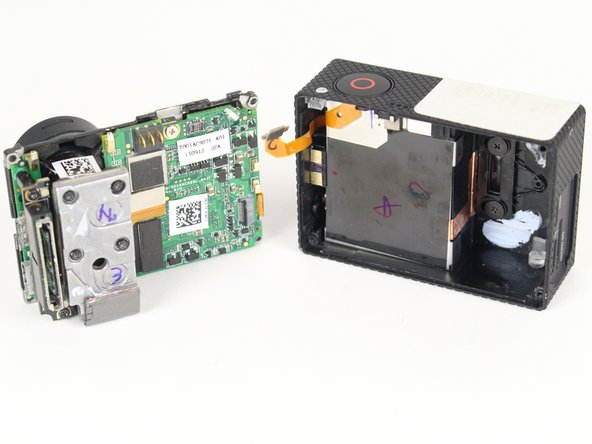
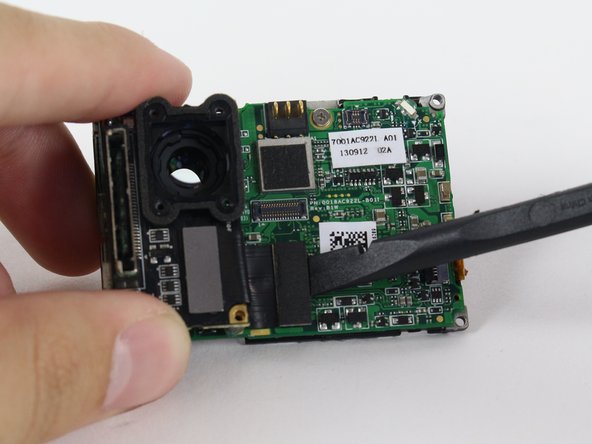
    • There is some adhesive and clips so be careful and the faceplate should pop right off.

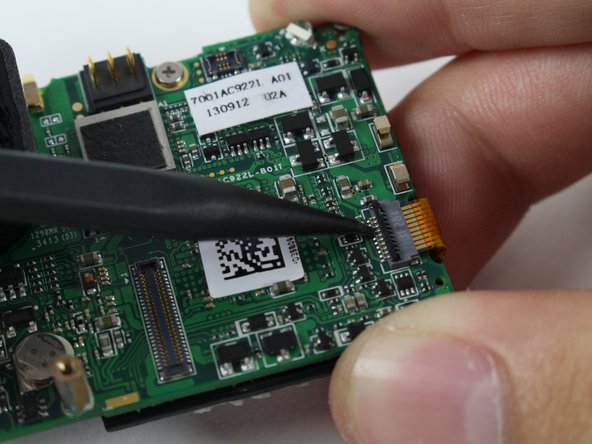
    Be careful. The LED screen came off with my faceplate, breaking its connection. It's not going to work any more :-(

    Nick Savill - 답글

    Same thing happened to me. Had to throw the camera out. 13.00 lost no bigee

    pz - 답글

  4. GoPro Hero 3 Silver Camera Lens Replacement: 4 단계, 이미지 1/2 GoPro Hero 3 Silver Camera Lens Replacement: 4 단계, 이미지 2/2
    • Now that the faceplate is off, it is time to remove the 4 screws on each corner.

    • Use the T4 tool bit from the iFixit toolkit in order to remove the 4 screws on each corner.

  5. GoPro Hero 3 Silver Camera Lens Replacement: 5 단계, 이미지 1/2 GoPro Hero 3 Silver Camera Lens Replacement: 5 단계, 이미지 2/2
    • Note: Make sure you remove the door cover of the USB, mini HDMI, and SD port before. Separating the motherboard will be easier.

    • Using the plastic opening tool, slowly pry open the motherboard assembly.

  6. GoPro Hero 3 Silver Camera Lens Replacement: 6 단계, 이미지 1/2 GoPro Hero 3 Silver Camera Lens Replacement: 6 단계, 이미지 2/2
    • Use the spudger to gently pry off the connector of the housing to the motherboard.

    • You should now have the motherboard assembly and the housing separated.

  7. GoPro Hero 3 Silver Camera Lens Replacement: 7 단계, 이미지 1/3 GoPro Hero 3 Silver Camera Lens Replacement: 7 단계, 이미지 2/3 GoPro Hero 3 Silver Camera Lens Replacement: 7 단계, 이미지 3/3
    • Use the spudger to remove the heat shield tape and detach the image sensor from the motherboard.

    • Using the T4 Torx toolbit, remove the 4 screws that connect the sensor to the lens.

    • Remove the silver connector of the image sensor from the motherboard using the spudger to pry it off.

  8. GoPro Hero 3 Silver Camera Lens Replacement: 8 단계, 이미지 1/3 GoPro Hero 3 Silver Camera Lens Replacement: 8 단계, 이미지 2/3 GoPro Hero 3 Silver Camera Lens Replacement: 8 단계, 이미지 3/3
    • The media adapter is attached to the motherboard via 3 screws:

    • x1 T4 Torx

    • x2 Phillips #00

    • There is a little silver bracket (in the yellow circle) that is held down by the Phillips #00 screw so be careful not to lose it.

    • With a little prying, use the spudger to detach the media adapter's connector from the motherboard.

  9. GoPro Hero 3 Silver Camera Lens Replacement: 9 단계, 이미지 1/3 GoPro Hero 3 Silver Camera Lens Replacement: 9 단계, 이미지 2/3 GoPro Hero 3 Silver Camera Lens Replacement: 9 단계, 이미지 3/3
    • Use the spudger to lift the black tab up to unlock.

    • Then remove LCD screen connector by sliding out.

  10. GoPro Hero 3 Silver Camera Lens Replacement: 10 단계, 이미지 1/3 GoPro Hero 3 Silver Camera Lens Replacement: 10 단계, 이미지 2/3 GoPro Hero 3 Silver Camera Lens Replacement: 10 단계, 이미지 3/3
    • Using the Phillips head bit, remove the silver screw near the top edge of the board.

    • Separate the LCD assembly by pulling it away from the motherboard.

  11. GoPro Hero 3 Silver Camera Lens Replacement: 11 단계, 이미지 1/2 GoPro Hero 3 Silver Camera Lens Replacement: 11 단계, 이미지 2/2
    • There are 3 Phillips #00 screws holding the lens onto the LCD housing that need to be removed.

    • Our screw on the top right is stripped, which is why it looks different. However, they will all look the same in your device.

  12. GoPro Hero 3 Silver Camera Lens Replacement: 12 단계, 이미지 1/2 GoPro Hero 3 Silver Camera Lens Replacement: 12 단계, 이미지 2/2
    • Carefully remove the camera lens from the LCD Housing.

    • You now have your GoPro's lens removed!

결론

To reassemble your device, follow these instructions in reverse order.

다른 7명이 해당 안내서를 완성하였습니다.

Brian Alvarez

회원 가입일: 04/02/15

1,439 평판

안내서 6개 작성하였습니다

Cal Poly, Team 24-7, Lancaster Spring 2015 Cal Poly, Team 24-7, Lancaster Spring 2015 회원

CPSU-LANCASTER-S15S24G7

3 회원들

안내서 21개 작성하였습니다

댓글 5개

Great job guys! Was successfully able to install the lens and put the camera back together to working order. Thanks for saving me $250

Tyler Bandauski - 답글

Thanks for not telling me to push on the display. When I pried off the front cover I broke the disply ribbon as the display was stuck to the front cover.

Please people for future check that the display is not stuck to the cover. The ribbon is so thin you dont even feel it tear.

Now i no display on me hero ...3. in tears...

merittravis - 답글

How were you able to find replacement lenses in original quality?

Soren Kuula - 답글

댓글 쓰기

조회 통계:

24 시간 전: 0

7일 전: 6

30일 전: 35

전체 시간: 13,947