주요 콘텐츠로 건너뛰기

이 안내서에는 최근 변경 사항이 더 있습니다. 최신 비검증 버전으로 전환하십시오.

GoPro Hero 3 Silver Image Sensor Replacement

필요한 것

  1. GoPro Hero 3 Silver Image Sensor Replacement, Battery: 1 단계, 이미지 1/2 GoPro Hero 3 Silver Image Sensor Replacement, Battery: 1 단계, 이미지 2/2
    • Pull back on the tab on the back of GoPro to open the battery cover.

  2. GoPro Hero 3 Silver Image Sensor Replacement: 2 단계, 이미지 1/1
    • Pull the battery out using the tab.

  3. GoPro Hero 3 Silver Image Sensor Replacement, Image Sensor: 3 단계, 이미지 1/2 GoPro Hero 3 Silver Image Sensor Replacement, Image Sensor: 3 단계, 이미지 2/2
    • Use the plastic opening tool to remove the faceplate.

    • There is some adhesive and clips so be careful and the faceplate should pop right off.

  4. GoPro Hero 3 Silver Image Sensor Replacement: 4 단계, 이미지 1/2 GoPro Hero 3 Silver Image Sensor Replacement: 4 단계, 이미지 2/2
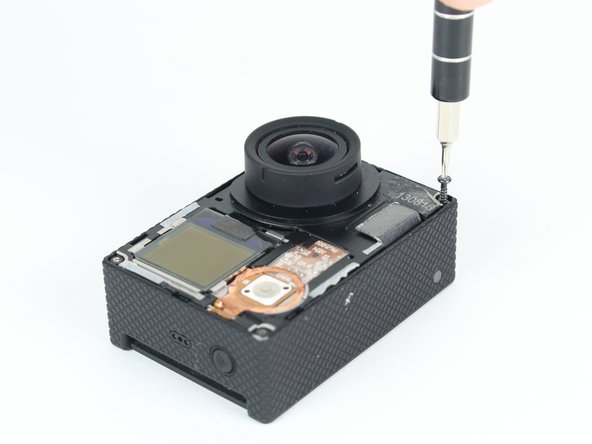
    • Now that the faceplate is off, it is time to remove the 4 screws on each corner.

    • Use the T4 tool bit from the iFixit toolkit in order to remove the 4 screws on each corner.

  5. GoPro Hero 3 Silver Image Sensor Replacement: 5 단계, 이미지 1/2 GoPro Hero 3 Silver Image Sensor Replacement: 5 단계, 이미지 2/2
    • Note: Make sure you remove the door cover of the USB, mini HDMI, and SD port before. Separating the motherboard will be easier.

    • Using the plastic opening tool, slowly pry open the motherboard assembly.

  6. GoPro Hero 3 Silver Image Sensor Replacement: 6 단계, 이미지 1/2 GoPro Hero 3 Silver Image Sensor Replacement: 6 단계, 이미지 2/2
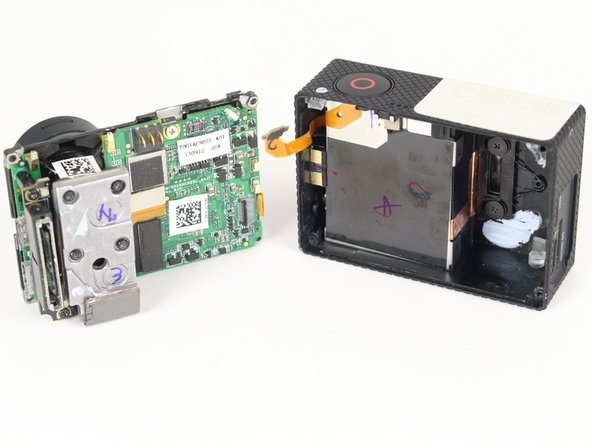
    • Use the spudger to gently pry off the connector of the housing to the motherboard.

    • You should now have the motherboard assembly and the housing separated.

  7. GoPro Hero 3 Silver Image Sensor Replacement: 7 단계, 이미지 1/2 GoPro Hero 3 Silver Image Sensor Replacement: 7 단계, 이미지 2/2
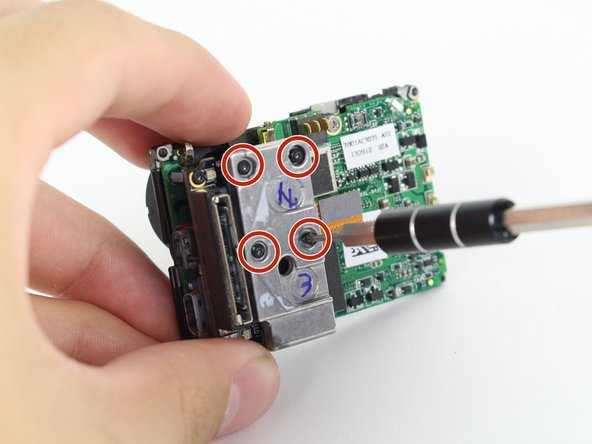
    • Use the spudger to remove the heat shield tape and detach the image sensor from the motherboard.

    • Using the T4 Torx toolbit, remove the 4 screws that connect the sensor to the lens.

  8. GoPro Hero 3 Silver Image Sensor Replacement: 8 단계, 이미지 1/2 GoPro Hero 3 Silver Image Sensor Replacement: 8 단계, 이미지 2/2
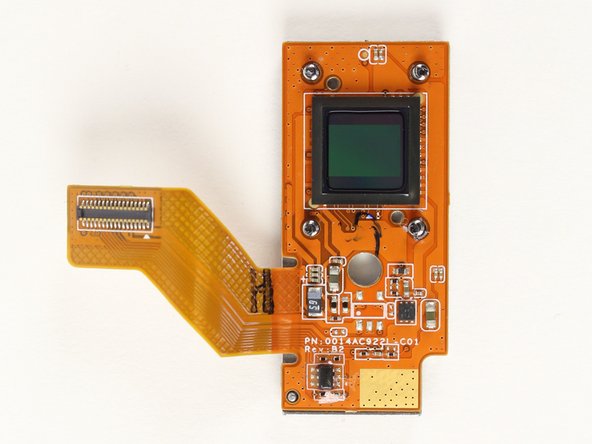
    • Remove the silver connector of the image sensor from the motherboard using the spudger to pry it off.

    • You should now be able to remove the image sensor by simply pulling it.

결론

To reassemble your device, follow these instructions in reverse order.

다른 2명이 해당 안내서를 완성하였습니다.

Jose Villa

회원 가입일: 04/01/15

297 평판

안내서 1개 작성함

Cal Poly, Team 24-7, Lancaster Spring 2015 Cal Poly, Team 24-7, Lancaster Spring 2015 회원

CPSU-LANCASTER-S15S24G7

3 회원들

안내서 21개 작성하였습니다

댓글 2개

After the sensor has been replaced, does the camera need any catibration?

enrilazaro - 답글

Your pictures are really dark.

Nick Ruiz - 답글

댓글 쓰기

조회 통계:

24 시간 전: 0

7일 전: 1

30일 전: 5

전체 시간: 1,854