주요 콘텐츠로 건너뛰기

이 안내서에는 최근 변경 사항이 더 있습니다. 최신 비검증 버전으로 전환하십시오.

GoPro Hero4 Black LCD Screen Replacement

필요한 것

  1. GoPro Hero4 Black LCD Screen Replacement, Midframe Housing: 1 단계, 이미지 1/3 GoPro Hero4 Black LCD Screen Replacement, Midframe Housing: 1 단계, 이미지 2/3 GoPro Hero4 Black LCD Screen Replacement, Midframe Housing: 1 단계, 이미지 3/3
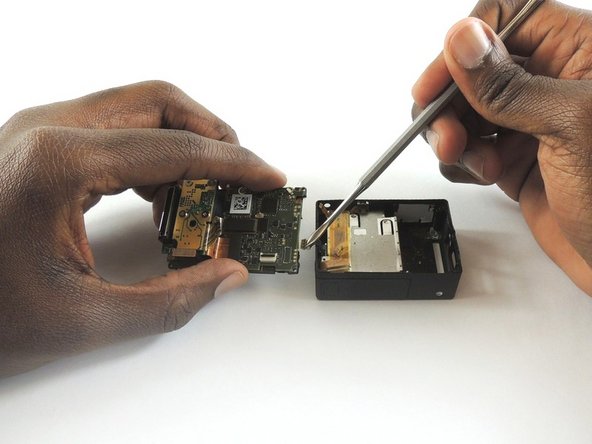
    • Remove the faceplate by carefully prying around the edge using a plastic opening tool. Loosen the clips on the edge, then pull the faceplate off.

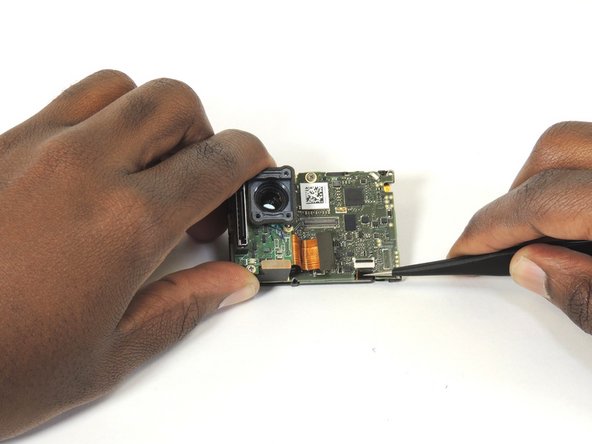
    • Use the tweezers to lift the faceplate from the rest of the device.

    • The power button on the front of the GoPro may pop off. Ensure to align it properly during reassembly.

  2. GoPro Hero4 Black LCD Screen Replacement: 2 단계, 이미지 1/2 GoPro Hero4 Black LCD Screen Replacement: 2 단계, 이미지 2/2
    • Using a #00 Phillips head screwdriver, remove the following screws:

    • One 4.6 mm screw

    • Three 8.2 mm screws

    • Two 6.1 mm screws

  3. GoPro Hero4 Black LCD Screen Replacement: 3 단계, 이미지 1/2 GoPro Hero4 Black LCD Screen Replacement: 3 단계, 이미지 2/2
    • Insert a metal spudger between the back plastic housing and the camera board assembly. Working around the edge to be careful of the inner components, carefully remove the camera.

  4. GoPro Hero4 Black LCD Screen Replacement: 4 단계, 이미지 1/3 GoPro Hero4 Black LCD Screen Replacement: 4 단계, 이미지 2/3 GoPro Hero4 Black LCD Screen Replacement: 4 단계, 이미지 3/3
    • Using tweezers, remove the ribbon strip by pulling on it. This will remove the connection.

    • Push down on the three wires with the metal spudger and the clip will disconnect from the motherboard.

    • The clip must be pulled up and away from the motherboard. Attempting to slide it out will damage the clip.

    • During reassembly, remove the black tape on the ribbon cable, turn the camera upside down so you can see the port, and reinsert the cable with tweezers. It's a lot easier!

  5. GoPro Hero4 Black LCD Screen Replacement, LCD Screen: 5 단계, 이미지 1/2 GoPro Hero4 Black LCD Screen Replacement, LCD Screen: 5 단계, 이미지 2/2
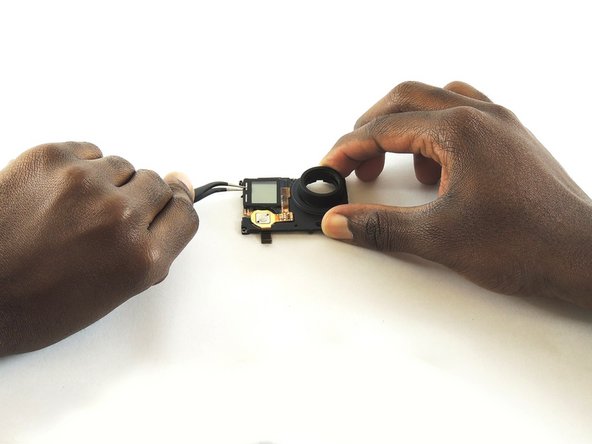
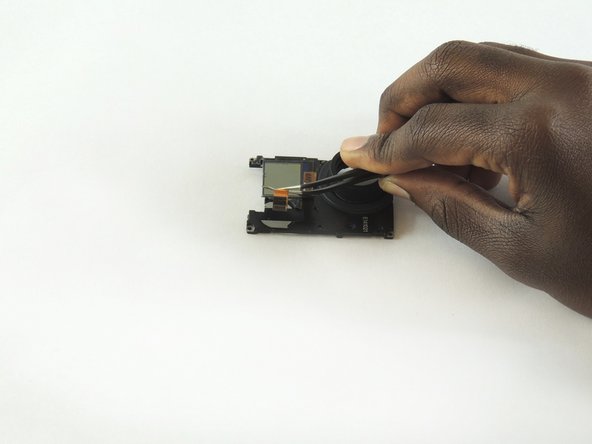
    • Open the clip that is located on the motherboard

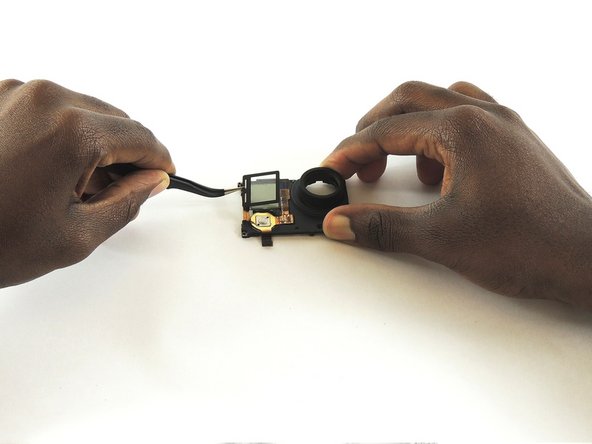
    • Use a pair of tweezers to pull the ribbon from the clip

  6. GoPro Hero4 Black LCD Screen Replacement: 6 단계, 이미지 1/3 GoPro Hero4 Black LCD Screen Replacement: 6 단계, 이미지 2/3 GoPro Hero4 Black LCD Screen Replacement: 6 단계, 이미지 3/3
    • Before you start this step flip the section holding the LCD screen over

    • Place the iOpener on the LCD screen cover to release the glue

    • Lift the covering of the LCD screen cover off with a pair of tweezers

  7. GoPro Hero4 Black LCD Screen Replacement: 7 단계, 이미지 1/2 GoPro Hero4 Black LCD Screen Replacement: 7 단계, 이미지 2/2
    • Use a pair of tweezers to lift the ribbon through the opening and lift all the way up to the LCD screen

    • A section of our LCD screen ribbon was broken so it is not visible from the image.

  8. GoPro Hero4 Black LCD Screen Replacement: 8 단계, 이미지 1/2 GoPro Hero4 Black LCD Screen Replacement: 8 단계, 이미지 2/2
    • Place the iOpener on the LCD screen to remove the glue

    • Use a pair of tweezers to left the LCD screen off the device

결론

To reassemble your device, follow these instructions in reverse order.

다른 5명이 해당 안내서를 완성하였습니다.

Jeffrey Goethe

회원 가입일: 02/20/17

665 평판

안내서 3개 작성하였습니다

USF Tampa, Team S2-G1, Sullivan Spring 2017 USF Tampa, Team S2-G1, Sullivan Spring 2017 회원

USFT-SULLIVAN-S17S2G1

4 회원들

안내서 12개 작성하였습니다

댓글 2개

Bonjour , est ce que je peux installer un écran LCD sur une hero 4 silver ( sans écran LCD d'origine ) . Je dispose d'une hero 4 black LCD HS . Merci de vos réponses. Sébastien

Coolsaet - 답글

You got the screw locations on the front wrong. Bottom left is the shortest screw, where the battery compartment is. If you try putting one of the longer screws through their it'll bust into the battery compartment. Ask me how I know. And that's the one reason why I came to this, the one thing I couldn't remember.

fat_toni987 - 답글

댓글 쓰기

조회 통계:

24 시간 전: 1

7일 전: 5

30일 전: 45

전체 시간: 7,255