이 버전에는 잘못된 편집 사항이 있을 수 있습니다. 최신 확인된 스냅샷으로 전환하십시오.
필요한 것
-
이 단계는 번역되지 않았습니다. 번역을 도와주십시오
-
Apply a suction cup as close to the SIM slot edge of the phone as you can while avoiding the curved edge.
-
-
이 단계는 번역되지 않았습니다. 번역을 도와주십시오
-
Pull up on the suction cup with firm, constant pressure and insert an opening pick between the front panel and rear case.
-
-
이 단계는 번역되지 않았습니다. 번역을 도와주십시오
-
Do not insert the pick more than 0.25 inches (6 mm) into the bottom edge of the phone. If the pick contacts the folded portion of the OLED panel, it can damage the display.
-
Do not cut along the left edge; there are delicate display cables that can be damaged.
-
Only make very shallow cuts in the upper left corner; prying deeply can damage the front-facing camera.
-
-
이 단계는 번역되지 않았습니다. 번역을 도와주십시오
-
Slide the opening pick down the right side of the phone to separate the display adhesive.
-
-
이 단계는 번역되지 않았습니다. 번역을 도와주십시오
-
Slide the opening pick around the lower-right corner and along the bottom edge of the phone.
-
-
이 단계는 번역되지 않았습니다. 번역을 도와주십시오
-
Reinsert the flat edge of the pick at the top-right corner of the phone, and slide it around the corner and the top edge of the phone.
-
-
-
이 단계는 번역되지 않았습니다. 번역을 도와주십시오
-
Gently lift the display from the right side of the phone, opening it like a book.
-
Carefully lay the display flat on the table next to the rest of the phone, keeping it close to the phone to avoid straining the display and digitizer cables.
-
-
이 단계는 번역되지 않았습니다. 번역을 도와주십시오
-
Use the corner of an opening tool to pry up and unclip on the lower edge of the digitizer cable connector cover.
-
Remove the connector cover.
-
-
이 단계는 번역되지 않았습니다. 번역을 도와주십시오
-
Use the point of a spudger to lift the digitizer cable connector up and out of its socket on the motherboard.
-
-
이 단계는 번역되지 않았습니다. 번역을 도와주십시오
-
Insert the point of a spudger into the small hole on the edge of the display connector cover.
-
Use the spudger to pry the cover out of its recess.
-
Remove the connector cover.
-
-
이 단계는 번역되지 않았습니다. 번역을 도와주십시오
-
Use the flat edge of a spudger to lift the display cable connector up from its socket.
-
Remove the display.
-
-
이 단계는 번역되지 않았습니다. 번역을 도와주십시오
-
Your replacement display may not come with pre-installed speaker grilles or a front-facing camera gasket. If that is the case, use tweezers to carefully remove these parts from your old display and follow the rest of the guide to install them on a new display.
-
Clean any adhesive residue off of the parts before reinstalling them.
-
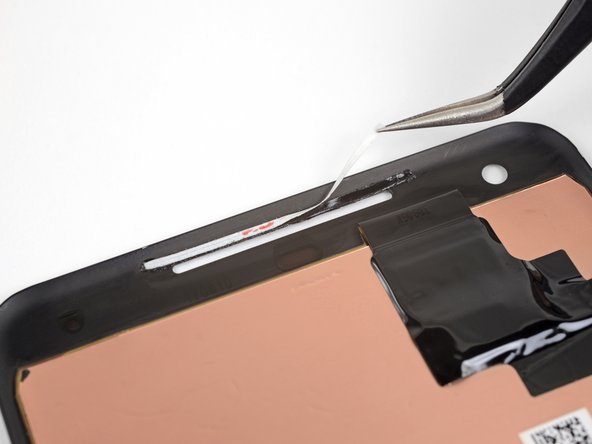
Cut a strip of 1 mm wide double-sided tape to be about 3 cm (1.25 inches) long.
-
Lay the adhesive strip along the upper edge of the earpiece speaker slot in your new display so that it's centered over the slot and touching the upper edge.
-
Gently press the adhesive strip into place on the display with your finger or a spudger.
-
Peel the white backing away from the adhesive strip.
-
-
이 단계는 번역되지 않았습니다. 번역을 도와주십시오
-
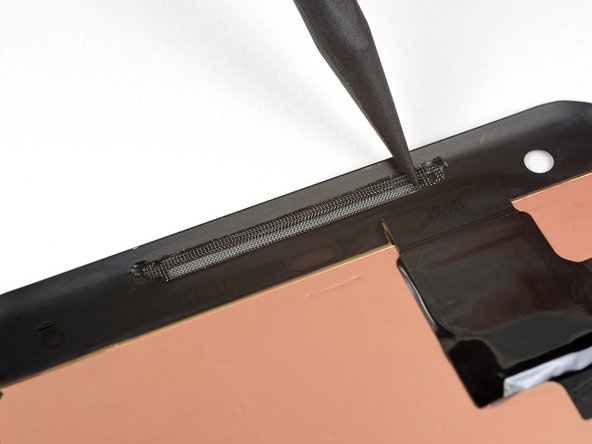
Lightly set the speaker grille into its slot so that the indented half of the grille sits inside the slot, and the flat, unindented half of the grille is above the slot on top of the adhesive. Do not push it onto the adhesive yet.
-
Use the point of a spudger to gently push the edges of the grille against the edges of the slot, centering the grille in the slot.
-
-
이 단계는 번역되지 않았습니다. 번역을 도와주십시오
-
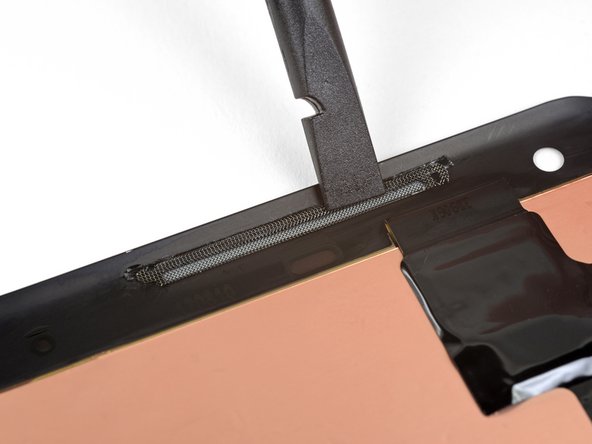
Use the flat end of a spudger to push the top of the grille down against the adhesive strip.
-
Repeat the last three steps to install the lower speaker grille.
-
When installing the lower speaker grille, apply the adhesive strip to the lower edge of the speaker slot, and position the grille with the flat half below the slot.
-
-
이 단계는 번역되지 않았습니다. 번역을 도와주십시오
-
Cut one strip of 1 mm wide adhesive to be 6 mm (1/4") long.
-
Place the adhesive underneath the front-facing camera hole, parallel to the top edge of the display.
-
Cut two 3 mm (1/8") strips of 1 mm wide adhesive.
-
Place the adhesive strips to the left and right of the camera hole, perpendicular to the bottom adhesive strip.
-
Gently press the adhesive strips into place on the display with your finger or a spudger.
-
-
이 단계는 번역되지 않았습니다. 번역을 도와주십시오
-
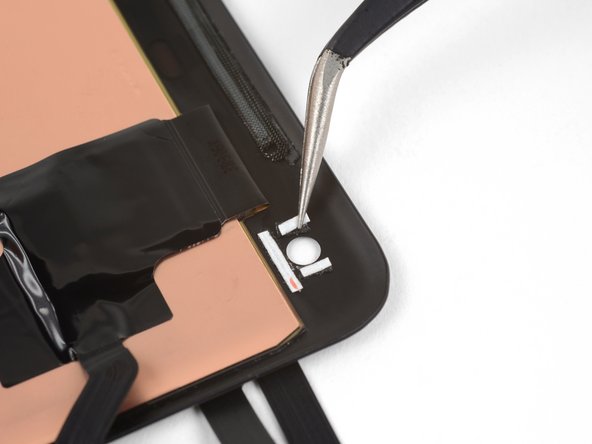
Carefully place the front-facing camera gasket down on top of the adhesive.
-
Make sure that the gasket is centered around the camera hole. If it overlaps the hole at all, it will disrupt the function of the camera.
-
Press the gasket down against the adhesive with your finger or a spudger.
-


다른 83명이 해당 안내서를 완성하였습니다.

댓글 37개
Be very careful on the bottom connection, if done incorrectly, 2 small components controlling bottom speaker are easily damaged, this will result in a motherboard replacement or replacing someones phone. Take it from me and a few others on the site…go at this slow and careful. Besides that risk, the phone is pretty simple to repair.
Hi Tom, what component are you talking about? I'm about to dive into this and it might be wise for me to doublecheck this prior to repairing it!
Showing where to place the new tape would be helpful.