이 버전에는 잘못된 편집 사항이 있을 수 있습니다. 최신 확인된 스냅샷으로 전환하십시오.
필요한 것
-
이 단계는 번역되지 않았습니다. 번역을 도와주십시오
-
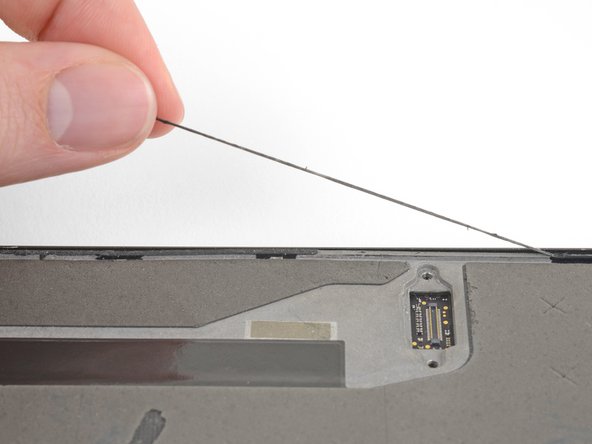
Peel away and remove all the old display adhesive from the body of your phone.
-
Use the point of your spudger to scour away and remove any lingering adhesive.
-
For best results, clean the area underneath the removed adhesive with 90% or greater isopropyl alcohol to prep the surface for the new adhesive.
-
-
이 단계는 번역되지 않았습니다. 번역을 도와주십시오
-
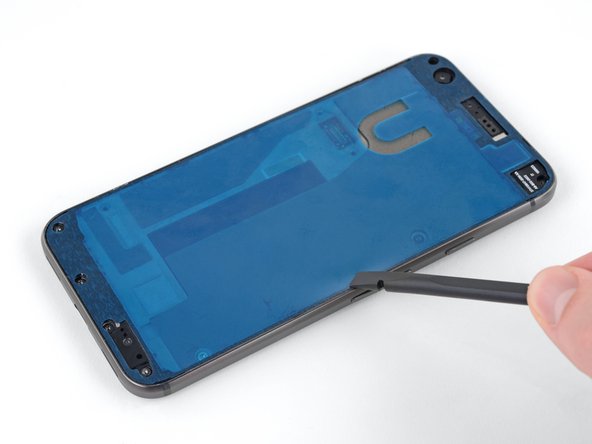
The replacement adhesive should only be applied to the edges of the frame, but may come with the center filled in.
-
To remove the unnecessary center section of the adhesive strip, carefully peel away the center portion of both the white (paper) and black (adhesive) layers, starting with the U-shaped cutout.
-
-
이 단계는 번역되지 않았습니다. 번역을 도와주십시오
-
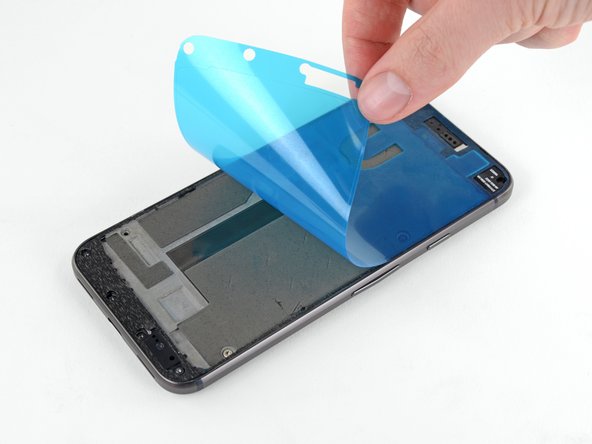
Peel off and discard the remaining paper liner, exposing the adhesive underneath.
-
-
-
이 단계는 번역되지 않았습니다. 번역을 도와주십시오
-
Hold the adhesive sheet with the exposed adhesive facing down, and carefully align it into the lower edge of the phone.
-
When it's correctly aligned, lower the rest of the adhesive sheet into the phone.
-
-
이 단계는 번역되지 않았습니다. 번역을 도와주십시오
-
Re-attach the display cable connector.
-
Screw the connector bracket back in place.
-
Power on your phone to make sure your repair was successful.
-
-
이 단계는 번역되지 않았습니다. 번역을 도와주십시오
-
Once you are sure the display is functioning properly, carefully align it with the chassis and firmly press it into place.
-


다른 48명이 해당 안내서를 완성하였습니다.

댓글 2개
What is the included tesa tape for?
The Tesa tape is to adhere the battery to the frame. You don't want anything moving around inside your phone--that can stress, damage, or disconnect ribbon connectors.