주요 콘텐츠로 건너뛰기

HKC P776A Digitizer Replacement

필요한 것

  1. HKC P776A Digitizer Replacement, Separating Digitizer and Case: 1 단계, 이미지 1/1
    • Insert the plastic opening tool between the digitizer and the case.

    • Place the spudger in the gap created by the plastic opening tool to assist in separation.

  2. HKC P776A Digitizer Replacement: 2 단계, 이미지 1/2 HKC P776A Digitizer Replacement: 2 단계, 이미지 2/2
    • Slide the spudger along the perimeter of the device to fully separate the two pieces.

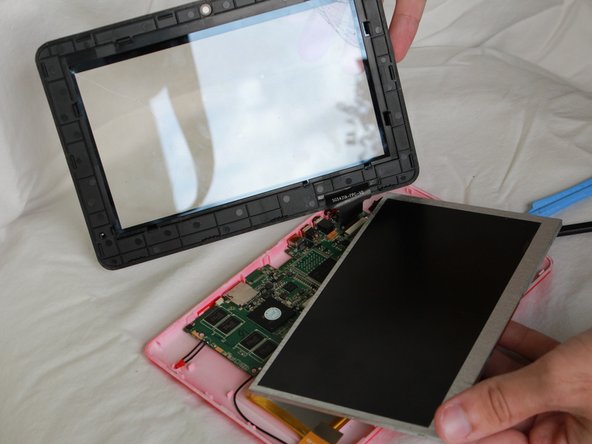
  3. HKC P776A Digitizer Replacement, Separating the Screen and the Digitizer: 3 단계, 이미지 1/2 HKC P776A Digitizer Replacement, Separating the Screen and the Digitizer: 3 단계, 이미지 2/2
    • Use your fingers to pop the screen out from the digitizer.

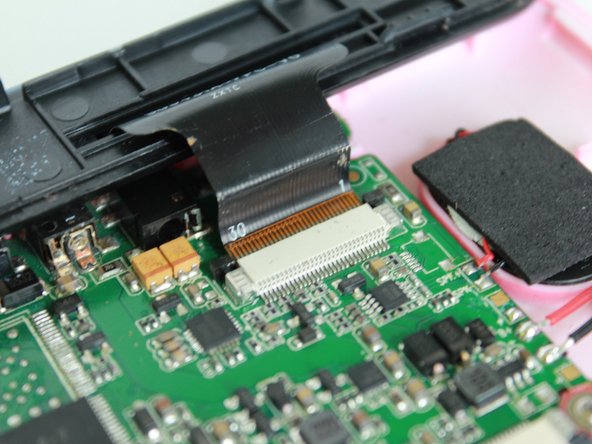
  4. HKC P776A Digitizer Replacement, Removing the Cable from the Motherboard: 4 단계, 이미지 1/2 HKC P776A Digitizer Replacement, Removing the Cable from the Motherboard: 4 단계, 이미지 2/2
    • Use the tip of the spudger to release the latches on the motherboard.

  5. HKC P776A Digitizer Replacement: 5 단계, 이미지 1/1
    • Remove the cable from the motherboard.

결론

To reassemble your device, follow these instructions in reverse order.

Spencer Pheasant

회원 가입일: 01/20/15

301 평판

안내서 3개 작성하였습니다

USF Tampa, Team 7-6, Remmell Winter 2015 USF Tampa, Team 7-6, Remmell Winter 2015 회원

USFT-REMMELL-W15S7G6

3 회원들

안내서 14개 작성하였습니다

댓글 0개

댓글 쓰기

조회 통계:

24 시간 전: 0

7일 전: 0

30일 전: 0

전체 시간: 128