주요 콘텐츠로 건너뛰기

HP 14-ac151nr DC Power Jack Replacement

필요한 것

  1. HP 14-ac151nr DC Power Jack Replacement, Backplate: 1 단계, 이미지 1/1
    • Remove battery by pushing the two buttons inward.

  2. HP 14-ac151nr DC Power Jack Replacement: 2 단계, 이미지 1/1
    • Remove the two rubber feet next to the battery.

  3. HP 14-ac151nr DC Power Jack Replacement: 3 단계, 이미지 1/1
    • Remove all 14 Phillips head #0 screws.

  4. HP 14-ac151nr DC Power Jack Replacement: 4 단계, 이미지 1/1
    • Use a plastic opener tool to pry off the black backplate.

  5. HP 14-ac151nr DC Power Jack Replacement, DC Power Jack: 5 단계, 이미지 1/2 HP 14-ac151nr DC Power Jack Replacement, DC Power Jack: 5 단계, 이미지 2/2
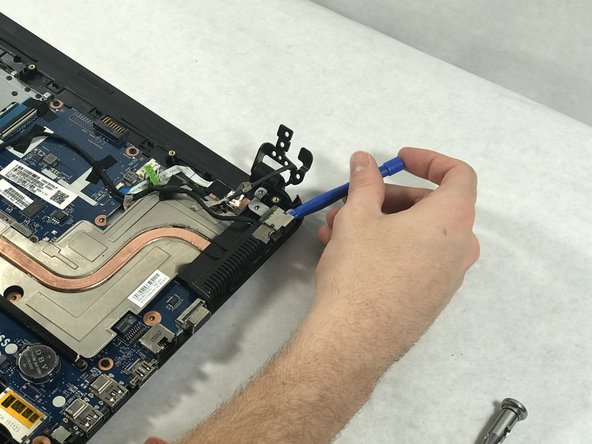
    • Remove the black tape near the power jack.

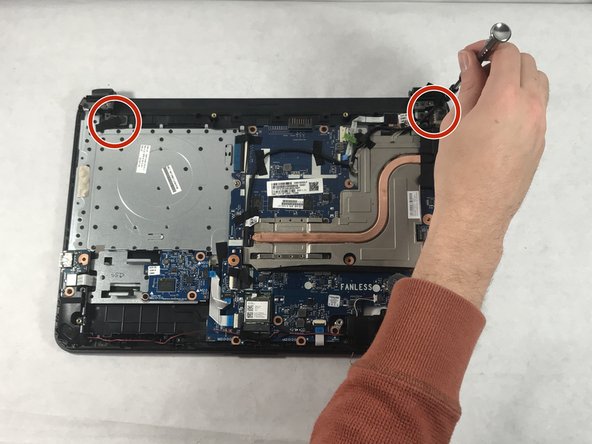
    • Remove the screws connecting monitor to the bottom of the computer.

  6. HP 14-ac151nr DC Power Jack Replacement: 6 단계, 이미지 1/1
    • Position the metal fittings attached to the monitor out of the way.

    • The monitor is still attached by wires — be careful not to pull on it too hard.

  7. HP 14-ac151nr DC Power Jack Replacement: 7 단계, 이미지 1/3 HP 14-ac151nr DC Power Jack Replacement: 7 단계, 이미지 2/3 HP 14-ac151nr DC Power Jack Replacement: 7 단계, 이미지 3/3
    • Disconnect the power jack from the motherboard.

    • Remove the power jack by lifting it up.

    • An opener tool may make this easier.

결론

To reassemble your device, follow these instructions in reverse order.

다른 한 분이 해당 안내서를 완성하였습니다.

Antonio Leonti

회원 가입일: 10/26/18

410 평판

안내서 3개 작성하였습니다

UMass Dartmouth, Team S1-G7, Simcock Fall 2018 UMass Dartmouth, Team S1-G7, Simcock Fall 2018 회원

UMASSD-SIMCOCK-F18S1G7

3 회원들

안내서 6개 작성하였습니다

댓글 0개

댓글 쓰기

조회 통계:

24 시간 전: 0

7일 전: 3

30일 전: 8

전체 시간: 426