주요 콘텐츠로 건너뛰기

HP 14-am052nr Daughterboard Replacement

필요한 것

  1. HP 14-am052nr Daughterboard Replacement, Battery: 1 단계, 이미지 1/3 HP 14-am052nr Daughterboard Replacement, Battery: 1 단계, 이미지 2/3 HP 14-am052nr Daughterboard Replacement, Battery: 1 단계, 이미지 3/3
    • Turn the laptop over to its bottom so that the backside is facing you.

    • Using your fingers, push the two locking tabs inwards to release the battery.

    • Remove the battery from the device.

  2. HP 14-am052nr Daughterboard Replacement, Back Panel: 2 단계, 이미지 1/2 HP 14-am052nr Daughterboard Replacement, Back Panel: 2 단계, 이미지 2/2
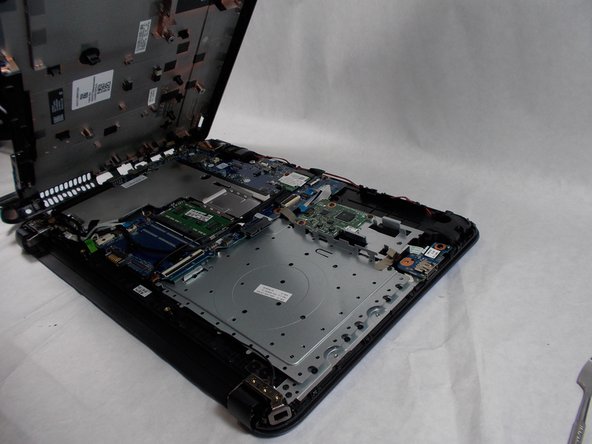
    • After removing the battery with the laptop on its back, expose screws that are hidden under the rubber feet and the center label.

    • Using the Phillips #0 screwdriver, remove fourteen (14) 6 mm screws from the back panel.

  3. HP 14-am052nr Daughterboard Replacement: 3 단계, 이미지 1/2 HP 14-am052nr Daughterboard Replacement: 3 단계, 이미지 2/2
    • Use a prying tool to remove the back panel from the base of the computer.

  4. HP 14-am052nr Daughterboard Replacement, Daughterboard: 4 단계, 이미지 1/2 HP 14-am052nr Daughterboard Replacement, Daughterboard: 4 단계, 이미지 2/2
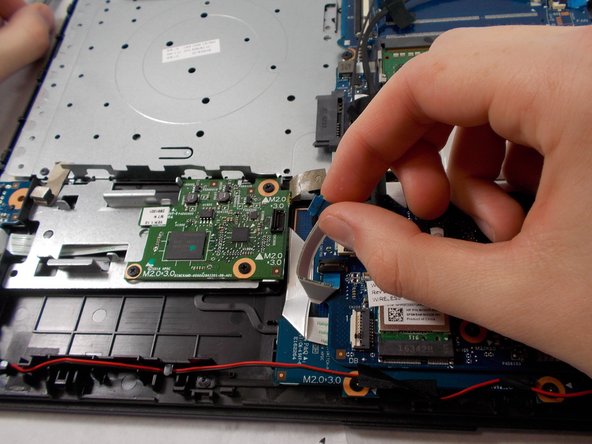
    • Disconnect the daughterboard from the connector with your thumb and pointer finger.

  5. HP 14-am052nr Daughterboard Replacement: 5 단계, 이미지 1/1
    • Use the Phillips #0 screwdriver to remove three 3 mm screws.

  6. HP 14-am052nr Daughterboard Replacement: 6 단계, 이미지 1/1
    • Remove the daughterboard from the device.

결론

To reassemble your device, follow these instructions in reverse order.

Paige Fonseca

회원 가입일: 10/25/21

217 평판

안내서 2개 작성하였습니다

UMass Dartmouth, Team 3-3, Sinclaire Fall 2021 UMass Dartmouth, Team 3-3, Sinclaire Fall 2021 회원

UMASSD-SINCLAIRE-F21S3G3

3 회원들

안내서 7개 작성하였습니다

댓글 0개

댓글 쓰기

조회 통계:

24 시간 전: 0

7일 전: 3

30일 전: 13

전체 시간: 293