주요 콘텐츠로 건너뛰기

HP 14-an012nr Daughterboard Replacement

필요한 것

  1. HP 14-an012nr Daughterboard Replacement, Battery: 1 단계, 이미지 1/3 HP 14-an012nr Daughterboard Replacement, Battery: 1 단계, 이미지 2/3 HP 14-an012nr Daughterboard Replacement, Battery: 1 단계, 이미지 3/3
    • Remove the battery by sliding both sliders inward.

  2. HP 14-an012nr Daughterboard Replacement, Back Panel: 2 단계, 이미지 1/3 HP 14-an012nr Daughterboard Replacement, Back Panel: 2 단계, 이미지 2/3 HP 14-an012nr Daughterboard Replacement, Back Panel: 2 단계, 이미지 3/3
    • Remove the eight 6 mm screws from the back panel using a Phillips #1 screwdriver.

    • Remove the rubber pads from the upper corners of the laptop to reveal two screws on each side.

    • Remove six 4 mm screws using a Phillips #1 screwdriver.

    • Pry the back panel off using an opening tool, working your way around the edges.

  3. HP 14-an012nr Daughterboard Replacement, Daughterboard: 3 단계, 이미지 1/3 HP 14-an012nr Daughterboard Replacement, Daughterboard: 3 단계, 이미지 2/3 HP 14-an012nr Daughterboard Replacement, Daughterboard: 3 단계, 이미지 3/3
    • Remove the three 4 mm screws holding the daughterboard down using a Phillips #00 screwdriver.

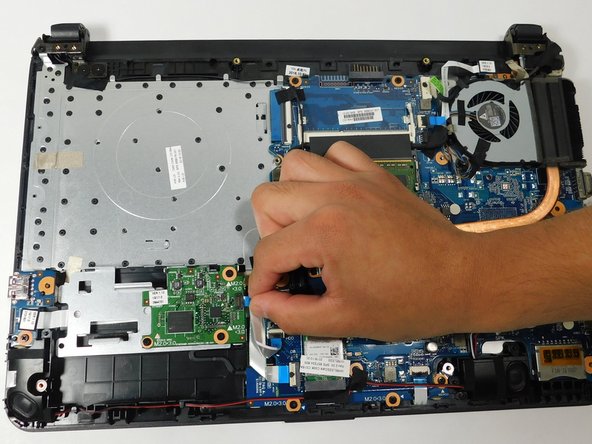
    • Remove the ribbon cable by gently pressing on the blue tab and pulling on the plastic reinforcement at the end of the cable.

    • Be careful when removing the cable as pulling with too much force can damage both the cable and connector.

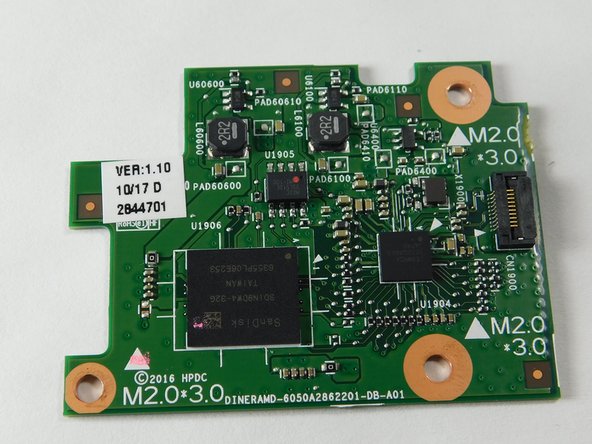
    • Remove the daughterboard.

결론

To reassemble your device, follow these instructions in reverse order.

Mihikou Ouaogninlin

회원 가입일: 10/24/23

73 평판

안내서 1개 작성함

Gateway, Team 2-2, Gonzalez Fall 2023 Gateway, Team 2-2, Gonzalez Fall 2023 회원

GCC-GONZALEZ-F23S2G2

5 회원들

안내서 5개 작성하였습니다

댓글 0개

댓글 쓰기

조회 통계:

24 시간 전: 1

7일 전: 3

30일 전: 9

전체 시간: 105