주요 콘텐츠로 건너뛰기

HP 14-fq1025nr Screen Replacement

필요한 것

  1. HP 14-fq1025nr Screen Replacement, Back Cover: 1 단계, 이미지 1/1
    • Flip the laptop upside down so the bottom cover is facing up.

  2. HP 14-fq1025nr Screen Replacement: 2 단계, 이미지 1/1
    이 단계에 사용된 도구:
    Tweezers
    $4.99
    구매
    • Use a pair of tweezers to grab and pull the feet off of the cover.

  3. HP 14-fq1025nr Screen Replacement: 3 단계, 이미지 1/1
    • Remove the two 4 mm screws using a Phillips #0 screwdriver.

    • Remove the six remaining 6 mm screws located around the edges and underneath the feet using a Phillips #0 screwdriver.

  4. HP 14-fq1025nr Screen Replacement: 4 단계, 이미지 1/1
    • Flip the laptop right-side up and slide an iFixit opening tool and/or Jimmy inside of the bottom cover seam to pry it open.

  5. HP 14-fq1025nr Screen Replacement: 5 단계, 이미지 1/1
    • Remove the bottom cover.

  6. HP 14-fq1025nr Screen Replacement, Screen: 6 단계, 이미지 1/3 HP 14-fq1025nr Screen Replacement, Screen: 6 단계, 이미지 2/3 HP 14-fq1025nr Screen Replacement, Screen: 6 단계, 이미지 3/3
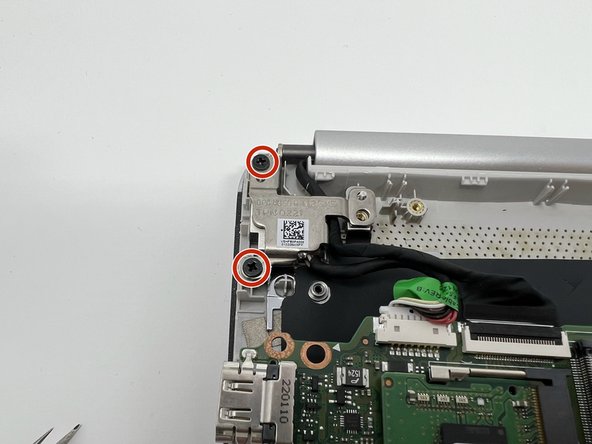
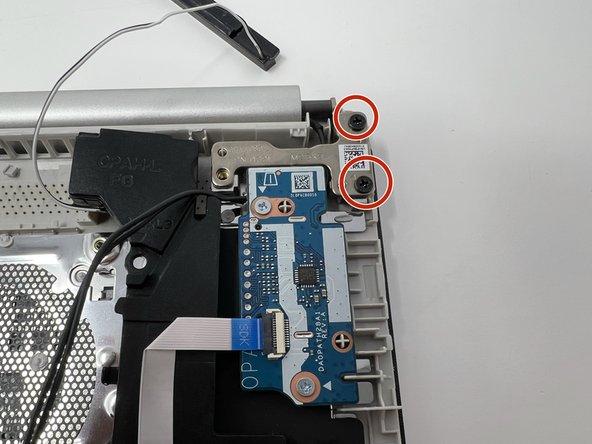
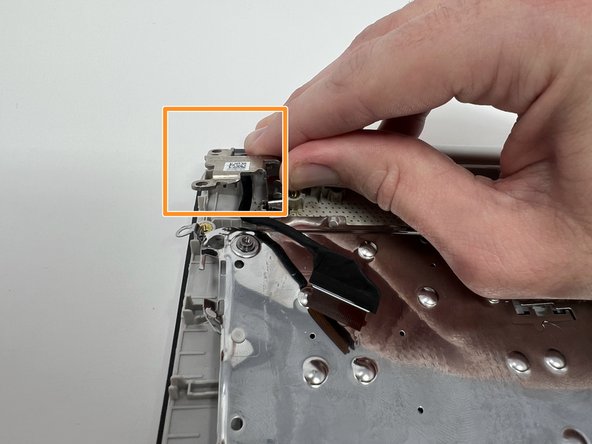
    • Remove the four black 5 mm screws holding down the two silver screen hinges using a Phillips #00 screwdriver.

  7. HP 14-fq1025nr Screen Replacement: 7 단계, 이미지 1/2 HP 14-fq1025nr Screen Replacement: 7 단계, 이미지 2/2
    • Unplug the screen from the motherboard by lifting the wire cover and removing the screen cord.

    • Separate the hinges from the computer.

  8. HP 14-fq1025nr Screen Replacement: 8 단계, 이미지 1/1
    • Remove the screen.

결론

To reassemble your device, follow these instructions in reverse order.

Yasli Kanimba Murenzi

회원 가입일: 09/27/22

193 평판

안내서 2개 작성하였습니다

Utah Tech University, Team 1-6, McMurrin Fall 2022 Utah Tech University, Team 1-6, McMurrin Fall 2022 회원

UTAHTECH-MCMURRIN-F22S1G6

3 회원들

안내서 9개 작성하였습니다

댓글 0개

댓글 쓰기

조회 통계:

24 시간 전: 2

7일 전: 4

30일 전: 20

전체 시간: 300