주요 콘텐츠로 건너뛰기

HP 15-ay014dx Hard Drive Disk Replacement

필요한 것

  1. HP 15-ay014dx Hard Drive Disk Replacement, Battery: 1 단계, 이미지 1/1
    • Disconnect device from power source and power down.

  2. HP 15-ay014dx Hard Drive Disk Replacement: 2 단계, 이미지 1/1
    • With the device turned upside down, use your index fingers to push the battery latches in towards each other.

  3. HP 15-ay014dx Hard Drive Disk Replacement: 3 단계, 이미지 1/1
    • The latch on your left will stay at the inward position, while the latch on the right will slide back out.

    • Gently grasp the battery and pull it back away from the device and yourself.

  4. HP 15-ay014dx Hard Drive Disk Replacement, Optical Drive: 4 단계, 이미지 1/1
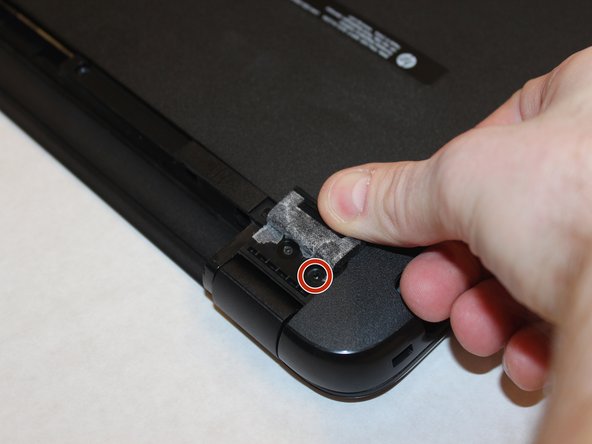
    • Close the laptop and lay it down with the bottom facing up.

    • Using a size #00 Phillips screw drive remove the screw holding in the optical drive.

  5. HP 15-ay014dx Hard Drive Disk Replacement: 5 단계, 이미지 1/1
    • Grip the optical drive and gently pull it out.

  6. HP 15-ay014dx Hard Drive Disk Replacement, Hard Drive Disk: 6 단계, 이미지 1/2 HP 15-ay014dx Hard Drive Disk Replacement, Hard Drive Disk: 6 단계, 이미지 2/2
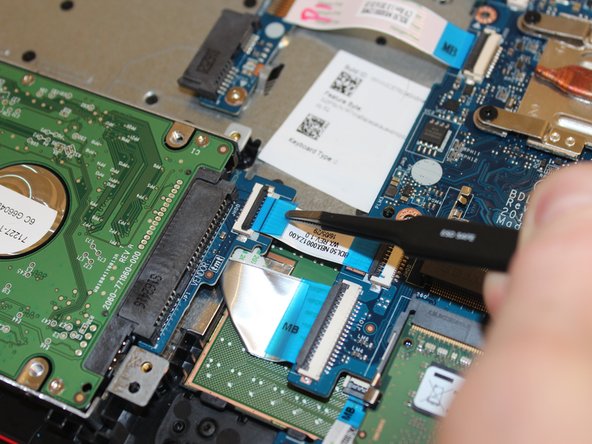
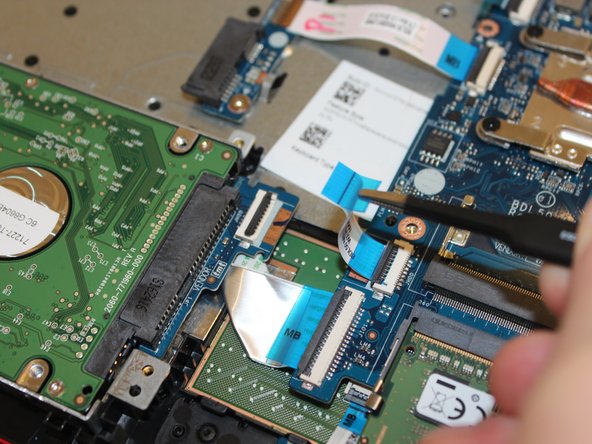
    • Remove the highlighted screws holding the body of the laptop together with a size #00 Phillips screwdriver.

  7. HP 15-ay014dx Hard Drive Disk Replacement: 7 단계, 이미지 1/3 HP 15-ay014dx Hard Drive Disk Replacement: 7 단계, 이미지 2/3 HP 15-ay014dx Hard Drive Disk Replacement: 7 단계, 이미지 3/3
    • Using the spudger, push in the tabs in the back that hold the body together. Carefully pry the body apart by working the spudger around the body.

    • Pull the back cover off.

  8. HP 15-ay014dx Hard Drive Disk Replacement: 8 단계, 이미지 1/3 HP 15-ay014dx Hard Drive Disk Replacement: 8 단계, 이미지 2/3 HP 15-ay014dx Hard Drive Disk Replacement: 8 단계, 이미지 3/3
    • Pry up on the clamp holding the SATA power ribbon using the plastic opening tool.

    • Pull out the SATA power ribbon using the tweezers.

  9. HP 15-ay014dx Hard Drive Disk Replacement: 9 단계, 이미지 1/2 HP 15-ay014dx Hard Drive Disk Replacement: 9 단계, 이미지 2/2
    • Remove the highlighted screws holding the hard drive to the body using the Philips #00 screwdriver.

    • Remove the hard drive.

  10. HP 15-ay014dx Hard Drive Disk Replacement: 10 단계, 이미지 1/1
    • Remove the 4 screws holding the hard drive to the hard drive cage using the Philips #00 screwdriver.

결론

To reassemble your device, follow these instructions in reverse order.

다른 6명이 해당 안내서를 완성하였습니다.

Jimmy Huynh

회원 가입일: 09/26/17

263 평판

안내서 1개 작성함

Washington State, Team S1-G4, Phelps-Hillen Fall 2017 Washington State, Team S1-G4, Phelps-Hillen Fall 2017 회원

WSU-PHELPS-HILLEN-F17S1G4

6 회원들

안내서 7개 작성하였습니다

댓글 0개

댓글 쓰기

조회 통계:

24 시간 전: 0

7일 전: 5

30일 전: 13

전체 시간: 1,929