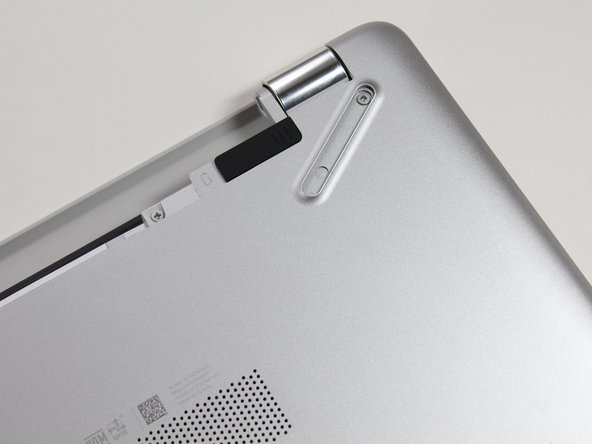
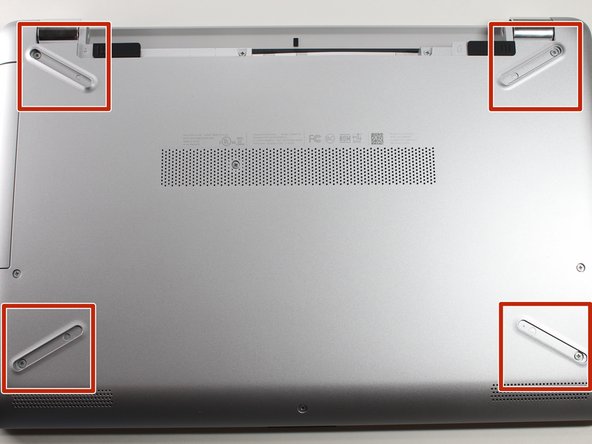
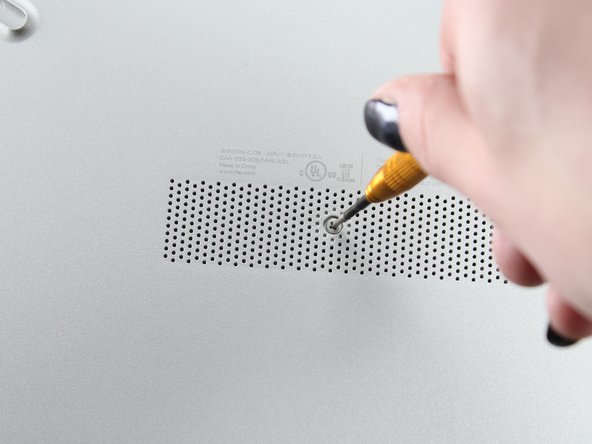
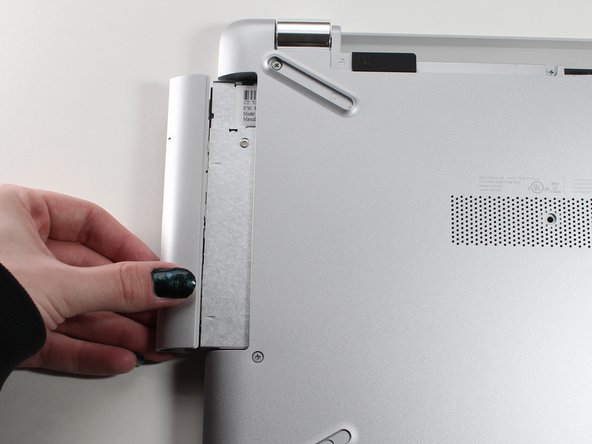
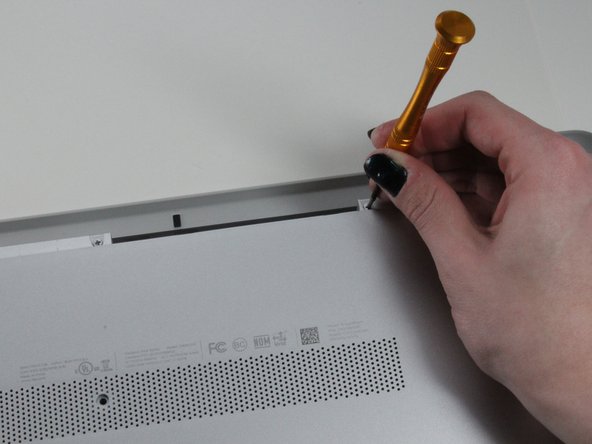
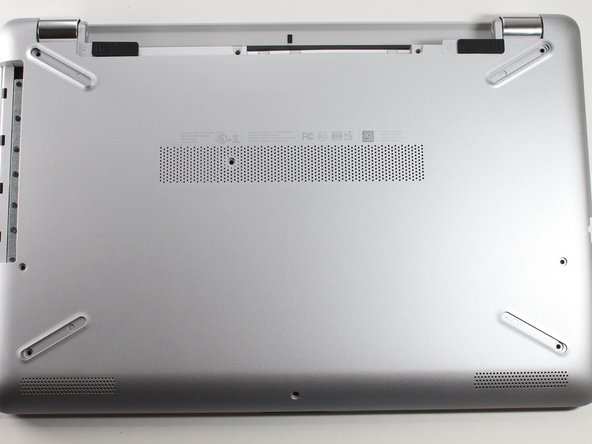
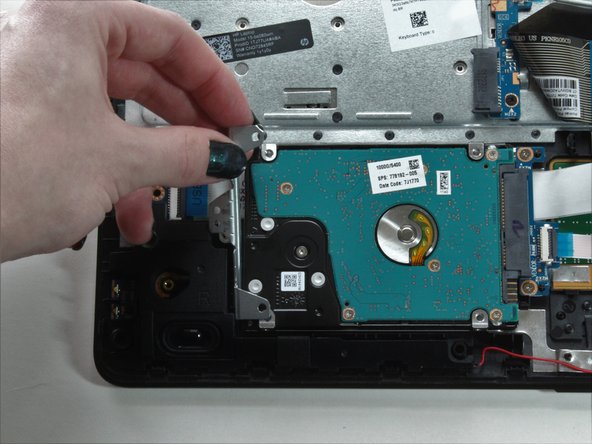
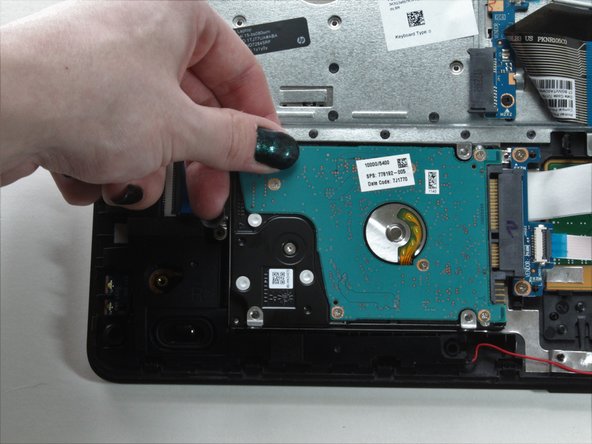
주요 콘텐츠로 건너뛰기

HP 15-bs080wm Hard Drive Replacement

필요한 것

  1. HP 15-bs080wm Hard Drive Replacement, Hard Drive: 1 단계, 이미지 1/3 HP 15-bs080wm Hard Drive Replacement, Hard Drive: 1 단계, 이미지 2/3 HP 15-bs080wm Hard Drive Replacement, Hard Drive: 1 단계, 이미지 3/3
    • Power off the laptop.

    • Do not proceed until both power lights are off.

  2. HP 15-bs080wm Hard Drive Replacement: 2 단계, 이미지 1/3 HP 15-bs080wm Hard Drive Replacement: 2 단계, 이미지 2/3 HP 15-bs080wm Hard Drive Replacement: 2 단계, 이미지 3/3
    • Slide the battery lock to the unlock position..

    • Slide the battery release inwards to remove the battery.

  3. HP 15-bs080wm Hard Drive Replacement: 3 단계, 이미지 1/3 HP 15-bs080wm Hard Drive Replacement: 3 단계, 이미지 2/3 HP 15-bs080wm Hard Drive Replacement: 3 단계, 이미지 3/3
    • Use the plastic opening tool to remove the four rubber feet.

  4. HP 15-bs080wm Hard Drive Replacement: 4 단계, 이미지 1/3 HP 15-bs080wm Hard Drive Replacement: 4 단계, 이미지 2/3 HP 15-bs080wm Hard Drive Replacement: 4 단계, 이미지 3/3
    • Remove the center screw from the back of the laptop using a Phillips #000 screwdriver.

    • Remove the optical drive.

  5. HP 15-bs080wm Hard Drive Replacement: 5 단계, 이미지 1/3 HP 15-bs080wm Hard Drive Replacement: 5 단계, 이미지 2/3 HP 15-bs080wm Hard Drive Replacement: 5 단계, 이미지 3/3
    • Remove the nine screws from the back of the laptop using a Phillips #000 screwdriver.

  6. HP 15-bs080wm Hard Drive Replacement: 6 단계, 이미지 1/3 HP 15-bs080wm Hard Drive Replacement: 6 단계, 이미지 2/3 HP 15-bs080wm Hard Drive Replacement: 6 단계, 이미지 3/3
    • Use the plastic opening tool to wedge the back plate from the body of the laptop.

    • Flip the laptop over and remove the back plate.

    • Use the opening tool around the entire perimeter of the laptop's base.

  7. HP 15-bs080wm Hard Drive Replacement: 7 단계, 이미지 1/3 HP 15-bs080wm Hard Drive Replacement: 7 단계, 이미지 2/3 HP 15-bs080wm Hard Drive Replacement: 7 단계, 이미지 3/3
    • Remove the three screws from the hard drive bracket using a Phillips #000 screwdriver.

    • Remove the bracket.

    • Slide the hard drive the left to remove it from the socket.

결론

To reassemble your device, follow these instructions in reverse order.

Landon Dickerson

회원 가입일: 02/22/22

195 평판

안내서 1개 작성함

University of North Texas, Team 1-4, Raign Spring 2022 University of North Texas, Team 1-4, Raign Spring 2022 회원

UNT-RAIGN-S22S1G4

2 회원들

안내서 1개 작성하였습니다

댓글 0개

댓글 쓰기

조회 통계:

24 시간 전: 2

7일 전: 3

30일 전: 9

전체 시간: 592