주요 콘텐츠로 건너뛰기

HP 15-ef2025nr Fan Replacement

필요한 것

  1. HP 15-ef2025nr Fan Replacement, Battery: 1 단계, 이미지 1/1
    • Turn the laptop upside down with the hinge facing you.

  2. HP 15-ef2025nr Fan Replacement: 2 단계, 이미지 1/2 HP 15-ef2025nr Fan Replacement: 2 단계, 이미지 2/2
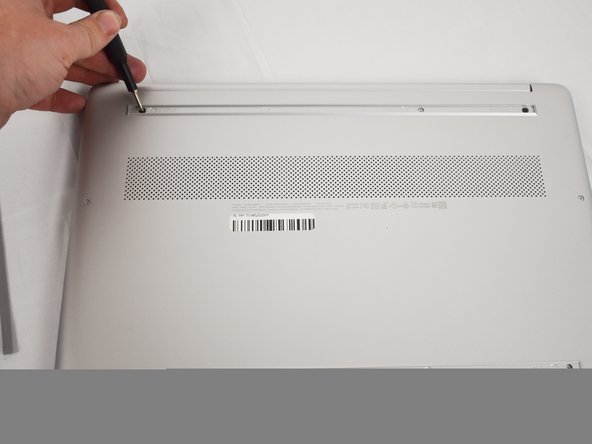
    • Use an opening tool to remove the rubber strips by prying up a corner and gently pulling off the strip.

  3. HP 15-ef2025nr Fan Replacement: 3 단계, 이미지 1/2 HP 15-ef2025nr Fan Replacement: 3 단계, 이미지 2/2
    • Use a Phillips screwdriver to remove the eight 3 mm screws (including the 2 screws that were not under the rubber strips) securing the lower case.

  4. HP 15-ef2025nr Fan Replacement: 4 단계, 이미지 1/2 HP 15-ef2025nr Fan Replacement: 4 단계, 이미지 2/2
    • Flip the laptop over and open the lid.

    • Insert an opening tool into the seam between the edge of the lower case and the chassis.

    • Gently pry around the entire perimeter until the lower case separates from the chassis.

    • Close the lid and flip the laptop back over.

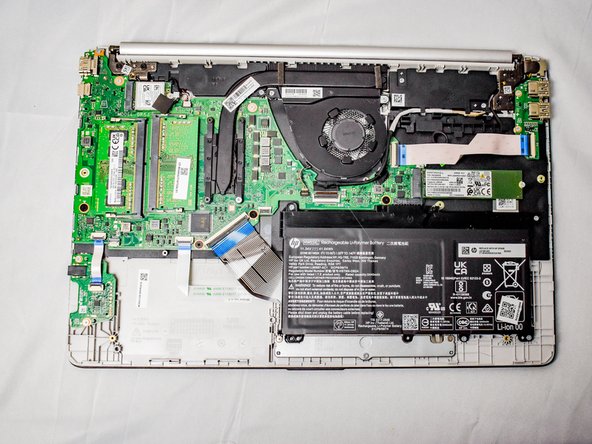
    • Remove the lower case.

  5. HP 15-ef2025nr Fan Replacement: 5 단계, 이미지 1/3 HP 15-ef2025nr Fan Replacement: 5 단계, 이미지 2/3 HP 15-ef2025nr Fan Replacement: 5 단계, 이미지 3/3
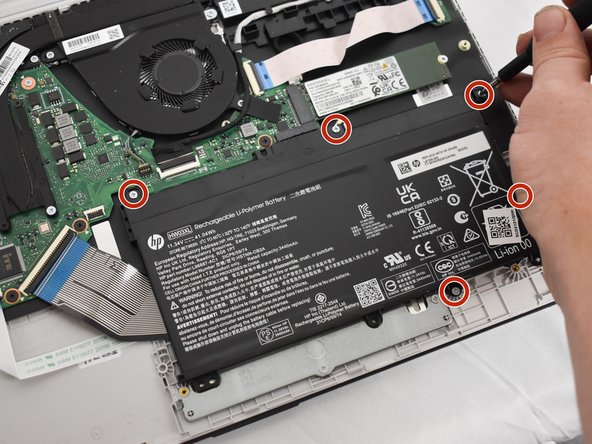
    • Remove the five 2 mm Phillips screws holding the battery down.

    • Take care not to puncture, bend, or twist the battery. Lithium batteries can be very volatile. Follow all proper hazardous disposal laws where you live.

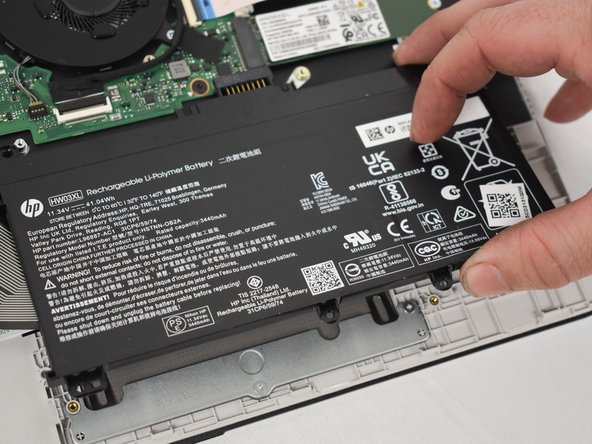
    • Gently lift the front edge of the battery up to disconnect the socket.

    • Lift the battery up and out.

  6. HP 15-ef2025nr Fan Replacement, Fan: 6 단계, 이미지 1/3 HP 15-ef2025nr Fan Replacement, Fan: 6 단계, 이미지 2/3 HP 15-ef2025nr Fan Replacement, Fan: 6 단계, 이미지 3/3
    이 단계에 사용된 도구:
    Tweezers
    $4.99
    구매
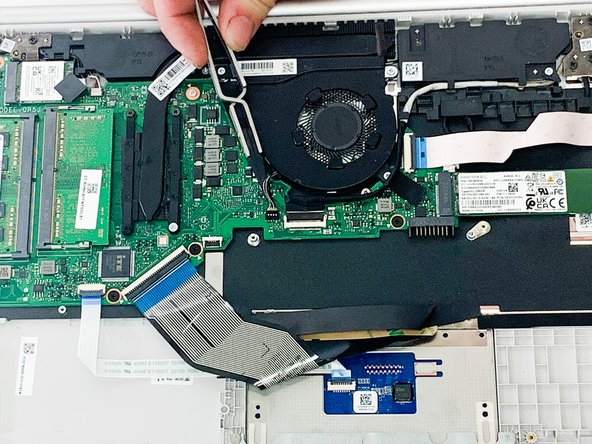
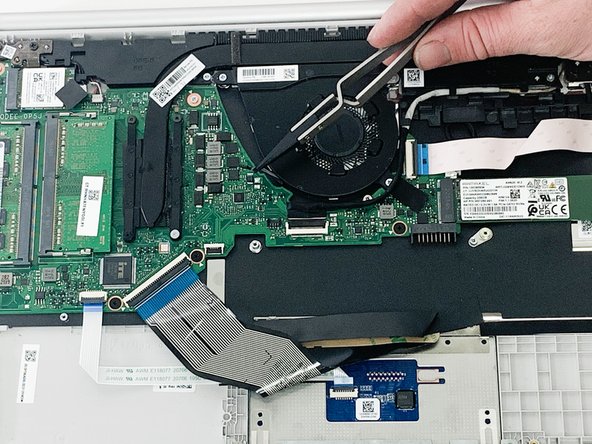
    • Use tweezers to pull the fan connector directly out of its motherboard socket.

    • Do not pull on the wires; they are very delicate.

  7. HP 15-ef2025nr Fan Replacement: 7 단계, 이미지 1/3 HP 15-ef2025nr Fan Replacement: 7 단계, 이미지 2/3 HP 15-ef2025nr Fan Replacement: 7 단계, 이미지 3/3
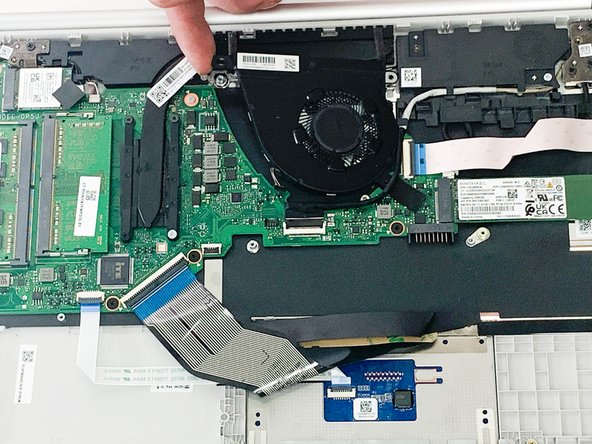
    • Remove the three 2 mm Phillips screws at the top corners and four o'clock position on the fan.

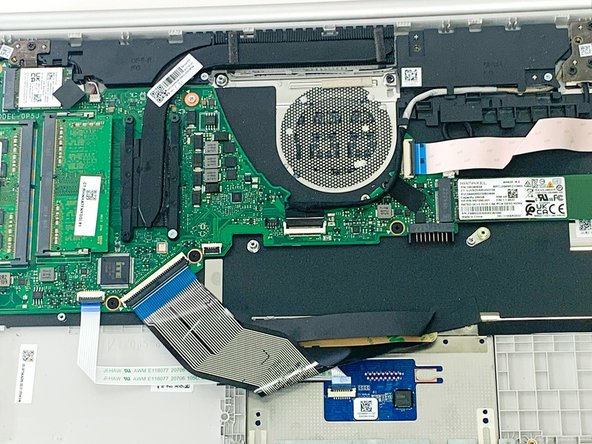
    • Remove the fan.

결론

To reassemble your device, follow these instructions in reverse order.

kyle mccomas

회원 가입일: 02/13/23

291 평판

안내서 2개 작성하였습니다

Austin Community College, Team 1-1, Watkins Spring 2023 Austin Community College, Team 1-1, Watkins Spring 2023 회원

AUSTINCC-WATKINS-S23S1G1

4 회원들

안내서 5개 작성하였습니다

댓글 0개

댓글 쓰기

조회 통계:

24 시간 전: 0

7일 전: 2

30일 전: 7

전체 시간: 167