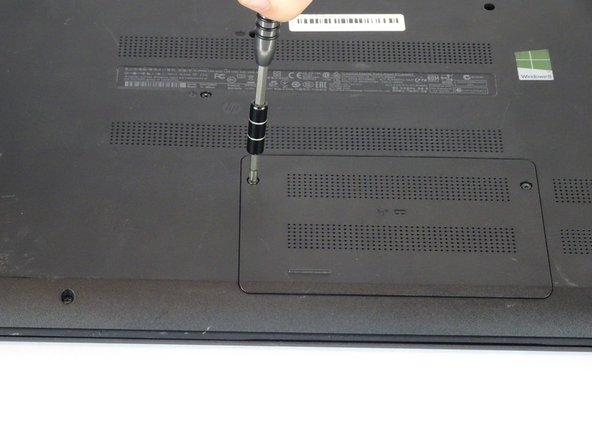
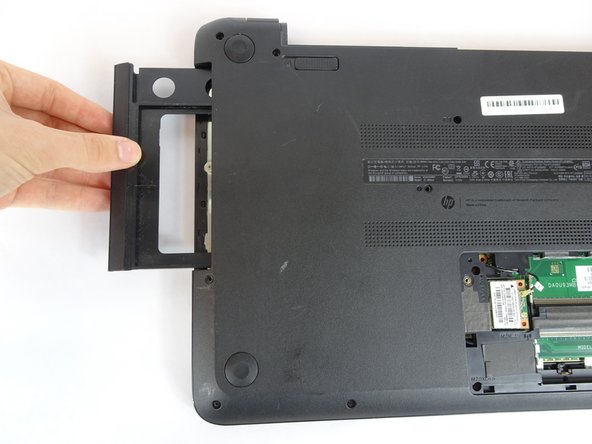
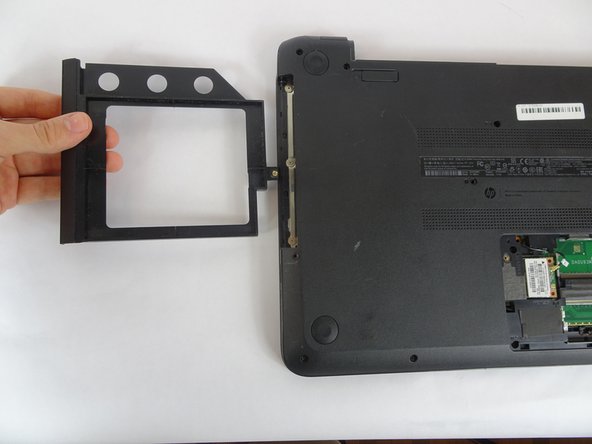
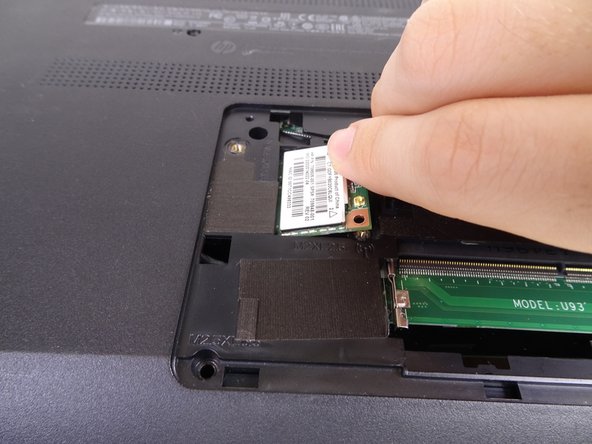
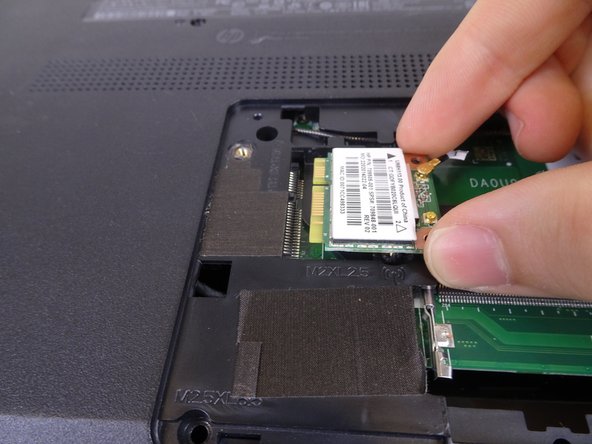
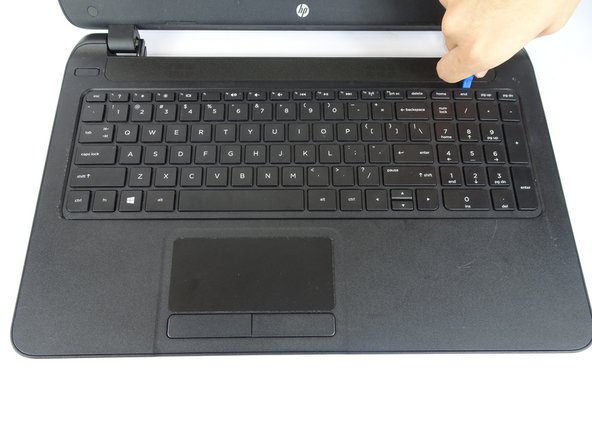
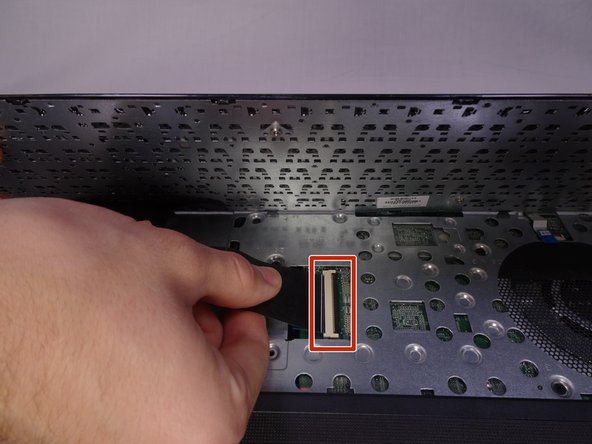
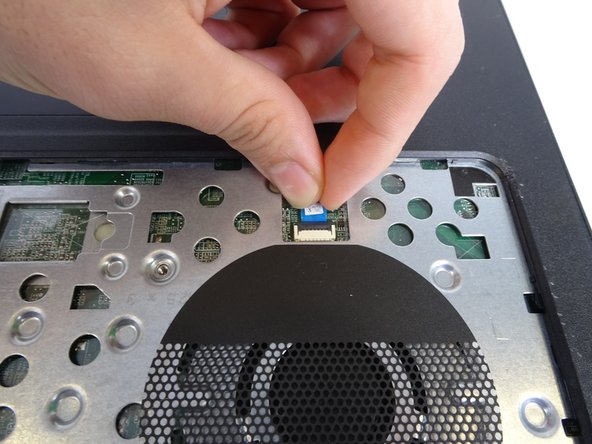
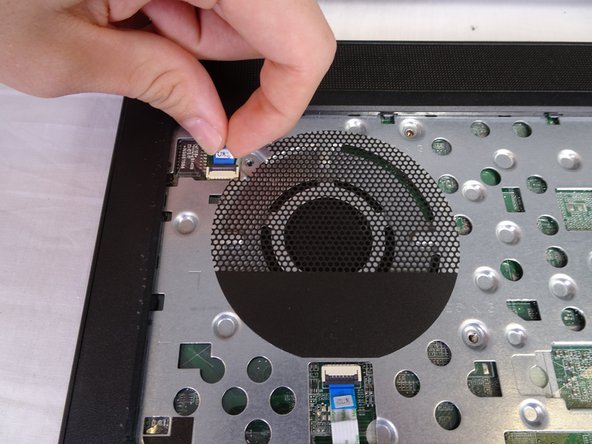
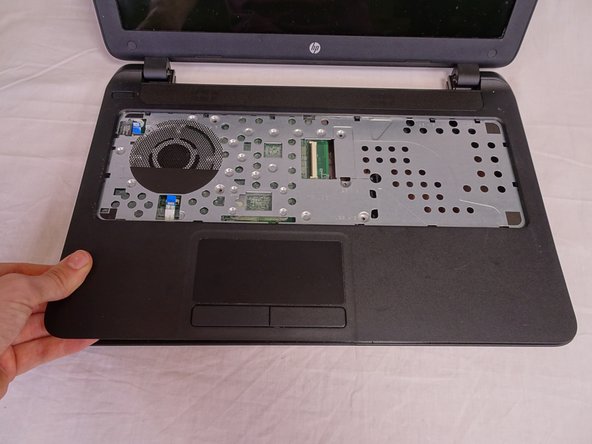
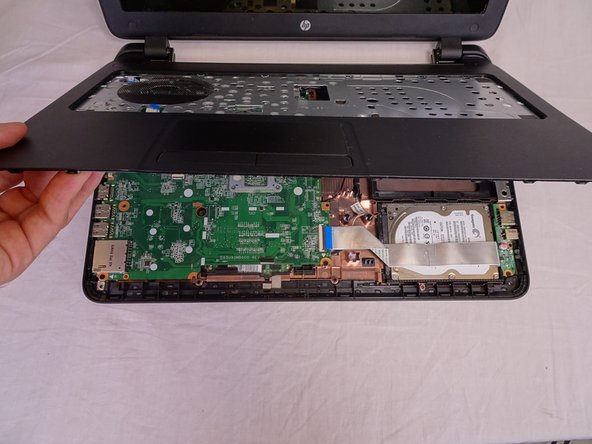
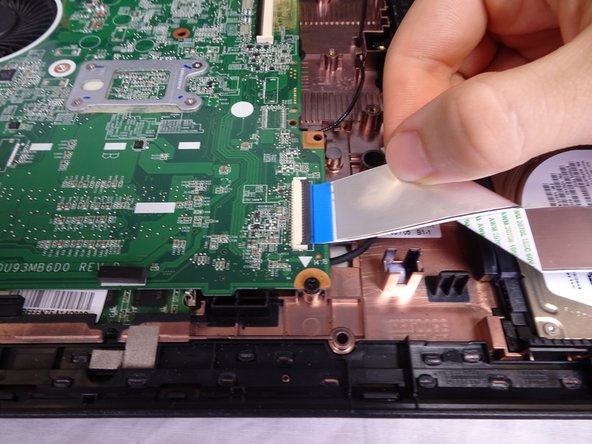
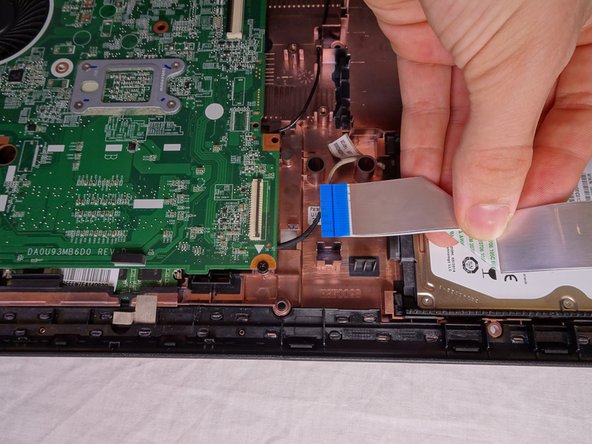
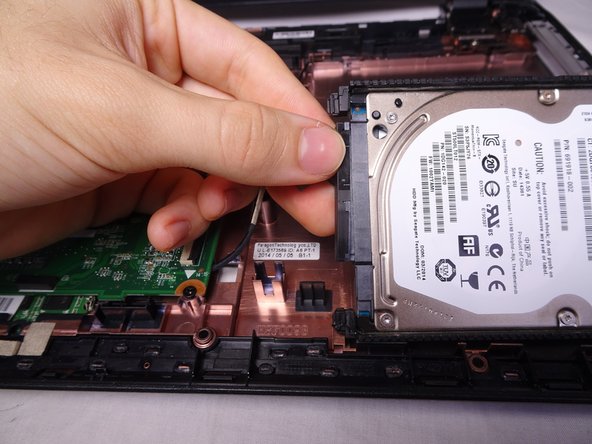
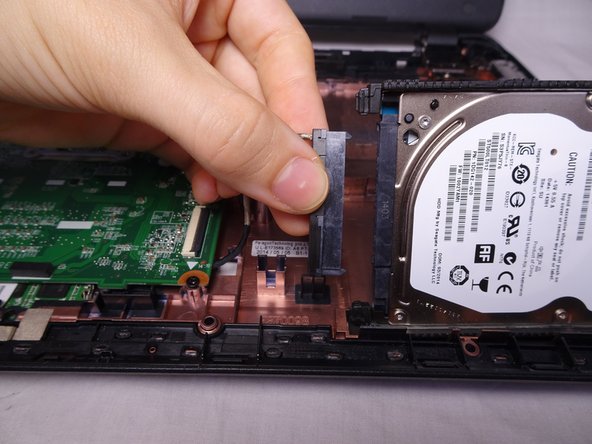
주요 콘텐츠로 건너뛰기

HP 15-f009wm Hard Drive Replacement

필요한 것

  1. HP 15-f009wm Hard Drive Replacement, Battery: 1 단계, 이미지 1/2 HP 15-f009wm Hard Drive Replacement, Battery: 1 단계, 이미지 2/2
    • Turn laptop upside down.

    • Flip the lock switch to the unlocked setting.

  2. HP 15-f009wm Hard Drive Replacement: 2 단계, 이미지 1/3 HP 15-f009wm Hard Drive Replacement: 2 단계, 이미지 2/3 HP 15-f009wm Hard Drive Replacement: 2 단계, 이미지 3/3
    • Flip the release switch.

    • Once the flip is switched, the battery should pop out.

  3. HP 15-f009wm Hard Drive Replacement: 3 단계, 이미지 1/2 HP 15-f009wm Hard Drive Replacement: 3 단계, 이미지 2/2
    • Slide the battery out.

  4. HP 15-f009wm Hard Drive Replacement, RAM: 4 단계, 이미지 1/3 HP 15-f009wm Hard Drive Replacement, RAM: 4 단계, 이미지 2/3 HP 15-f009wm Hard Drive Replacement, RAM: 4 단계, 이미지 3/3
    • Remove the two Phillips #1 screws from the RAM panel.

  5. HP 15-f009wm Hard Drive Replacement: 5 단계, 이미지 1/3 HP 15-f009wm Hard Drive Replacement: 5 단계, 이미지 2/3 HP 15-f009wm Hard Drive Replacement: 5 단계, 이미지 3/3
    • Use the plastic opening tool to pop the panel off.

  6. HP 15-f009wm Hard Drive Replacement: 6 단계, 이미지 1/3 HP 15-f009wm Hard Drive Replacement: 6 단계, 이미지 2/3 HP 15-f009wm Hard Drive Replacement: 6 단계, 이미지 3/3
    • Release the tabs on each side of the chip by simultaneously pushing each tab away from the RAM.

    • These tabs lock the chip in place and releasing them will cause the chip to "pop" up.

  7. HP 15-f009wm Hard Drive Replacement: 7 단계, 이미지 1/1
    • Remove the RAM chip from the laptop.

  8. HP 15-f009wm Hard Drive Replacement, Hard Drive: 8 단계, 이미지 1/1
    • Remove the sixteen 7mm Phillips #1 screws from the bottom panel.

  9. HP 15-f009wm Hard Drive Replacement: 9 단계, 이미지 1/3 HP 15-f009wm Hard Drive Replacement: 9 단계, 이미지 2/3 HP 15-f009wm Hard Drive Replacement: 9 단계, 이미지 3/3
    • Pull the disk drive out of the laptop.

  10. HP 15-f009wm Hard Drive Replacement: 10 단계, 이미지 1/1
    • Remove the three 2mm Phillips #00 screws found underneath the disk drive.

  11. HP 15-f009wm Hard Drive Replacement: 11 단계, 이미지 1/3 HP 15-f009wm Hard Drive Replacement: 11 단계, 이미지 2/3 HP 15-f009wm Hard Drive Replacement: 11 단계, 이미지 3/3
    • Remove the single 4mm Phillips #1 screw from the Wi-Fi card.

    • Pull the Wi-Fi card out of the motherboard.

  12. HP 15-f009wm Hard Drive Replacement: 12 단계, 이미지 1/3 HP 15-f009wm Hard Drive Replacement: 12 단계, 이미지 2/3 HP 15-f009wm Hard Drive Replacement: 12 단계, 이미지 3/3
    • Open the laptop.

    • Use a plastic opening tool to pop out the keyboard by starting at the top and working your way around the perimeter.

  13. HP 15-f009wm Hard Drive Replacement: 13 단계, 이미지 1/2 HP 15-f009wm Hard Drive Replacement: 13 단계, 이미지 2/2
    • Open the screen up until it lays flat and rotate the laptop until the screen is closest to you.

    • Lift the keyboard from the laptop.

    • Use a spudger to lift up the black latch on the ZIF connector and remove the ribbon cable.

  14. HP 15-f009wm Hard Drive Replacement: 14 단계, 이미지 1/1
    • Remove the five 7mm Phillips #1 screws found underneath the keyboard.

  15. HP 15-f009wm Hard Drive Replacement: 15 단계, 이미지 1/3 HP 15-f009wm Hard Drive Replacement: 15 단계, 이미지 2/3 HP 15-f009wm Hard Drive Replacement: 15 단계, 이미지 3/3
    • Use a spudger to lift the black tabs on the ZIF connectors.

    • Remove the ribbon cables from the ZIF connectors.

  16. HP 15-f009wm Hard Drive Replacement: 16 단계, 이미지 1/3 HP 15-f009wm Hard Drive Replacement: 16 단계, 이미지 2/3 HP 15-f009wm Hard Drive Replacement: 16 단계, 이미지 3/3
    • Use a plastic opening tool to pop the palm rest off of the laptop.

    • Lift and remove the palm rest.

  17. HP 15-f009wm Hard Drive Replacement: 17 단계, 이미지 1/3 HP 15-f009wm Hard Drive Replacement: 17 단계, 이미지 2/3 HP 15-f009wm Hard Drive Replacement: 17 단계, 이미지 3/3
    • Use a spudger to lift up the black latch on the ZIF connector.

    • Remove the USB/AUX port ribbon cable from the ZIF connector on the motherboard.

  18. HP 15-f009wm Hard Drive Replacement: 18 단계, 이미지 1/2 HP 15-f009wm Hard Drive Replacement: 18 단계, 이미지 2/2
    • Remove the single 7mm Phillips #1 screw from the USB/AUX board.

    • Remove the USB/AUX board from the laptop.

  19. HP 15-f009wm Hard Drive Replacement: 19 단계, 이미지 1/3 HP 15-f009wm Hard Drive Replacement: 19 단계, 이미지 2/3 HP 15-f009wm Hard Drive Replacement: 19 단계, 이미지 3/3
    • Lift the Hard Drive from the laptop.

    • Disconnect the hard drive from the motherboard.

결론

To reassemble your device, follow these instructions in reverse order.

다른 9명이 해당 안내서를 완성하였습니다.

Alex Birchler

회원 가입일: 02/14/18

1,008 평판

안내서 5개 작성하였습니다

USF Tampa, Team S2-G2, Nance Spring 2018 USF Tampa, Team S2-G2, Nance Spring 2018 회원

USFT-NANCE-S18S2G2

4 회원들

안내서 5개 작성하였습니다

댓글 3개

This guide helped me so much with my laptop, thanks m8

Connor Cornelison - 답글

Thank you for this excellent write-up!

Dan Snow - 답글

Hello, i have a question. How much of capacity and technology i could use to upgrade my hard drive?

Samuel Arreaza - 답글

댓글 쓰기

조회 통계:

24 시간 전: 0

7일 전: 7

30일 전: 21

전체 시간: 3,852