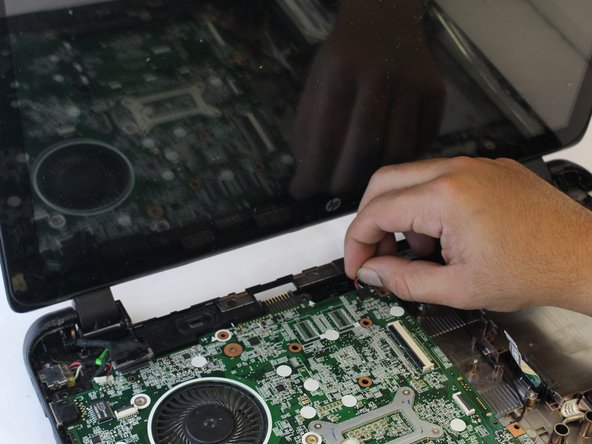
주요 콘텐츠로 건너뛰기

HP 15-f162dx Motherboard Replacement

필요한 것

  1. HP 15-f162dx Motherboard Replacement, Battery: 1 단계, 이미지 1개 중 1개
    • Pull back the lock.

  2. HP 15-f162dx Motherboard Replacement: 2 단계, 이미지 1개 중 1개
    • Take off the battery

  3. HP 15-f162dx Motherboard Replacement, Motherboard: 3 단계, 이미지 1개 중 1개
    • Use a Flathead 2.5 mm Phillips screwdriver to remove all of the screws on the backside of the laptop.

    • There are 14 screws on the back plate in total, make sure to remove them all before proceeding.

    • Apply gentle pressure when undoing the screws to preserve the condition of screw heads for future repairs or servicing.

  4. HP 15-f162dx Motherboard Replacement: 4 단계, 이미지 1개 중 1개
    • Once all screws have been removed , place the laptop on a flat surface and insert a metal spudger in a gap between the top side coverings.

    • Once inserted, move the spudger around the base, lifting the top edge about quarter of an inch. Gently go around the edge repeating the action.

    • The sharp popping sound that the latches on the inside will produce is normal and does not signify anything being broken.

    • While some force will be required in this step, make sure not to over-apply pressure since extra force might break the plastic latches.

    • After all of the inside latches have been dislodged, remove the front cover. Now is a good time to clean the dust that collects in the device after prolonged use.

  5. HP 15-f162dx Motherboard Replacement: 6 단계, 이미지 1개 중 1개
    • Use Phillips JIS J00 screwdriver to undo the screws that attach the motherboard to the back cover.

    • Again, make sure to apply only a gentle pressure when undoing the screws.

    • Be very careful: If the metal head of the screwdriver slips during the process, it can damage the motherboard. While not relevant in case of removing a broken motherboard, it is crucial while putting in a new one.

  6. HP 15-f162dx Motherboard Replacement: 7 단계, 이미지 3개 중 1개 HP 15-f162dx Motherboard Replacement: 7 단계, 이미지 3개 중 2개 HP 15-f162dx Motherboard Replacement: 7 단계, 이미지 3개 중 3개
    • Locate and disconnect the wires that are connected to the motherboard.

    • Do not use any kind of metal instrument to assist you in this process since it can damage the contacts of the wires.

    • Instead, you can use a credit card or a plastic spudger included in the Essential Electronics Toolkit.

    • After the wires have been disconnected, gently lift the motherboard out of the laptop.

결론

To reassemble your device, follow these instructions in reverse order.

작성자

5다른 기여자 명과 함께

Abdulrahman Bogshan

회원 가입일: 10/02/18

322 평판

안내서 3개를 작성함

댓글 0개

댓글 쓰기

조회 통계:

지난 24시간: 2

지난 7일: 3

지난 30일: 12

전체 시간: 710