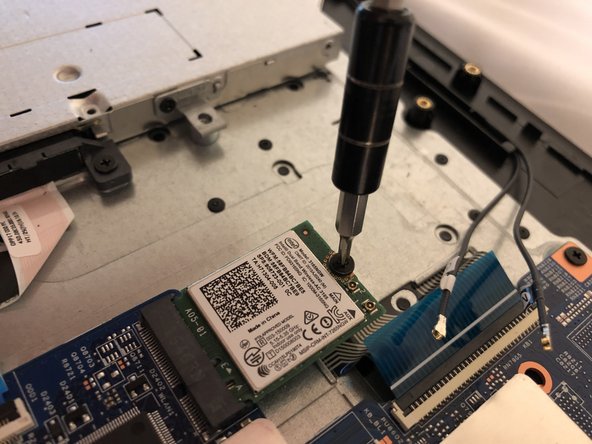
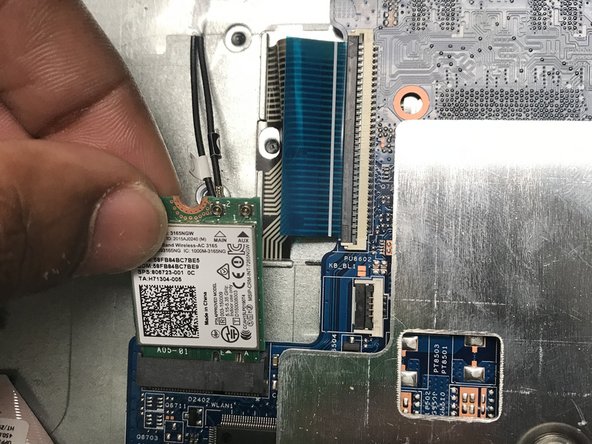
주요 콘텐츠로 건너뛰기

HP 17-x027ds Wifi Card Replacement

필요한 것

  1. HP 17-x027ds Wifi Card Replacement, WiFi Card: 1 단계, 이미지 1/3 HP 17-x027ds Wifi Card Replacement, WiFi Card: 1 단계, 이미지 2/3 HP 17-x027ds Wifi Card Replacement, WiFi Card: 1 단계, 이미지 3/3
    • Flip the laptop so you can see the serial number and the four 7mm screws in all the corners.

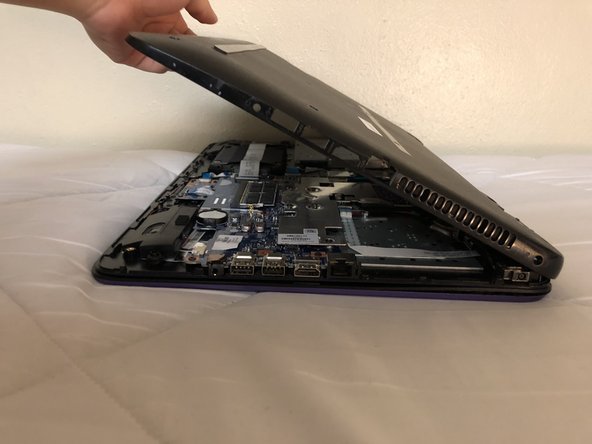
    • Click the hinges by pushing them inward, which are located at the top.

    • Remove the battery by pulling it out.

  2. HP 17-x027ds Wifi Card Replacement: 2 단계, 이미지 1/3 HP 17-x027ds Wifi Card Replacement: 2 단계, 이미지 2/3 HP 17-x027ds Wifi Card Replacement: 2 단계, 이미지 3/3
    • Remove the 2 pieces of black tape that are each covering a 7mm screw at the top corners of the laptop.

    • When removing the 2 black pieces of tape, keep the tape so you can place it back on the laptop again when reassembling.

    • Remove the fourteen 7mm screws with a JIS #00 screwdriver.

  3. HP 17-x027ds Wifi Card Replacement: 3 단계, 이미지 1/2 HP 17-x027ds Wifi Card Replacement: 3 단계, 이미지 2/2
    • Lift the bottom cover of the laptop with a metal spudger by wedging the sides first and going all around.

    • The cover is difficult to lift, so use extreme force.

  4. HP 17-x027ds Wifi Card Replacement: 4 단계, 이미지 1/3 HP 17-x027ds Wifi Card Replacement: 4 단계, 이미지 2/3 HP 17-x027ds Wifi Card Replacement: 4 단계, 이미지 3/3
    • Carefully pull the two cables attached to the CPU.

    • They are labeled 1 and 2. When putting the cables back, make sure to put them in the correct section.

    • Remove the screw holding down the CPU with the same screwdriver tip as before.

    • Gently pull on the CPU to remove it.

결론

To reassemble your device, follow these instructions in reverse order.

Tyrin

회원 가입일: 09/20/18

188 평판

안내서 2개 작성하였습니다

University of North Texas, Team S3-G1, Raign Fall 2018 University of North Texas, Team S3-G1, Raign Fall 2018 회원

UNT-RAIGN-F18S3G1

4 회원들

안내서 5개 작성하였습니다

댓글 0개

댓글 쓰기

조회 통계:

24 시간 전: 0

7일 전: 0

30일 전: 2

전체 시간: 361