주요 콘텐츠로 건너뛰기

HP 17-x173dx Motherboard Replacement

필요한 것

  1. HP 17-x173dx Motherboard Replacement, Battery: 1 단계, 이미지 1/2 HP 17-x173dx Motherboard Replacement, Battery: 1 단계, 이미지 2/2
    • Begin by sliding the left tab to the unlock position

  2. HP 17-x173dx Motherboard Replacement: 2 단계, 이미지 1/1
    • Push each of the two tabs in the direction specified by the picture.

  3. HP 17-x173dx Motherboard Replacement: 3 단계, 이미지 1/3 HP 17-x173dx Motherboard Replacement: 3 단계, 이미지 2/3 HP 17-x173dx Motherboard Replacement: 3 단계, 이미지 3/3
    • Slide and hold the right tab to the left, while gently pushing out the battery with your thumbs

  4. HP 17-x173dx Motherboard Replacement, Motherboard: 4 단계, 이미지 1/1
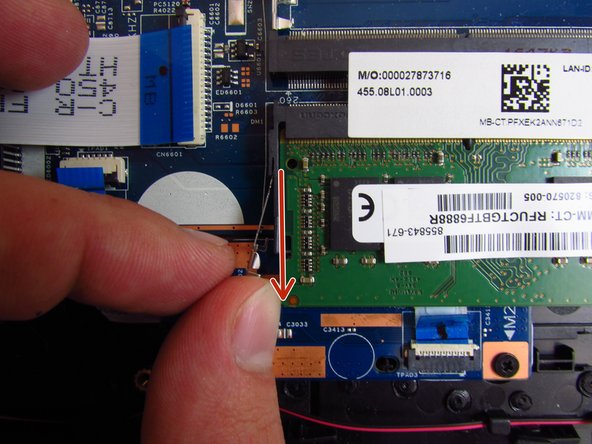
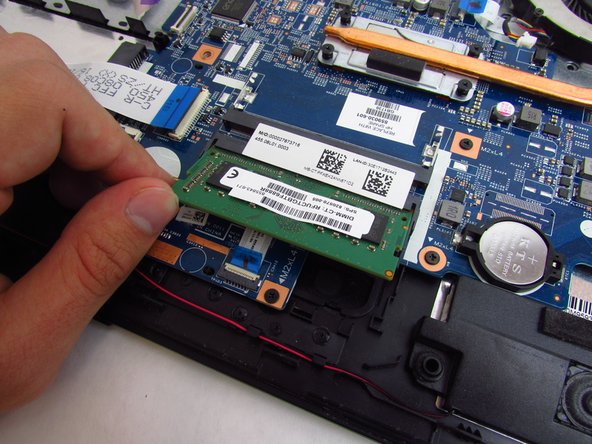
    • Using the Phillips #0 screwdriver, remove fourteen 7 mm screws on the back of the device (two will be underneath where the battery was).

  5. HP 17-x173dx Motherboard Replacement: 5 단계, 이미지 1/3 HP 17-x173dx Motherboard Replacement: 5 단계, 이미지 2/3 HP 17-x173dx Motherboard Replacement: 5 단계, 이미지 3/3
    • Remove the optical disk drive.

    • Use the spudger to lift the plastic backing, starting from the back right side, near the vents.

    • Remove the back of the device by continuing to lift the plastic around the entire perimeter of the device.

  6. HP 17-x173dx Motherboard Replacement: 6 단계, 이미지 1/1
    • Disconnect all cable connections from the motherboard. For the 6 ribbon cables, take care to lift each plastic flap using a pair of dull tweezers before pulling the cable out. Additionally remove the 2 white plastic cable connections by simply pulling them away.

  7. HP 17-x173dx Motherboard Replacement: 7 단계, 이미지 1/3 HP 17-x173dx Motherboard Replacement: 7 단계, 이미지 2/3 HP 17-x173dx Motherboard Replacement: 7 단계, 이미지 3/3
    • Use a pair of tweezers or your nails to carefully pry the metal retention clips out and away from the RAM casing.

    • Gently bend the plastic retainers away to free the RAM stick and remove it from the device.

  8. HP 17-x173dx Motherboard Replacement: 8 단계, 이미지 1/1
    • Using the Phillips #0 screwdriver, remove the Wi-Fi module by unscrewing a single 5 mm screw.

    • Remove the hard drive by undoing the hard drive retention case.

    • The hard drive did not come attached when we received the device.

  9. HP 17-x173dx Motherboard Replacement: 10 단계, 이미지 1/2 HP 17-x173dx Motherboard Replacement: 10 단계, 이미지 2/2
    • Remove nine 4 mm motherboard screws using the Phillips #0 screwdriver.

    • Lift the motherboard and heatsink with fan out of the laptop case.

  10. HP 17-x173dx Motherboard Replacement: 11 단계, 이미지 1/3 HP 17-x173dx Motherboard Replacement: 11 단계, 이미지 2/3 HP 17-x173dx Motherboard Replacement: 11 단계, 이미지 3/3
    • Unscrew four heat sink screws using the Phillips #0 screwdriver.

    • These will unscrew, but will stay attached to the heat-sink.

    • Remove the cooling fan and heat sink from the motherboard.

    • After removing the cooling fan and heat sink, you will be left with the motherboard.

결론

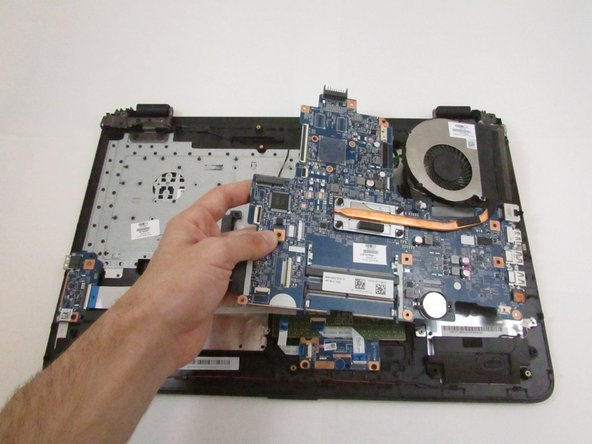
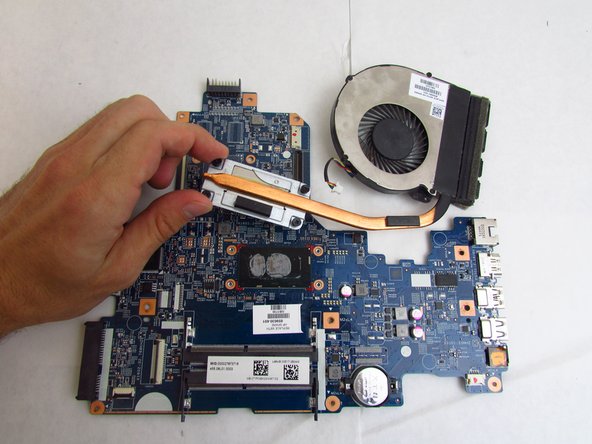
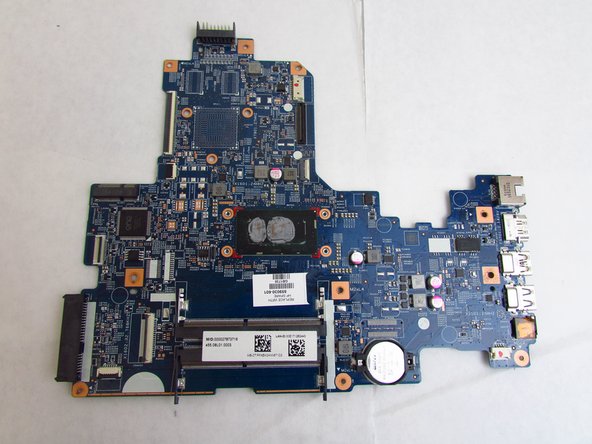
Install replacement motherboard and reassemble your device by following these instructions in reverse order.

다른 4명이 해당 안내서를 완성하였습니다.

Hunter Kerr

회원 가입일: 09/16/19

307 평판

안내서 2개 작성하였습니다

댓글 0개

댓글 쓰기

조회 통계:

24 시간 전: 0

7일 전: 1

30일 전: 4

전체 시간: 628