주요 콘텐츠로 건너뛰기

HP 250 G3 WiFi Card Replacement

필요한 것

  1. HP 250 G3 WiFi Card Replacement, WiFi Card: 1 단계, 이미지 1/1
    • Remove the battery.

  2. HP 250 G3 WiFi Card Replacement: 2 단계, 이미지 1/1
    • Remove the two indicated screws using a #1 Phillips driver.

  3. HP 250 G3 WiFi Card Replacement: 3 단계, 이미지 1/3 HP 250 G3 WiFi Card Replacement: 3 단계, 이미지 2/3 HP 250 G3 WiFi Card Replacement: 3 단계, 이미지 3/3
    • Use a #1 Philips driver to remove the disc drive's screw.

    • Using a spudger, gently pry the drive out of the housing.

  4. HP 250 G3 WiFi Card Replacement, screws of the case 1: 4 단계, 이미지 1/3 HP 250 G3 WiFi Card Replacement, screws of the case 1: 4 단계, 이미지 2/3 HP 250 G3 WiFi Card Replacement, screws of the case 1: 4 단계, 이미지 3/3
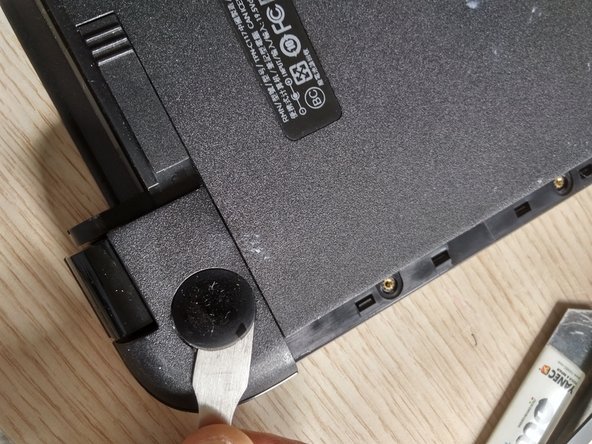
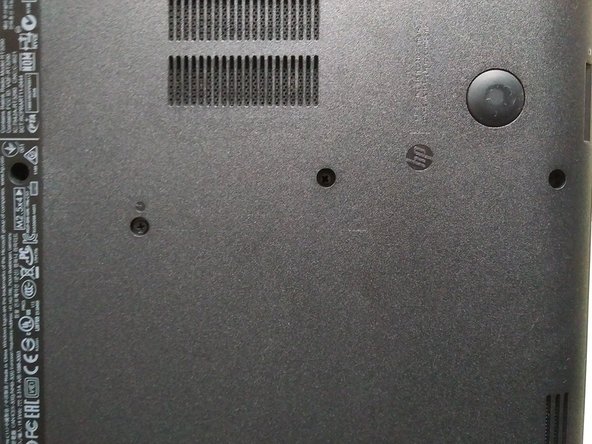
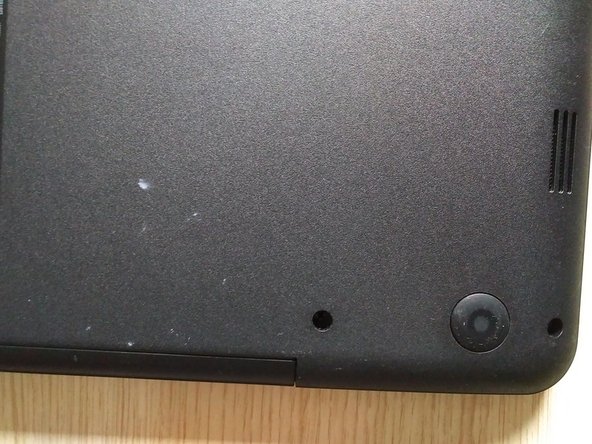
    • Remove the rubber rests on the rear of the device, which are close to the battery.

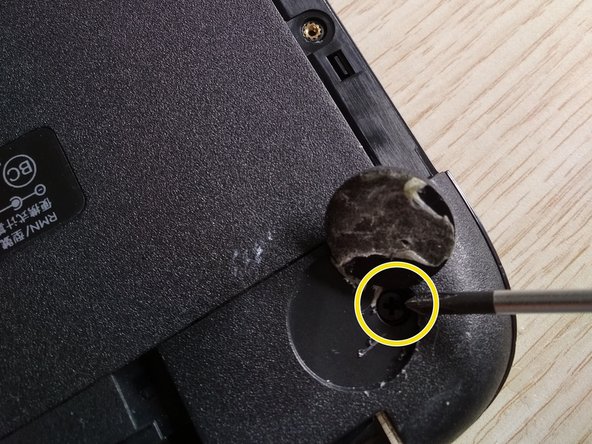
    • Remove the hidden screws placed under the rests using a #1 Philips driver.

  5. HP 250 G3 WiFi Card Replacement, screws of the case 2: 5 단계, 이미지 1/3 HP 250 G3 WiFi Card Replacement, screws of the case 2: 5 단계, 이미지 2/3 HP 250 G3 WiFi Card Replacement, screws of the case 2: 5 단계, 이미지 3/3
    • Remove the remaining screws on the bottom of the device.

    • Remove the two little screws at the DVD entrance.

  6. HP 250 G3 WiFi Card Replacement, removing keyboard: 7 단계, 이미지 1/3 HP 250 G3 WiFi Card Replacement, removing keyboard: 7 단계, 이미지 2/3 HP 250 G3 WiFi Card Replacement, removing keyboard: 7 단계, 이미지 3/3
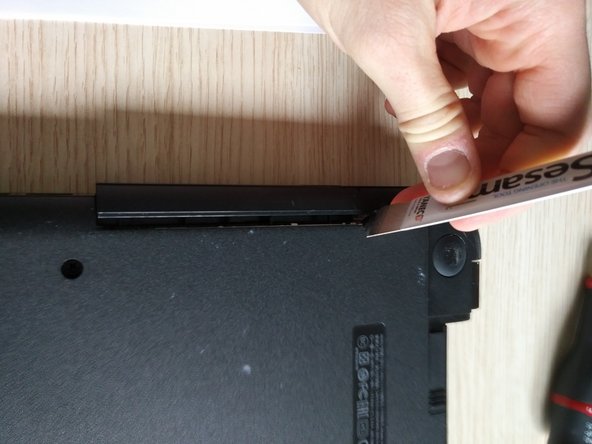
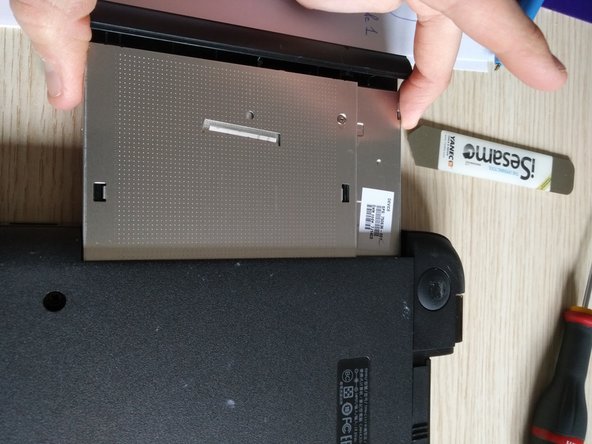
    • Turn the laptop around.

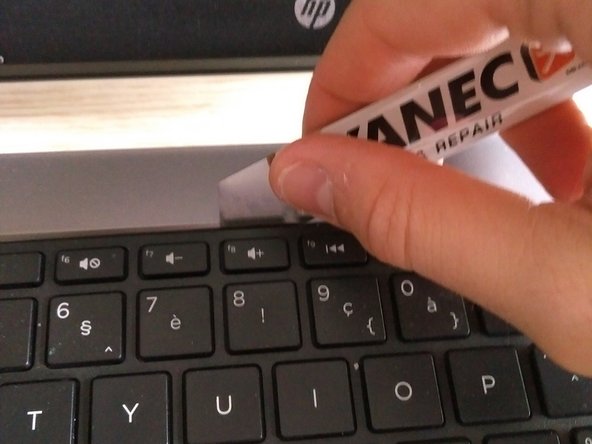
    • Open up the laptop (to remove the keyboard).

    • Use a spudger or iSesamo to remove the keyboard.

    • Slide the iSesamo around the upper side of the keyboard as shown in the pictures (you will hear clicks).

  7. HP 250 G3 WiFi Card Replacement: 8 단계, 이미지 1/3 HP 250 G3 WiFi Card Replacement: 8 단계, 이미지 2/3 HP 250 G3 WiFi Card Replacement: 8 단계, 이미지 3/3
    • When it becomes loose, gently slide the keyboard to the left as shown in the third picture.

    • Be gentle as the thin ribbon can easily tear.

  8. HP 250 G3 WiFi Card Replacement, removing keyboard / ribbon cable: 9 단계, 이미지 1/3 HP 250 G3 WiFi Card Replacement, removing keyboard / ribbon cable: 9 단계, 이미지 2/3 HP 250 G3 WiFi Card Replacement, removing keyboard / ribbon cable: 9 단계, 이미지 3/3
    • Gently lift the keyboard up.

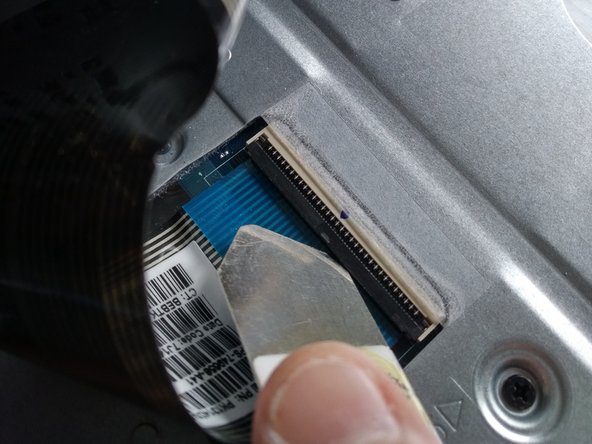
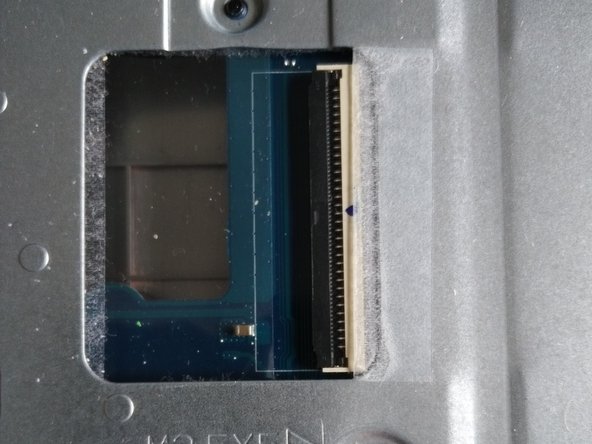
    • Spot the thin ribbon cable attached to the connector (the connector has a plastic lid).

    • Carefully open the lid with a spudger and slide the ribbon cable out of the connector.

    • Be very gently with the cable and the connector as the lid may come loose.

    • Close the lid after removing the cable so that the cable cannot fall out.

  9. HP 250 G3 WiFi Card Replacement, removing upper plate/case: 10 단계, 이미지 1/3 HP 250 G3 WiFi Card Replacement, removing upper plate/case: 10 단계, 이미지 2/3 HP 250 G3 WiFi Card Replacement, removing upper plate/case: 10 단계, 이미지 3/3
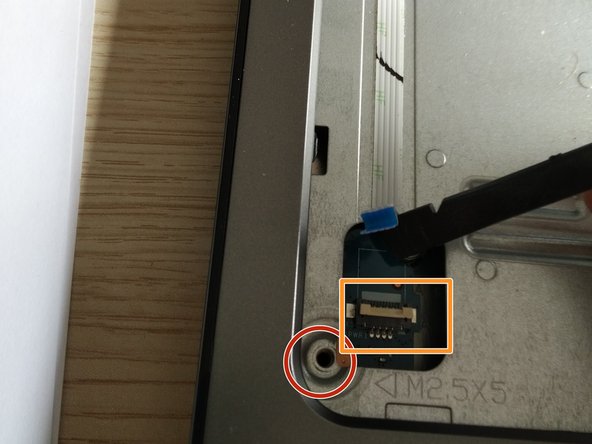
    • Remove the screw circled in the second picture.

    • Remove the tape over the cable and the connector.

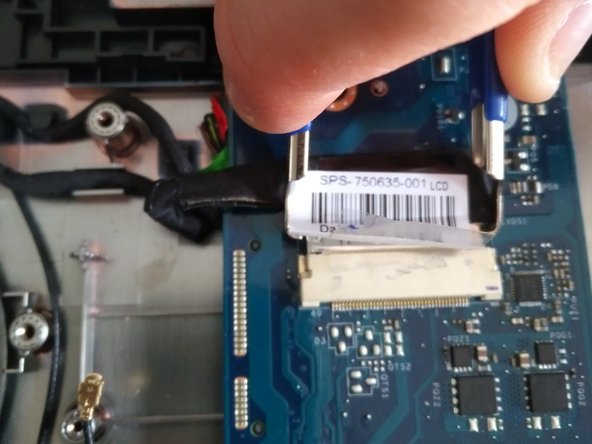
    • Remove the white ribbon cable from the connector.

    • Open up the lid with a spudger, and gently remove the ribbon cable.

    • Use caution, as the ribbon cable is pasted to the plate.

    • This ribbon cable is the connector from the ON/OFF switch.

  10. HP 250 G3 WiFi Card Replacement: 11 단계, 이미지 1/2 HP 250 G3 WiFi Card Replacement: 11 단계, 이미지 2/2
    • Remove the circled screw.

    • Remove the ribbon cable from the connector.

    • The ribbon cable/connector is the touch pad/mouse connector.

  11. HP 250 G3 WiFi Card Replacement: 12 단계, 이미지 1/1
    • Remove the screw on the upper side of the laptop.

    • Remove the last screw (unfortunately, I do not have a picture of this, but you will see it on your laptop).

  12. HP 250 G3 WiFi Card Replacement: 14 단계, 이미지 1/3 HP 250 G3 WiFi Card Replacement: 14 단계, 이미지 2/3 HP 250 G3 WiFi Card Replacement: 14 단계, 이미지 3/3
    • Slide your iSesamo around the case as shown in picture 1 and 2, and go around the entire laptop.

    • You will hear clicks after using the iSesamo.

    • Lift the upper plate to reveal the motherboard.

  13. HP 250 G3 WiFi Card Replacement, removing main board: 15 단계, 이미지 1/3 HP 250 G3 WiFi Card Replacement, removing main board: 15 단계, 이미지 2/3 HP 250 G3 WiFi Card Replacement, removing main board: 15 단계, 이미지 3/3
    • Remove the two screws holding the main board to the plate (see pictures two and three).

  14. HP 250 G3 WiFi Card Replacement, loose screws and cables to remove main board: 16 단계, 이미지 1/1
    • Use an IC extractor to remove the audio connector from the socket.

  15. HP 250 G3 WiFi Card Replacement, removing LCD cable: 17 단계, 이미지 1/3 HP 250 G3 WiFi Card Replacement, removing LCD cable: 17 단계, 이미지 2/3 HP 250 G3 WiFi Card Replacement, removing LCD cable: 17 단계, 이미지 3/3
    • Use a spudger to remove the tape/sticker.

    • Be very gentle as the connector is a hard-to-remove ribbon cable with several small cables. Ripping one of them will damage the ribbon cable, and will thereby damage the screen.

    • It is recommended to use an IC extractor to remove the LCD connector (however, you can use two small flathead screwdrivers or tweezers to slide the connector out of the socket).

  16. HP 250 G3 WiFi Card Replacement, removing HDD: 18 단계, 이미지 1/2 HP 250 G3 WiFi Card Replacement, removing HDD: 18 단계, 이미지 2/2
    • Remove the two screws holding the HDD.

    • Slide out the HDD.

  17. HP 250 G3 WiFi Card Replacement, removing usb pcb: 19 단계, 이미지 1/3 HP 250 G3 WiFi Card Replacement, removing usb pcb: 19 단계, 이미지 2/3 HP 250 G3 WiFi Card Replacement, removing usb pcb: 19 단계, 이미지 3/3
    • Use a spudger to loosen the cable from the bottom plate.

    • The flat ribbon cable is pasted to the bottom plate, and the ribbon cable is soldered to the PCB.

  18. HP 250 G3 WiFi Card Replacement, removing the bad Wifi module.: 20 단계, 이미지 1/3 HP 250 G3 WiFi Card Replacement, removing the bad Wifi module.: 20 단계, 이미지 2/3 HP 250 G3 WiFi Card Replacement, removing the bad Wifi module.: 20 단계, 이미지 3/3
    • Remove the golden antenna cable from the socket. Be very careful, and use a spudger.

    • Remove the screw.

    • The WiFi module will jump up when the screw is removed. Slide the WiFi module out.

    • Wear gloves to avoid touching the antenna or the antenna sockets.

    • To install the new Wifi module, slide the new WiFi module in, push it down, and drive the screw back in.

    • Reattach the antenna.

  19. HP 250 G3 WiFi Card Replacement, removing main PVB: 21 단계, 이미지 1/3 HP 250 G3 WiFi Card Replacement, removing main PVB: 21 단계, 이미지 2/3 HP 250 G3 WiFi Card Replacement, removing main PVB: 21 단계, 이미지 3/3
    • In this case I did not remove the main PCB because I would have had to remove the DC jack. It is a very breakable connector, and the wires are very thin. If they are broken the laptop will no longer charge.

    • If the DC jack is damaged or broken in your laptop, remove the hinge instead (this is holding the DC power jack in place).

결론

To reassemble your device, follow these instructions in reverse order.

다른 10명이 해당 안내서를 완성하였습니다.

Kevin D

회원 가입일: 05/02/14

7,276 평판

안내서 21개 작성하였습니다

댓글 0개

댓글 쓰기

조회 통계:

24 시간 전: 1

7일 전: 15

30일 전: 64

전체 시간: 11,402