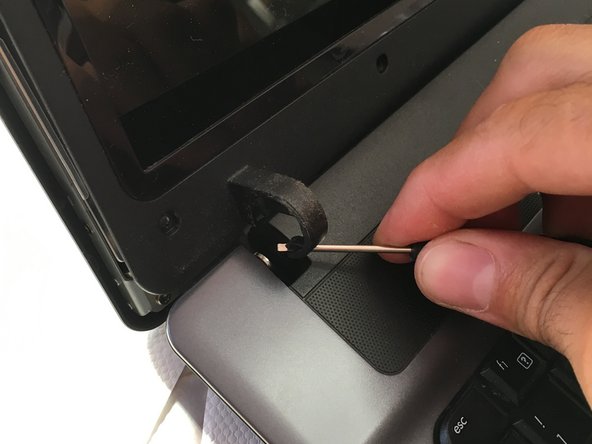
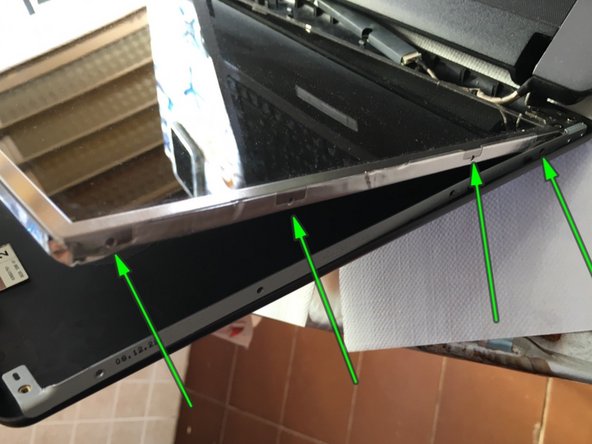
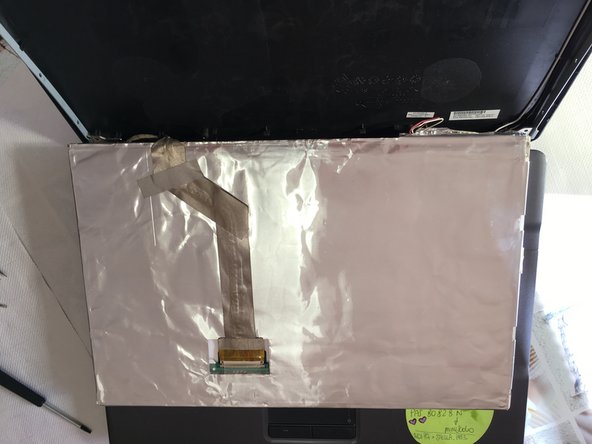
주요 콘텐츠로 건너뛰기

HP 550 Notebook LCD Display Replacement

필요한 것

  1. HP 550 Notebook LCD Display Replacement, LCD display: 1 단계, 이미지 1/1
    • Remove the battery

  2. HP 550 Notebook LCD Display Replacement: 2 단계, 이미지 1/3 HP 550 Notebook LCD Display Replacement: 2 단계, 이미지 2/3 HP 550 Notebook LCD Display Replacement: 2 단계, 이미지 3/3
    • Remove the 8 pads and the underlying screws

  3. HP 550 Notebook LCD Display Replacement: 3 단계, 이미지 1/3 HP 550 Notebook LCD Display Replacement: 3 단계, 이미지 2/3 HP 550 Notebook LCD Display Replacement: 3 단계, 이미지 3/3
    • Use a thin tool to separate the lcd frame

    • Unhook the cover on the 2 hinges on the upper side

  4. HP 550 Notebook LCD Display Replacement: 4 단계, 이미지 1/3 HP 550 Notebook LCD Display Replacement: 4 단계, 이미지 2/3 HP 550 Notebook LCD Display Replacement: 4 단계, 이미지 3/3
    • Remove the LCD cover with delicacy, paying attention to the wires and removing any adhesive if present.

    • Remove 4 lcd fixing screws on one side and 4 screws on the other

    • Force the back cover slightly to access the last screw on both sides

  5. HP 550 Notebook LCD Display Replacement: 5 단계, 이미지 1/3 HP 550 Notebook LCD Display Replacement: 5 단계, 이미지 2/3 HP 550 Notebook LCD Display Replacement: 5 단계, 이미지 3/3
    • Disconnect the lcd panel connector

    • Gently lay the LCD panel on the keyboard.

    • Disconnect video display connector.

  6. HP 550 Notebook LCD Display Replacement: 6 단계, 이미지 1/1
    • Remove the LCD panel and replace with the new one

결론

To reassemble the device, follow these instructions in reverse order.

다른 3명이 해당 안내서를 완성하였습니다.

다음 번역가들에게 특별히 감사 드립니다:

it en

100%

이 번역자 분들은 저희가 세상을 수리하는데 동참해 주시는 분입니다! 기여하시겠습니까?
번역 시작하기 ›

Smilzo

회원 가입일: 11/09/13

11,267 평판

안내서 39개 작성하였습니다

댓글 2개

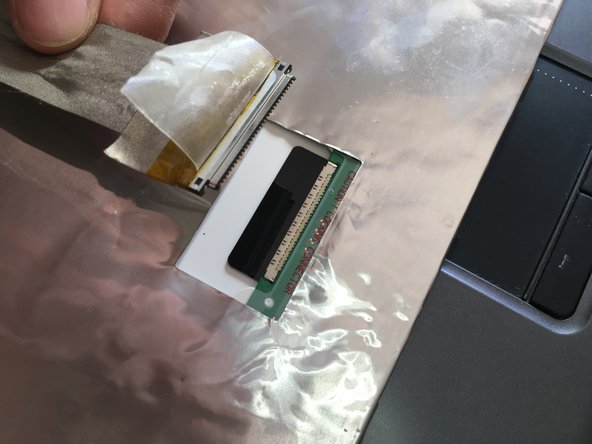
what are those two things on top labeled 1 and 2 in the last picture?

Vladut Prcsina - 답글

Non ho capito la domanda. Grazie

Smilzo -

댓글 쓰기

조회 통계:

24 시간 전: 1

7일 전: 3

30일 전: 15

전체 시간: 2,242