이 버전에는 잘못된 편집 사항이 있을 수 있습니다. 최신 확인된 스냅샷으로 전환하십시오.
필요한 것
-
이 단계는 번역되지 않았습니다. 번역을 도와주십시오
-
Slide the flat end of the spudger under the rubber pads at the upper right-hand and the upper left-hand corners.
-
Pry off the rubber pads to reveal a screw under each pad.
-
-
이 단계는 번역되지 않았습니다. 번역을 도와주십시오
-
Insert the flat end of the spudger between the bottom body of the Chromebook and keyboard body.
-
Slide the spudger along the gap, applying downward pressure to separate the two components.
-
-
이 단계는 번역되지 않았습니다. 번역을 도와주십시오
-
Lift the bottom of the keyboard assembly to reveal the internal components of the device.
-
-
-
이 단계는 번역되지 않았습니다. 번역을 도와주십시오
-
Use the pointed end of the spudger to flip up the black tabs on the two ZIF connectors located on the motherboard.
-
Disconnect the ribbon cables from the motherboard by gently sliding them out of their sockets.
-
-
이 단계는 번역되지 않았습니다. 번역을 도와주십시오
-
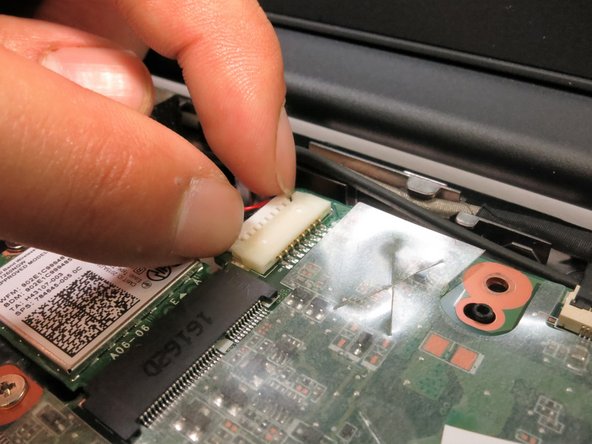
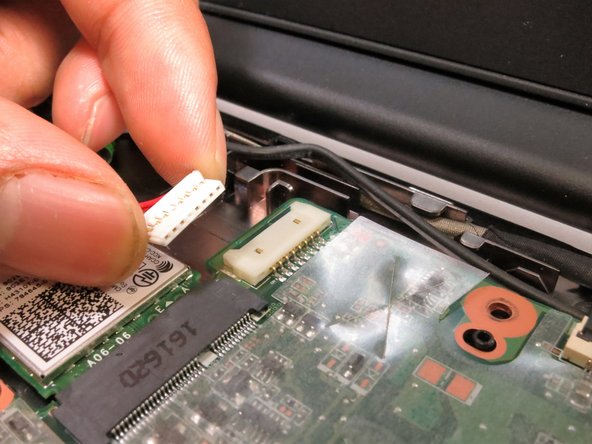
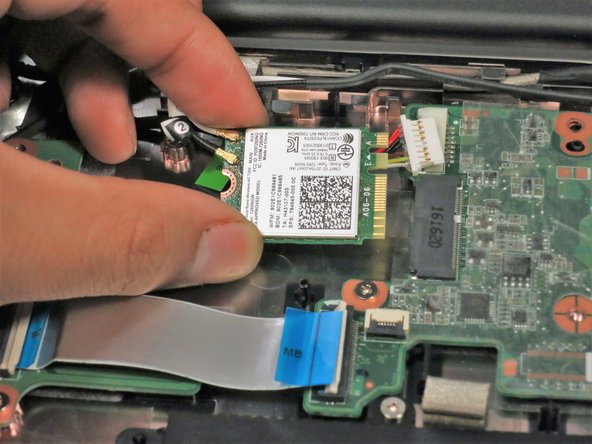
Remove the cable at the top left of the motherboard by grabbing the male connector and applying force in the direction of the wires away from the motherboard.
-
-
이 단계는 번역되지 않았습니다. 번역을 도와주십시오
-
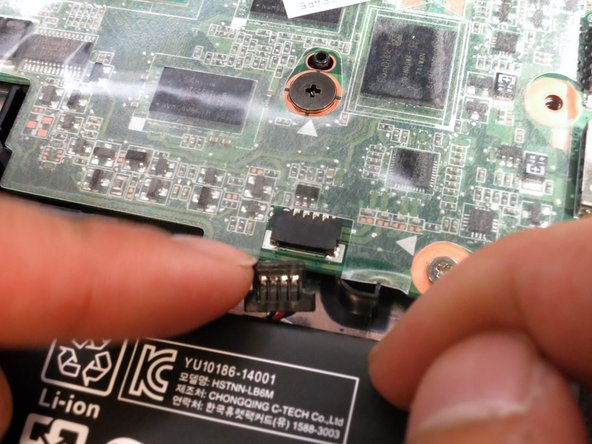
Disconnect the battery wires from the motherboard by applying pressure on the male connector away from the motherboard.
-
-
이 단계는 번역되지 않았습니다. 번역을 도와주십시오
-
Disconnect the wire bundle on the bottom right of the motherboard by pulling the black male connector away from its socket on the motherboard.
-
-
이 단계는 번역되지 않았습니다. 번역을 도와주십시오
-
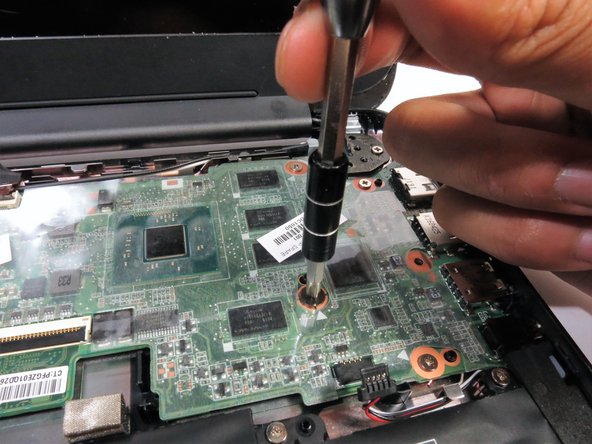
Use a fingernail or a spudger to flip up the black tab on the zero insertion force connector located at the top of the motherboard.
-
Remove the cable by pulling away from the motherboard.
-
-
이 단계는 번역되지 않았습니다. 번역을 도와주십시오
-
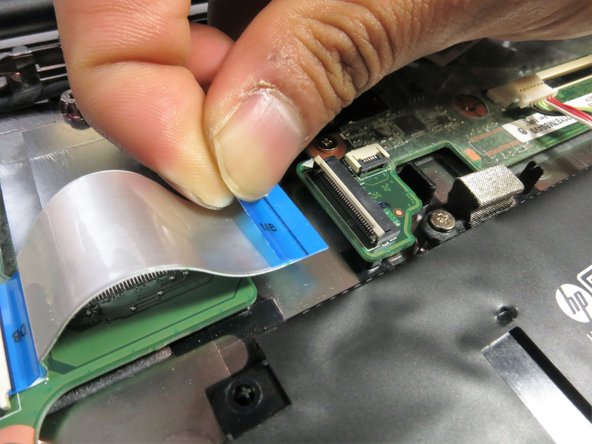
Use a fingernail or a spudger to flip up the white tab on the zero insertion force connector on the bottom left of the motherboard.
-
Remove the cable by pulling away from the motherboard.
-
-
이 단계는 번역되지 않았습니다. 번역을 도와주십시오
-
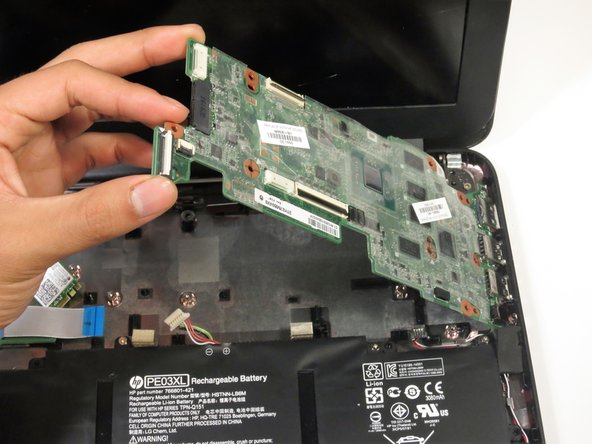
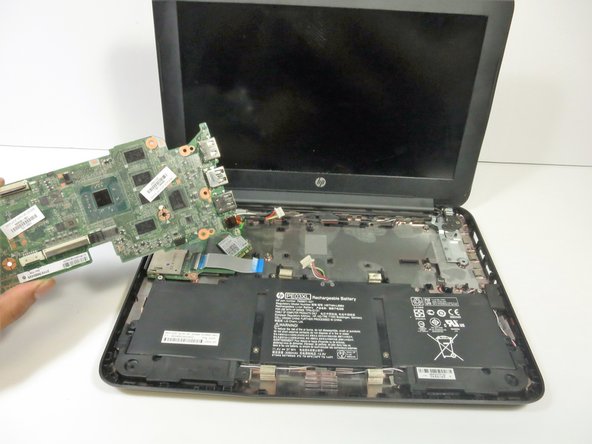
Lift the left edge up and away from the base of the laptop.
-
Remove the motherboard.
-


다른 한 분이 해당 안내서를 완성하였습니다.
팀

Cal Poly, Team S16-G5, Banghart Winter 2018 Cal Poly, Team S16-G5, Banghart Winter 2018 회원
CPSU-BANGHART-W18S16G5
5 회원들
안내서 15개 작성하였습니다