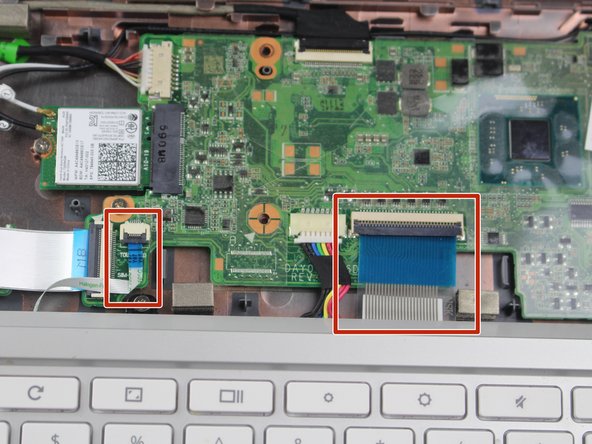
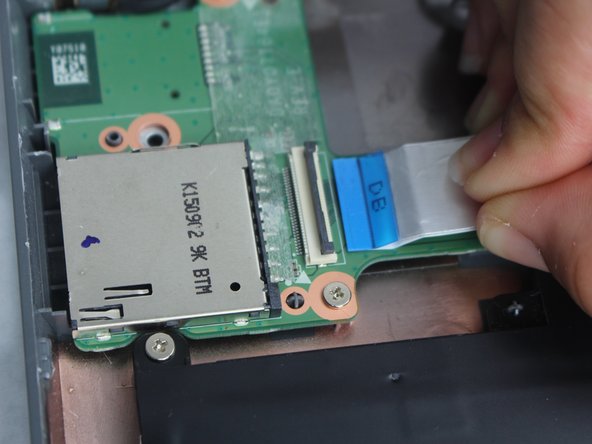
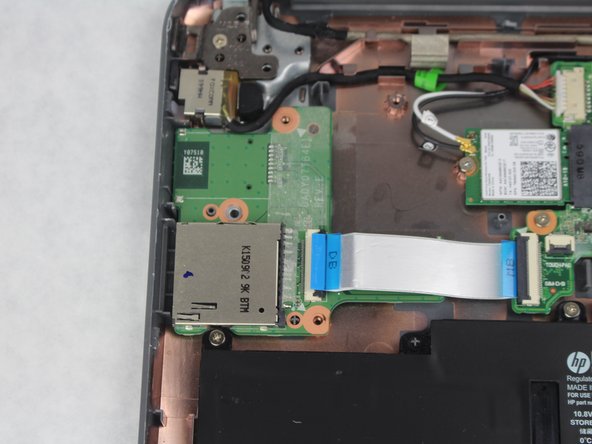
주요 콘텐츠로 건너뛰기

HP Chromebook 11-2210nr SD Card Reader Replacement

필요한 것

  1. HP Chromebook 11-2210nr SD Card Reader Replacement, SD Card Reader: 1 단계, 이미지 1/2 HP Chromebook 11-2210nr SD Card Reader Replacement, SD Card Reader: 1 단계, 이미지 2/2
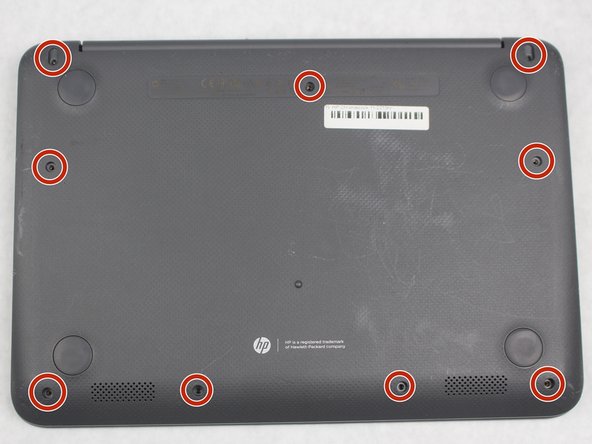
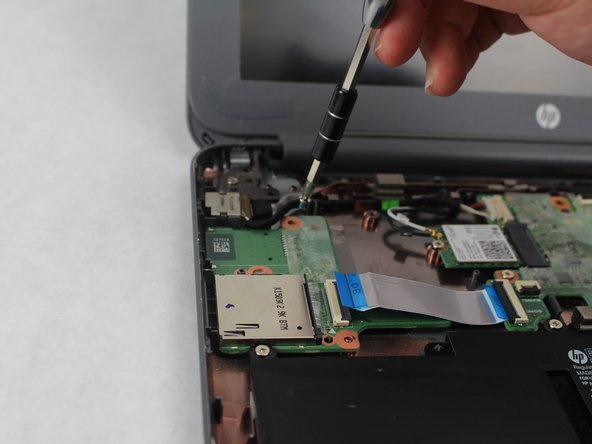
    • Turn over your laptop and remove the 9 visible 6mm screws using the Phillips #1 screwdriver.

  2. HP Chromebook 11-2210nr SD Card Reader Replacement: 2 단계, 이미지 1/3 HP Chromebook 11-2210nr SD Card Reader Replacement: 2 단계, 이미지 2/3 HP Chromebook 11-2210nr SD Card Reader Replacement: 2 단계, 이미지 3/3
    • Using the metal spudger, remove the two rubber pads that are closer to the hinge of the laptop.

    • Remove the two additional 6mm screws located beneath the rubber pads using the Phillips #1 screwdriver.

    • The two bottom rubber pads do not contain screws, but you may check if you wish to be sure.

  3. HP Chromebook 11-2210nr SD Card Reader Replacement: 3 단계, 이미지 1/3 HP Chromebook 11-2210nr SD Card Reader Replacement: 3 단계, 이미지 2/3 HP Chromebook 11-2210nr SD Card Reader Replacement: 3 단계, 이미지 3/3
    • Turn the Laptop over and with the metal spudger start to run it along the plastic seam to pry it off.

    • You will hear popping sounds when you are sliding the spudger along the device.

    • For an easier removal, start from the sides and work your way in to the corners.

  4. HP Chromebook 11-2210nr SD Card Reader Replacement: 4 단계, 이미지 1/3 HP Chromebook 11-2210nr SD Card Reader Replacement: 4 단계, 이미지 2/3 HP Chromebook 11-2210nr SD Card Reader Replacement: 4 단계, 이미지 3/3
    • Carefully lift off the keyboard and gently place it towards you until the two ribbon wires become visible and place the keyboard down.

    • Locate where the two ribbon wires are being held in place by two chips.

    • This does not disconnect the keyboard from the laptop just yet.

  5. HP Chromebook 11-2210nr SD Card Reader Replacement: 5 단계, 이미지 1/3 HP Chromebook 11-2210nr SD Card Reader Replacement: 5 단계, 이미지 2/3 HP Chromebook 11-2210nr SD Card Reader Replacement: 5 단계, 이미지 3/3
    • Using the nylon spudger, push the plastic clasps holding the two ribbon wires up to properly disconnect the wires.

    • You must use the nylon spudger for this step. Any metal can damage your motherboard.

    • This step completely disconnects the keyboard to allow safe removal and replacement.

  6. HP Chromebook 11-2210nr SD Card Reader Replacement: 6 단계, 이미지 1/3 HP Chromebook 11-2210nr SD Card Reader Replacement: 6 단계, 이미지 2/3 HP Chromebook 11-2210nr SD Card Reader Replacement: 6 단계, 이미지 3/3
    • Locate the SD card reader at the top left corner above the battery.

    • Flip up the plastic clasps holding the ZIF connectors into place by using the nylon spudger or your finger.

    • Gently slide out the ribbon cable, removing it from the SD Card Reader.

  7. HP Chromebook 11-2210nr SD Card Reader Replacement: 7 단계, 이미지 1/3 HP Chromebook 11-2210nr SD Card Reader Replacement: 7 단계, 이미지 2/3 HP Chromebook 11-2210nr SD Card Reader Replacement: 7 단계, 이미지 3/3
    • Remove the two 4mm screws using a Phillips #1 screwdriver.

    • This successfully disconnects the SD port from the laptop.

  8. HP Chromebook 11-2210nr SD Card Reader Replacement: 8 단계, 이미지 1/2 HP Chromebook 11-2210nr SD Card Reader Replacement: 8 단계, 이미지 2/2
    • Gently lift and remove SD Card Reader component from laptop.

결론

To reassemble your device, follow these instructions in reverse order.

Gerardo Cardona

회원 가입일: 10/02/18

364 평판

안내서 2개 작성하였습니다

Sam Houston State, Team S11-G3, Blackburne Fall 2018 Sam Houston State, Team S11-G3, Blackburne Fall 2018 회원

SHSU-BLACKBURNE-F18S11G3

4 회원들

안내서 5개 작성하였습니다

댓글 0개

댓글 쓰기

조회 통계:

24 시간 전: 0

7일 전: 1

30일 전: 1

전체 시간: 167