주요 콘텐츠로 건너뛰기

HP Chromebook 11-v002dx Motherboard Replacement

필요한 것

  1. HP Chromebook 11-v002dx Motherboard Replacement, Keyboard: 1 단계, 이미지 1/2 HP Chromebook 11-v002dx Motherboard Replacement, Keyboard: 1 단계, 이미지 2/2
    • Working with your device plugged in may result in electric shock. Be sure to power off your device and unplug it from any power source before proceeding with step one.

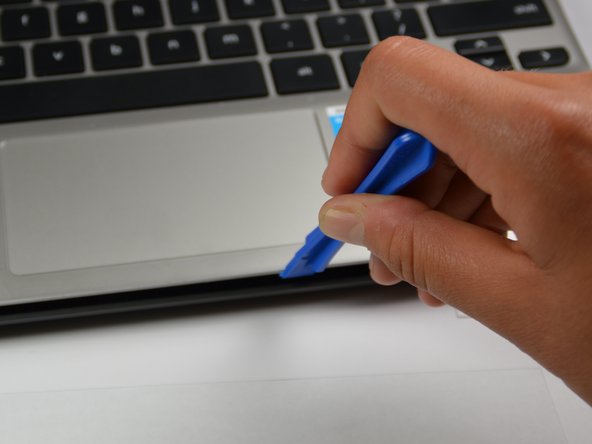
    • Place your laptop bottom up on your work space.

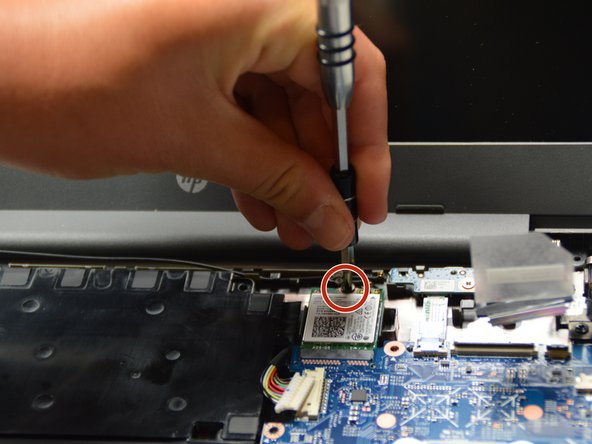
    • Use a Phillips #0 screwdriver to remove the eleven 0.2 mm screws, including the six from underneath the adhesives.

  2. HP Chromebook 11-v002dx Motherboard Replacement: 2 단계, 이미지 1/3 HP Chromebook 11-v002dx Motherboard Replacement: 2 단계, 이미지 2/3 HP Chromebook 11-v002dx Motherboard Replacement: 2 단계, 이미지 3/3
    • Using a sharp tool, remove the six adhesives from the bottom of your laptop to expose the screwheads underneath. Two of the pads are small and four are larger.

  3. HP Chromebook 11-v002dx Motherboard Replacement: 3 단계, 이미지 1/2 HP Chromebook 11-v002dx Motherboard Replacement: 3 단계, 이미지 2/2
    • Use a plastic opening tool to loosen the keyboard face from the device.

    • Start prying at one end of the laptop and slowly work your way around so as not to break the keyboard.

  4. HP Chromebook 11-v002dx Motherboard Replacement: 4 단계, 이미지 1/2 HP Chromebook 11-v002dx Motherboard Replacement: 4 단계, 이미지 2/2
    • Lift the keyboard so that the inner workings of the laptop are exposed.

    • Gently pull each of the two ribbons connecting the keyboard to the device so that neither ribbon is still connected to the device, only to the keyboard.

  5. HP Chromebook 11-v002dx Motherboard Replacement, Motherboard: 5 단계, 이미지 1/2 HP Chromebook 11-v002dx Motherboard Replacement, Motherboard: 5 단계, 이미지 2/2
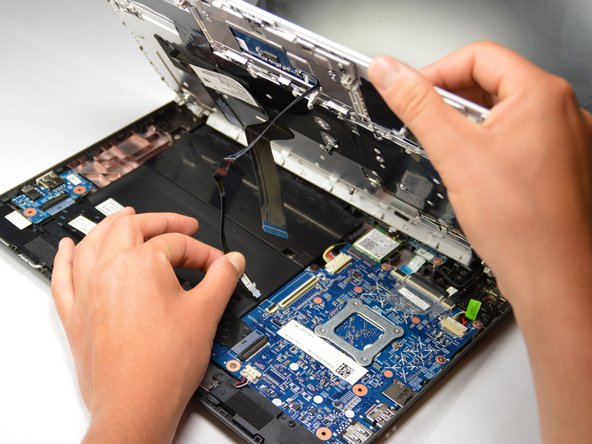
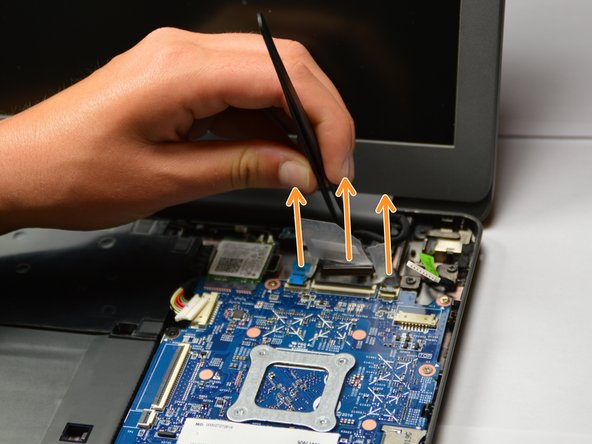
    • Pinch the thin black bar which holds the right side of the black ribbon down, and flip it up.

    • Gently pull the ribbon out of the black holder on its right, then out of the left side as well.

  6. HP Chromebook 11-v002dx Motherboard Replacement: 6 단계, 이미지 1/3 HP Chromebook 11-v002dx Motherboard Replacement: 6 단계, 이미지 2/3 HP Chromebook 11-v002dx Motherboard Replacement: 6 단계, 이미지 3/3
    • Squeeze the three white connectors on their sides to disconnect them.

    • Use your Phillips #0 screwdriver to unscrew the five 0.2 mm screws from the motherboard.

  7. HP Chromebook 11-v002dx Motherboard Replacement: 7 단계, 이미지 1/2 HP Chromebook 11-v002dx Motherboard Replacement: 7 단계, 이미지 2/2
    • Flip up the two clear tabs and the blue tab at the top of the motherboard.

    • Use your tweezers to lift each tab away so their connected components are no longer attached to the motherboard.

  8. HP Chromebook 11-v002dx Motherboard Replacement: 8 단계, 이미지 1/2 HP Chromebook 11-v002dx Motherboard Replacement: 8 단계, 이미지 2/2
    • Use your tweezers to pull the two metal pieces connecting the two wires to the top of the green wifi card above the motherboard.

    • Use your Phillips head screwdriver to unscrew the 0.2 mm screw from the wifi card.

  9. HP Chromebook 11-v002dx Motherboard Replacement: 9 단계, 이미지 1/2 HP Chromebook 11-v002dx Motherboard Replacement: 9 단계, 이미지 2/2
    • Grab the motherboard on its bottom right corner and pull it out of the laptop.

    • Ensure all connection points and motherboard are free of dust and any stickiness, then if necessary replace entire motherboard.

결론

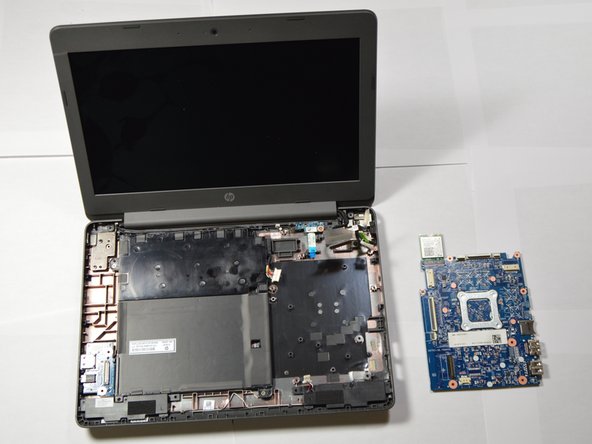
To reassemble your device, follow these instructions in reverse order.

Abby Zilvitis

회원 가입일: 04/17/17

448 평판

안내서 4개 작성하였습니다

Cal Poly, Team S14-G1, Banghart Spring 2017 Cal Poly, Team S14-G1, Banghart Spring 2017 회원

CPSU-BANGHART-S17S14G1

4 회원들

안내서 5개 작성하였습니다

댓글 0개

댓글 쓰기

조회 통계:

24 시간 전: 0

7일 전: 1

30일 전: 5

전체 시간: 473