이 버전에는 잘못된 편집 사항이 있을 수 있습니다. 최신 확인된 스냅샷으로 전환하십시오.
필요한 것
-
이 단계는 번역되지 않았습니다. 번역을 도와주십시오
-
Turn the Chromebook upside down, as shown in the first image.
-
Remove the five rubber feet pieces as shown using a metal spudger.
-
-
이 단계는 번역되지 않았습니다. 번역을 도와주십시오
-
Begin removal of the back panel by unscrewing all exposed screws using a small Phillips screwdriver.
-
Use a plastic prying tool to split the back panel from the keyboard.
-
Move the prying tool around the sides of the back panel to detach it. Do not fully remove the panel, taking note of the two ribbon cables.
-
-
-
이 단계는 번역되지 않았습니다. 번역을 도와주십시오
-
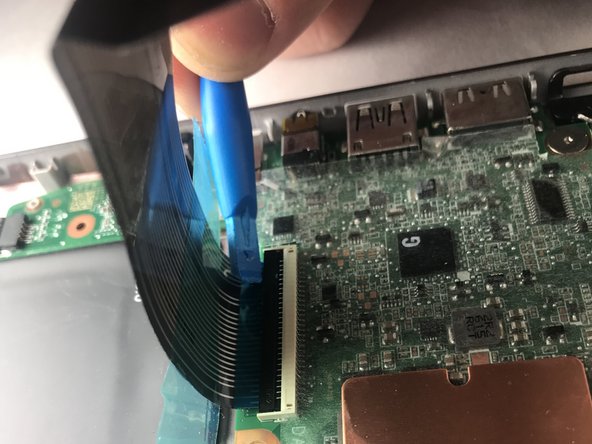
Remove both ribbon cables attaching the separated keyboard to the motherboard.
-
The large black ribbon cable was a tab that should be pried open to loosen the ribbon from its hub. Use the plastic opening tool as shown.
-
Gently pull out the short white ribbon cable out of its hub.
-
-
이 단계는 번역되지 않았습니다. 번역을 도와주십시오
-
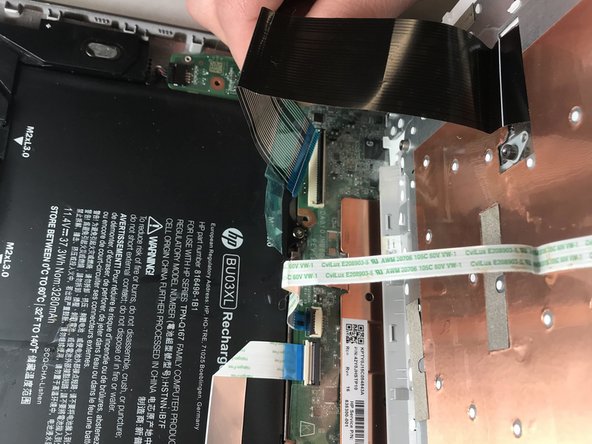
Peel up the adhered ribbon cable. This cable does not need to be detached from the motherboard.
-
Use a plastic opening tool to disconnect the battery before going any further by inserting the tool between the plug and the hub where the recesses are on either side of the plug.
-
-
이 단계는 번역되지 않았습니다. 번역을 도와주십시오
-
Unscrew the four M2xL3 screws , shown in the picture, using a Phillips screwdriver.
-
Carefully lift the battery out of its place, avoiding the previously adhered silver ribbon cable in the process.
-


팀

IUPUI, Team S3-G5, Harley Fall 2018 IUPUI, Team S3-G5, Harley Fall 2018 회원
IUPUI-HARLEY-F18S3G5
3 회원들
안내서 2개 작성하였습니다