이 버전에는 잘못된 편집 사항이 있을 수 있습니다. 최신 확인된 스냅샷으로 전환하십시오.
필요한 것
-
이 단계는 번역되지 않았습니다. 번역을 도와주십시오
-
Remove lower left and right nylon flaps on the screen to remove the screws located underneath them.
-
Remove the two 2mm screws holding the bezel to the laptop case.
-
-
이 단계는 번역되지 않았습니다. 번역을 도와주십시오
-
Gently pry around the edges of the display using a spudger to remove the bezel that borders the screen.
-
-
-
이 단계는 번역되지 않았습니다. 번역을 도와주십시오
-
Once glue is separated, pop out the front cover by pulling upwards on the hinge.
-
-
이 단계는 번역되지 않았습니다. 번역을 도와주십시오
-
Once the bezel has been removed, remove the four 5mm screws at the corners of the screen using a PH00 screwdriver.
-
-
이 단계는 번역되지 않았습니다. 번역을 도와주십시오
-
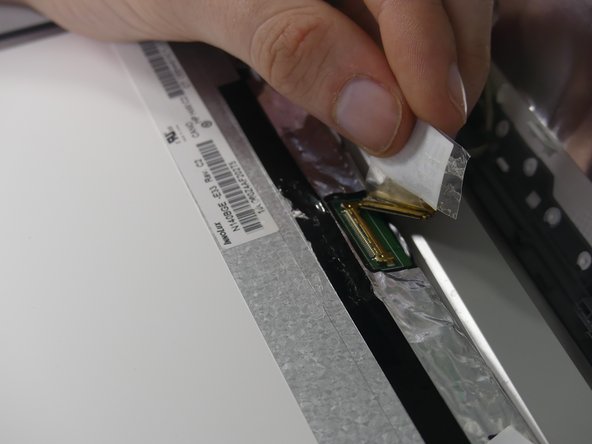
Before completely removing the screen, detach the connected located at the bottom of the screen.
-


다른 3명이 해당 안내서를 완성하였습니다.
팀

USF Tampa, Team S3-G6, Nance Fall 2017 USF Tampa, Team S3-G6, Nance Fall 2017 회원
USFT-NANCE-F17S3G6
4 회원들
안내서 5개 작성하였습니다