주요 콘텐츠로 건너뛰기

HP Chromebook x360 14-da0011dx I/O Board Replacement

필요한 것

  1. HP Chromebook x360 14-da0011dx I/O Board Replacement, Lower Case: 1 단계, 이미지 1/1
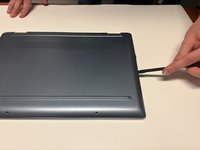
    • Flip the device over with the hinge facing away from you.

    • On the back of the device, remove the two rubber strips on the top and the bottom of the device using a spudger.

  2. HP Chromebook x360 14-da0011dx I/O Board Replacement: 2 단계, 이미지 1/2 HP Chromebook x360 14-da0011dx I/O Board Replacement: 2 단계, 이미지 2/2
    • Remove the seven 8.0 mm screws located under the two rubber pads and the screws along the back of the device using a Phillips #1 screwdriver.

  3. HP Chromebook x360 14-da0011dx I/O Board Replacement: 3 단계, 이미지 1/3 HP Chromebook x360 14-da0011dx I/O Board Replacement: 3 단계, 이미지 2/3 HP Chromebook x360 14-da0011dx I/O Board Replacement: 3 단계, 이미지 3/3
    • Use a spudger to gently pry the edges of the back cover off the device. Slowly work all the way around the device until the panel comes loose.

  4. HP Chromebook x360 14-da0011dx I/O Board Replacement, Battery: 4 단계, 이미지 1/2 HP Chromebook x360 14-da0011dx I/O Board Replacement, Battery: 4 단계, 이미지 2/2
    • Remove the cable attached to the battery.

  5. HP Chromebook x360 14-da0011dx I/O Board Replacement: 5 단계, 이미지 1/2 HP Chromebook x360 14-da0011dx I/O Board Replacement: 5 단계, 이미지 2/2
    • Remove the five 3.0 mm screws holding the battery in place using the Phillips #1 screwdriver.

  6. HP Chromebook x360 14-da0011dx I/O Board Replacement: 6 단계, 이미지 1/1
    • Lift the battery out of the chassis.

  7. HP Chromebook x360 14-da0011dx I/O Board Replacement, I/O Board: 7 단계, 이미지 1/3 HP Chromebook x360 14-da0011dx I/O Board Replacement, I/O Board: 7 단계, 이미지 2/3 HP Chromebook x360 14-da0011dx I/O Board Replacement, I/O Board: 7 단계, 이미지 3/3
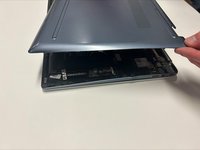
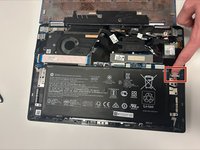
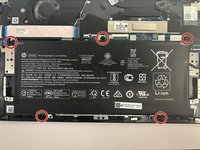
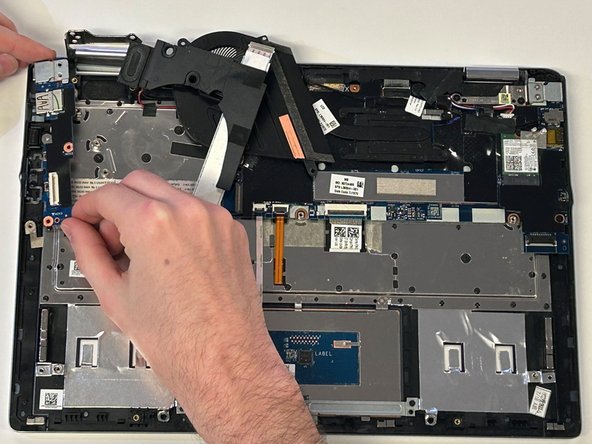
    • Locate the I/O Board on the top left of the laptop.

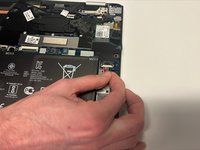
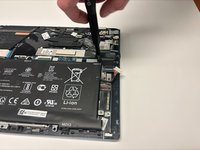
    • Remove the four 3.0 mm screws with the Phillips #1 screwdriver.

  8. HP Chromebook x360 14-da0011dx I/O Board Replacement: 8 단계, 이미지 1/2 HP Chromebook x360 14-da0011dx I/O Board Replacement: 8 단계, 이미지 2/2
    • Flip up the ZIF connector locking flaps connected to the I/O board.

    • Remove the ribbon cables.

  9. HP Chromebook x360 14-da0011dx I/O Board Replacement: 9 단계, 이미지 1/1
    • Lift the I/O board up and out.

결론

To reassemble your device, follow these instructions in reverse order.

Jared Tallent

회원 가입일: 02/14/23

196 평판

안내서 2개 작성하였습니다

댓글 0개

댓글 쓰기

조회 통계:

24 시간 전: 2

7일 전: 13

30일 전: 29

전체 시간: 210